Is mold easy to treat? A practical homeowner's guide
Discover whether mold is easy to treat, the factors that influence remediation, and safe, practical steps homeowners can take to address small outbreaks while knowing when to call professionals.

Is mold easy to treat? Not always. The answer depends on mold type, area size, moisture levels, and the materials involved. Small patches on non-porous surfaces can often be cleaned with consumer cleaners and drying, while larger or porous infestations, and hidden growth behind walls, typically require professional remediation and ongoing moisture control to prevent return.
Is mold easy to treat? A nuanced reality
According to Mold Removal Lab, the ease of treating mold hinges on moisture, surface, and infestation size. is mold easy to treat? The short answer is: it depends. While small growth on non-porous surfaces can often be managed with common cleaners and thorough drying, larger growth, hidden colonies behind walls, or mold on porous materials like drywall or wood usually requires a more careful approach and may necessitate professional remediation. Understanding the baseline biology of mold — that it thrives in moist environments and can return if moisture isn’t controlled — is essential for making smart decisions. This guide from Mold Removal Lab emphasizes safety, moisture control, and proper containment as foundations of any remediation effort. Mold Removal Lab Analysis, 2026 reinforces that moisture management is the single most important factor in preventing reinfestation.
What qualifies as 'easy to treat' mold
In practical terms, 'easy to treat' means growth that is small, isolated, on non-porous surfaces, and easily accessible. For many homeowners, this category includes surface mold on tile, glass, sinks, or metal where spores are few and cleanup is straightforward. Important caveat: even when the visible mold looks small, the underlying moisture problem might be bigger; if you cannot identify or fix this moisture source quickly, any cleanup may be temporary. The Mold Removal Lab team recommends validating the moisture source before cleanup and documenting the area to monitor for recurrence. As with any home project, safety and moisture control come first.
Factors that influence remediation difficulty
Several intersecting factors determine how hard remediation will be. The most impactful is moisture: any remaining humidity or water intrusion will almost guarantee reinfestation. The type of material affected matters too: porous substrates like drywall, fabric, or wood absorb spores and toxins, making complete removal harder and often requiring material replacement. Accessibility and the size of the affected area influence effort and time, while the presence of pets, children, and ventilation quality can affect safety and effectiveness. Finally, mold variety and toxin production can add complexity and risk. Based on Mold Removal Lab research from 2026, effective moisture control is the cornerstone of successful remediation, and poor containment dramatically increases airborne exposure during cleanup.
Porous vs non-porous surfaces: how materials affect treatment
Non-porous surfaces (glass, metal, tile) are generally easier to clean because mold colonies sit on the surface and can often be scrubbed away with appropriate cleaners. Porous materials (drywall, wood, fabric) can trap mold spores inside, require removal or replacement, and pose greater health and safety challenges. Cleaning porous materials without addressing the underlying moisture often yields only temporary results, as spores repopulate once humidity returns. In practice, homeowners can expect quick wins on non-porous items but should plan for replacement or professional intervention for porous components affected by mold.
Common household strategies for small infestations
For small, surface-level growth, household strategies can be effective when done carefully. Start by isolating the area and gathering PPE. Use a non-ammonia cleaner or a mild detergent solution, and scrub moldy areas with a stiff brush or cloth. Dry the surface completely and monitor for signs of return. If the mold recurs in the same spot, or if you notice staining, musty odors, or increased symptoms, escalate to a professional evaluation. Always avoid mixing cleaners, and never attempt to remediate behind walls without proper containment.
When to call a professional
If mold covers a large area, recurs after cleaning, or if you suspect growth behind walls, you should consult a professional. Structural damage, wood rot, or persistent musty odors indicate moisture problems that require specialized assessment, containment, and possibly remediation. Early professional involvement can prevent costly repairs later and reduce exposure risk. The Mold Removal Lab team recommends seeking help when you feel unsure about the extent of contamination or if you have underlying health concerns that could be aggravated by mold.
Steps to take immediately after finding mold
Act quickly to limit spread: (1) stop disturbing the area and avoid direct contact with spores; (2) seal the space off from the rest of the home and close doors; (3) plug or seal HVAC vents to prevent spore distribution; (4) don PPE and begin containment and cleaning for non-porous surfaces only if you are confident in your approach. Document the area with photos and notes, and arrange a professional assessment for porous materials or larger infestations. Early containment and moisture control are the best defenses against growth.
Maintenance and prevention to keep mold from returning
Prevention focuses on moisture control and air quality. Fix leaks promptly, use dehumidifiers in damp spaces, and ensure good ventilation, especially in bathrooms and kitchens. Regularly check for condensation on windows and walls, and dry any damp areas within 24-48 hours. Clean spills quickly and keep surfaces dry; use exhaust fans or open windows to improve airflow. A proactive maintenance plan reduces the likelihood of future mold problems.
Common myths vs reality
Myth: Bleach cures mold. Reality: Bleach can remove visible mold on non-porous surfaces but does not eliminate mold roots in porous materials and can create volatile compounds. Myth: Any mold is toxic. Reality: Not all mold species produce toxins; however, some can cause health issues for sensitive individuals, so caution is warranted. Myth: If you can’t see mold, you’re safe. Reality: Hidden moisture and porosity can harbor unseen growth behind walls and in ductwork. The safest approach is to address moisture and consult a professional when in doubt.
Tools & Materials
- Nitrile gloves(Protect skin from irritants; powder-free preferred)
- N95 respirator or P100 mask(Ensure a proper seal; replace if damp)
- Safety goggles(Guard eyes from splashes and spores)
- Disposable coveralls or old clothing(Contain contaminants; remove before reentry)
- Spray bottle(For cleaners and misting solutions)
- Microfiber cloths(Use to wipe and trap spores)
- Non-ammonia household cleaner(Avoid ammonia-based products with bleach)
- Mold-safe cleaner or detergent(EPA-registered if possible)
- Bleach (5-6% sodium hypochlorite)(Use on non-porous surfaces only; follow safety guidance)
- Hydrogen peroxide 3%(Alternative cleaner on some surfaces)
- Scrub brush(Stiff-bristled; avoid scratching delicate surfaces)
- HEPA vacuum(Use a sealed unit to minimize spore spread)
- Plastic sheeting or drop cloths(Contain work areas during cleanup)
- Tape and markers(Label containment zones and bags)
- Heavy-duty trash bags(Dispose of contaminated materials safely)
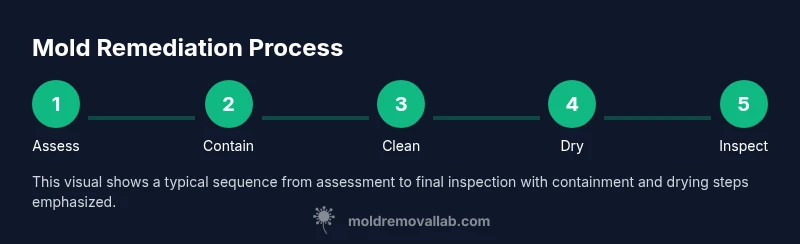
Steps
Estimated time: 2-6 hours
- 1
Assess the extent and identify materials
Survey the affected area and determine whether the growth is surface-level or embedded in porous materials. Take clear photos, note dimensions, and decide which materials may need removal. Avoid disturbing the mold to prevent spore release during the assessment.
Tip: Document areas with measurements and markings to compare after remediation. - 2
Contain the affected area to prevent spread
Close off the space from the rest of the home, seal doorways with plastic sheeting, and temporarily turn off or mask HVAC vents. Containment reduces cross-contamination while you work. Plan containment before cleaning begins.
Tip: Use tape to secure plastic sheeting and label the area clearly. - 3
Wear PPE and prepare cleaning solutions
Put on nitrile gloves, a respirator, and eye protection. Prepare a non-ammonia cleaner or a mild detergent solution in the spray bottle. Do not mix cleaners, as chemical reactions can release harmful vapors.
Tip: Perform a small test area first to ensure compatibility. - 4
Clean non-porous surfaces first
Spray cleaner on non-porous surfaces and scrub with a microfiber cloth or brush until visible mold is removed. Rinse and dry thoroughly to prevent regrowth. Remove and bag disposable cleaning materials after use.
Tip: Work from clean to dirty areas to avoid recontaminating clean spots. - 5
Address porous materials and removal decisions
For porous materials like drywall or wood, containment and cleaning may be insufficient; consider removal and replacement if growth is extensive or embeds deeply. If removal is chosen, seal and dispose of contaminated materials in heavy-duty bags.
Tip: If in doubt, consult a professional about material removal. - 6
Dry thoroughly and reduce humidity
After cleaning, thoroughly dry the area using fans or dehumidifiers to suppress regrowth conditions. Run dehumidification for several hours and monitor moisture levels with a hygrometer if available.
Tip: Keep humidity below 50% in most living spaces. - 7
Inspect, re-clean if needed, and plan prevention
Reinspect the cleaned area for any remaining spores or damp patches. If you notice recurring growth, escalate the issue to a professional and review moisture sources to prevent future outbreaks.
Tip: Document the outcome with photos for future reference.
FAQ
What are the risks of DIY mold cleanup?
DIY cleanup can expose you to spores and mycotoxins, especially if your area is large or porous. Use PPE, work slowly, and avoid disturbing the growth. For larger infestations or hidden mold, professional remediation is advised.
DIY cleanup can expose you to spores; use protective gear and avoid disturbing mold. Seek professional help for large or hidden infestations.
Can bleach kill mold?
Bleach can kill mold on non-porous surfaces but does not reach embedded roots in porous materials. It may provide a temporary surface clean, but moisture control is still essential for lasting results.
Bleach can help on non-porous surfaces, but it won't remove mold from porous materials or address moisture issues.
How long does remediation take?
Remediation duration varies with area size, moisture control needs, and material type. Minor surface mold can be cleaned quickly, while larger or hidden growth may take days, especially if removal or structural work is necessary.
Time varies; small cleanup can be quick, larger jobs may take days, especially if materials need removal.
Should I worry about mold health risks?
Exposure can trigger allergies or respiratory symptoms in sensitive individuals. If you have asthma, allergies, or a suppressed immune system, limit exposure and seek professional help for testing or remediation.
Mold exposure can affect breathing for sensitive people. Consider professional help if you have health concerns.
What steps prevent mold from returning?
Fix leaks promptly, use dehumidifiers in damp spaces, improve ventilation, and dry spills quickly. Regular checks for condensation help catch problems before they grow.
Keep moisture in check and maintain good airflow to prevent return.
Watch Video
The Essentials
- Assess moisture and material type before cleaning
- Contain the area to prevent spread
- Porous materials often require removal and replacement
- Drying and humidity control prevent recurrence
- Know when to call a professional