Is Black Mold Easy to Remove? A Homeowner's Practical Guide
Learn when black mold is easy to remove and when it requires professional remediation. A practical, safety-focused guide with steps, tips, and prevention for homeowners.

Quick answer: Is black mold easy to remove? Not always. Small, surface-level growth on non-porous materials can often be cleaned with detergent and a scrub, using proper PPE and containment. However, if mold penetrates porous materials (drywall, insulation) or covers large areas, professional remediation is typically required to ensure safety and prevent regrowth.
What the question gets right and what it misses
Homeowners often ask, is black mold easy to remove, and the answer hinges on the extent of growth and the material involved. According to Mold Removal Lab, black mold growth is a sign that moisture control has broken down and that health risks may be present, especially for sensitive individuals. The key takeaway is that removal difficulty is not a single yes or no answer; it depends on scope, surface type, and how quickly you act. This section lays the groundwork for practical, safe decisions rather than quick fixes. Throughout this guide you’ll see practical steps you can take, grounded in professional principles and safety-first thinking, to reduce exposure and prevent recurrence.
Common places where black mold appears and why it matters
Mold thrives where moisture and organic material meet warmth. You’ll often find it behind walls, under sinks, in basements, around leaky windows, and in crawl spaces. In bathrooms, it can appear on grout and caulk, while kitchens may show it on damp cabinetry or around sink areas. Porous materials like drywall, ceiling tiles, and carpet backing are particularly vulnerable because mold can infiltrate their tiny pores. Conversely, non-porous surfaces such as ceramic, glass, or sealed metal may trap mold on the surface but are easier to wipe away when addressed quickly. Recognize that early detection improves removal prospects and reduces the chance of hidden growth behind walls or under insulation.
Safety first: PPE, containment, and ventilation you should use
Before you touch any mold, plan for containment to prevent spores from spreading. Wear a properly fitted N95 or higher respirator, eye protection, and gloves at minimum. Seal off the area with plastic sheeting, and set up a simple negative-pressure approach if available. Ventilation is important, but you should avoid blowing air from a moldy space into clean areas. The Mold Removal Lab team stresses that maintaining air quality and preventing cross-contamination is as important as the cleaning itself. Keep pets and children away from the work zone, and avoid disturbing mold to prevent aerosolization.
Cleaning small, non-porous areas: safe, effective steps you can take
For limited, non-porous surfaces, a careful cleaning routine can often resolve surface mold. Start with a detergent-and-water solution and a non-abrasive scrub pad to physically remove mold. Wipe the area with a clean cloth and dry thoroughly to discourage regrowth. If you choose to use a disinfectant, select an EPA-registered product and follow label directions. Do not mix chemicals or create strong fumes; never substitute bleach for every cleaning job—bleach is not always appropriate, especially on porous materials, and can produce hazardous byproducts in enclosed spaces. The goal is to remove visible mold and moisture sources while reducing exposure risk.
Porous materials: when cleaning isn’t enough and replacement is wiser
Porous substrates like drywall, insulation, carpet, and ceiling tiles can trap mold within their structure. Cleaning these materials may not fully remove microscopic spores and can leave behind odors and a risk of regrowth. In most cases, replacement is the safer, more effective option when mold has penetrated the material, moisture problems persist, or there is ongoing water intrusion. If replacement isn’t feasible due to cost, consult a professional to discuss remediation options that minimize demolition and disposal risks. Mold can reappear if moisture remains, so addressing the water source is essential.
Containment, moisture control, and long-term prevention during remediation
Containment stops mold spores from spreading beyond the affected area. Use plastic sheeting to create a sealed work zone, and maintain dehumidification to keep relative humidity below 50-60% where possible. Repair leaks promptly and improve ventilation to reduce humidity levels. After cleanup, run a moisture check to confirm the space is dry and check for hidden moisture pockets behind walls. Prevention is the ongoing part of the process: fix leaks, redirect water away from foundations, and manage indoor humidity with dehumidifiers or ventilation fans.
When to call in professionals: clear indicators you shouldn’t DIY
If mold covers more than 10 square feet, or if there is visible mold behind wallpaper or under insulation, or if occupants report ongoing allergic symptoms or respiratory issues, seek professional remediation. DIY mistakes can spread spores and lead to incomplete removal, ongoing odors, or structural damage. The Mold Removal Lab team notes that professionals have specialized equipment such as HEPA filtration, moisture meters, and containment systems that greatly reduce exposure and improve outcomes. If in doubt, a professional assessment is a prudent first step.
Aftercare: quick prevention tips to minimize regrowth
Post-cleanup care is as important as the cleanup itself. Focus on moisture control: fix leaks, improve drainage around the home, and ensure proper grading away from the foundation. Maintain dehumidification in damp spaces, especially basements and bathrooms. Clean regularly but avoid introducing new moisture sources, such as leaving damp towels lying around. Consider routine mold-preventive measures like improving ventilation in bathrooms and kitchens, using exhaust fans, and checking for condensation on windows.
Debunking myths: common beliefs about bleach, vinegar, and DIY fixes
There are many myths about removing black mold quickly with household products. Bleach may not reach mold roots in porous materials and can cause flare-ups if used in enclosed spaces. Vinegar has antimicrobial properties but may be ineffective against established mold colonies in porous substrates. The best approach is to treat surface mold on non-porous materials with appropriate cleaners and address moisture; for porous materials or large areas, professional remediation is the safest route.
Real-world scenarios: examples that illustrate outcomes
Consider a small bathroom mold patch on tile grout versus a mold colony behind drywall due to a hidden leak. The first scenario is usually addressable with careful cleaning, proper PPE, and drying. The second scenario involves structural considerations, potential contaminated insulation, and possible drywall replacement. Each case demonstrates why the answer to is black mold easy to remove depends on the area and materials involved. In all cases, you should fix the moisture problem to prevent recurrence and reassess the space after cleanup to ensure the area remains dry.
A concise recap: major takeaways you can act on today
By understanding material type, moisture sources, and containment basics, you can make informed decisions about mold cleanup. Small, surface mold on non-porous surfaces is more amenable to DIY cleaning with caution, while larger, porous growth requires professional help. Always prioritize safety and moisture control to prevent regrowth and protect health.
Tools & Materials
- N95 respirator or better(Fit-tested if possible)
- Safety goggles or face shield(Protect eyes from splashes and spores)
- Disposable gloves (nitrile or latex)(Two layers if handling liquids)
- Plastic sheeting or painter's drop cloths(Seal off area to prevent spread)
- Detergent or mild soap(First line of cleaning; avoid harsh solvents on porous materials)
- Scrub brushes or sponges(Non-abrasive for non-porous surfaces)
- Spray bottle with water solution(For rinsing and dilution as needed)
- EPA-registered disinfectant (if appropriate)(Follow label directions; do not mix cleaners)
- Portable HEPA vacuum (optional)(Best for cleanup in sealed spaces)
- Disposable trash bags (heavy-duty)(Seal and remove mold-contaminated waste carefully)
- Moisture meter or hygrometer (optional)(Monitor humidity and moisture levels)
Steps
Estimated time: 60-120 minutes for small area; larger jobs may require several hours or multiple sessions
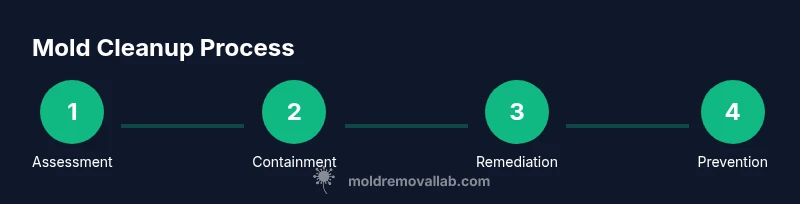
- 1
Assess the area and set up containment
Survey the affected space and identify moisture sources. Close off the area with plastic sheeting to prevent spores from spreading to clean zones. Establish a clean-to-dirty workflow and prepare PPE before touching any mold.
Tip: Create a one-way flow: dirty area first, then clean areas; avoid back-and-forth movement. - 2
Turn off moisture sources and dry the space
Repair leaks or water intrusion if visible. Use fans and dehumidifiers to dry the area to a safe moisture level. Plan to maintain drying throughout the cleanup to prevent regrowth.
Tip: Keep doors/windows closed; use a dehumidifier in the area and monitor humidity. - 3
Clean non-porous surfaces with detergent
Wipe surfaces with a detergent solution, using a scrub brush to remove visible mold. Rinse with clean water and dry completely with towels or a dry cloth.
Tip: Work from the least contaminated area outward to prevent cross-contamination. - 4
Disinfect surfaces if appropriate
Apply an EPA-registered disinfectant following label directions on non-porous surfaces. Allow contact time as specified by the product for effective disinfection.
Tip: Never mix cleaners; avoid alcohol-based products on all surfaces if bleach is present. - 5
Evaluate porous materials for replacement
Inspect drywall, insulation, carpets, and ceiling tiles. If growth penetrates the material or it remains damp after cleaning, consider replacement to prevent regrowth.
Tip: Document moisture issues and plan replacement before reassembling the space. - 6
Contain and ventilate during cleanup
Maintain containment and avoid creating cross-contamination. Use exhaust fans to vent air to the exterior, not into clean spaces.
Tip: Keep pets and kids away from the work area during cleanup. - 7
Perform a final moisture check
Reassess moisture and confirm the area is dry. Record humidity levels and observe for any signs of lingering odor or dampness.
Tip: Take daily air checks for a week after cleaning to ensure no resurgence. - 8
Dispose of contaminated materials
Place moldy materials in sealed bags for disposal. Clean tools and surfaces after disposal to prevent cross-contamination.
Tip: Double-bag especially contaminated items and label - 9
Plan long-term prevention
Address root causes such as leaks, ventilation inadequacy, or insulation moisture. Implement ongoing humidity control and routine inspections.
Tip: Install or improve exhaust fans in moisture-prone rooms.
FAQ
Is black mold dangerous to health, and should I worry if I see it in small amounts?
Yes, black mold can pose health risks, especially for children, the elderly, and people with allergies or respiratory conditions. Visible growth should be addressed promptly, and moisture sources should be fixed. If symptoms persist, consult a healthcare professional and consider professional remediation.
Black mold can affect health, especially for sensitive people. Treat visible growth promptly and fix moisture sources; seek professional help if symptoms persist.
Can I remove black mold myself, or is professional help always required?
Small, surface mold on non-porous surfaces may be manageable with proper PPE and cleaners. Large areas, porous materials, or ongoing leaks usually require professional remediation to ensure safety and prevent regrowth.
You can handle small surface mold with PPE, but larger or porous growth should be tackled by professionals.
What surfaces are difficult to remediate and should be replaced?
Drywall, insulation, carpet, and ceiling tiles that harbor mold or remain damp after cleaning often need replacement to prevent regrowth and ensure indoor air quality.
Porous materials like drywall and insulation often need replacement if mold is present.
How long does remediation typically take for a small area?
For small areas, remediation may take several hours to a day depending on moisture control, drying time, and containment setup. Complex cases with hidden growth can take longer and may require professional scheduling.
A few hours to a day for small spots, longer for tricky or hidden growth.
Should I test for mold after cleaning?
Post-cleanup testing is optional for many homeowners, but a professional mold test can help verify that the space is safe, especially after severe contamination or recurrent moisture issues.
Testing after cleanup can confirm safety, especially after heavy contamination.
What is the most important step to prevent mold return?
Control moisture consistently: fix leaks, improve ventilation, and keep humidity low. Regular inspections help catch issues before mold can establish again.
The key is moisture control and regular checks to stop mold from returning.
Watch Video
The Essentials
- Assess moisture sources before cleanup
- Non-porous surfaces can be cleaned; porous materials often require replacement
- Containment and PPE are essential to safety
- Professional remediation is advised for large or hidden growth
- Prevent recurrence through moisture control and regular maintenance