How to Treat Mold in House: A Practical Guide
A homeowner-friendly guide from Mold Removal Lab on treating mold safely, fixing moisture, cleaning surfaces, and preventing recurrence.

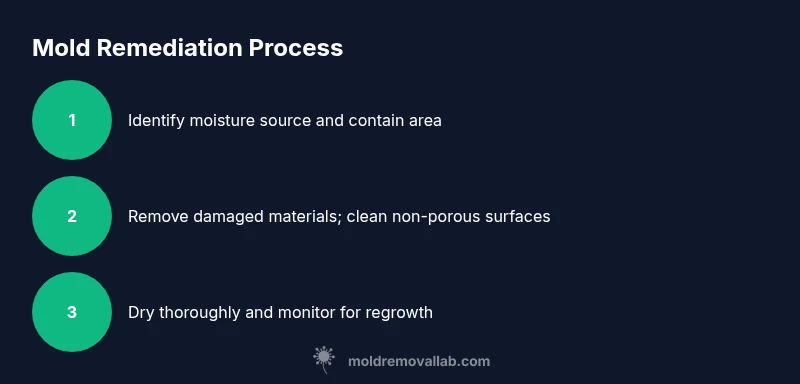
Treating mold in a house starts with stopping moisture, isolating affected areas, and cleaning non-porous surfaces with approved methods. Use PPE, monitor for regrowth, and know when to hire a professional. This practical guide expands on each step with clear actions you can take.
Understanding Mold in Homes
Mold in the home is typically a symptom of excess moisture and poor ventilation. Mold spores are microscopic and constantly present in the air, but they only become a problem when they land on a damp surface and begin to grow. According to Mold Removal Lab, addressing moisture sources is the most effective way to stop mold from spreading. Health concerns vary by person, but common symptoms can include nasal irritation, throat discomfort, and coughing in damp environments. The goal of any remediation plan is not just cleaning visible growth but reducing the moisture that feeds it and preventing future outbreaks through simple, repeatable habits.
Common Moisture Sources and Where Mold Grows
Mold thrives wherever humidity remains high and materials stay wet after a leak or flood. Look for condensation on windows, roof leaks, plumbing drips, basement dampness, or bottled moisture in closets. Common hotspots include bathrooms, kitchens, basements, laundry rooms, and crawl spaces. In homes with poor ventilation, humid air can linger, enabling mold to grow on walls, behind wallpaper, and on porous materials like drywall and insulation. Early detection often relies on spotting a musty odor and visible discoloration.
How to Inspect Affected Areas for Mold
A thorough inspection combines visual checks with moisture measuring and sniff tests. Start with areas that have experienced leaks or frequent condensation. Use a moisture meter on walls, ceilings, and subflooring to identify hidden dampness. Document areas with photos before cleaning, noting dates of discovery and any water events. If you discover extensive growth beyond your comfort zone, consider postponing cleaning until you’ve consulted with a professional. Early action reduces the risk of cross-contamination to unaffected rooms.
Cleaning Non-Porous Surfaces vs Porous Materials
When learning how to treat mold in house, distinguish between surfaces:
- Non-porous surfaces (glass, metal, sealed tile, hard plastic): Clean with soap and water, then dry completely. For stubborn spots, use a mild cleaner followed by thorough drying.
- Porous materials (drywall, carpet, ceiling tiles, fabric): Contaminated materials that absorb mold may need to be removed and discarded to prevent regrowth. Do not attempt to salvage heavily damaged porous items without professional guidance. After removal, clean the surrounding non-porous area to prevent residual spores from taking hold again.
Safety, PPE, and Ventilation Essentials
Protect yourself with appropriate PPE: gloves, eye protection, and a properly fitted respirator (N95 or better). Work with good ventilation—open windows, use fans that exhaust to the outside, and run a HEPA-filtered vacuum to capture spores. Never mix cleaners that contain ammonia with bleach. Keep children and pets out of the area during remediation, and bag and seal contaminated waste securely for disposal.
Cleaning Techniques for Different Materials (Step-by-Step Snapshot)
For small, contained mold on non-porous surfaces, a soap-and-water approach often suffices when dry afterward. In cases of more persistent growth, consider mold-specific cleaners and consult local guidelines. Porous materials that are contaminated beyond cleaning should be removed and replaced. After cleaning, monitor humidity levels to maintain a dry environment and prevent regrowth. This approach minimizes the chance that mold returns after you learn how to treat mold in house.
When to Call a Professional and How to Choose One
If growth covers more than a small area, involves HVAC systems, or if occupants have health concerns, it’s wise to call a licensed mold remediation professional. Ask about containment practices, waste disposal, and whether they’ll test for hidden moisture. Look for certifications from reputable bodies, read reviews, and request a written remediation plan with estimated timelines and safety measures. A pro can assess hidden damage behind walls and ensure all moisture sources are addressed to prevent recurrence.
Prevention and Maintenance to Stop Mold Recurrence
Preventing mold starts with controlling moisture. Use dehumidifiers in damp spaces, fix roof and plumbing leaks promptly, and ensure bathrooms and kitchens stay well-ventilated. Regularly inspect areas prone to dampness, clean surfaces with non-toxic cleaners, and maintain indoor humidity around 30-50%. Simple habits—drying laundry outdoors, clearing clogged gutters, and using exhaust fans—greatly reduce the chance of mold returning. Consistency is the key to long-term mold control.
Authority Sources
This section provides references from recognized public health and safety agencies to support the guidance above:
- https://www.cdc.gov/
- https://www.epa.gov/
- https://www.osha.gov/
What to Do If You Still See Mold
If mold reappears after your initial remediation, reassess moisture control, review cleaning outcomes, and consider hiring a pro for an in-depth assessment. Do a fresh moisture survey, check for hidden leaks, and verify that your drying process achieved consistent results. Persistent mold may indicate structural damage or ongoing dampness that requires professional intervention to restore a safe living environment.
Tools & Materials
- Nitrile gloves(Disposable; choose a snug, chemical-resistant pair.)
- Safety goggles(Wraparound style recommended to shield eyes.)
- N95 respirator or P100 mask(Fit-tested if possible; replace after use.)
- Disposable coveralls or old clothing(Protect skin and prevent contaminant spread.)
- Plastic sheeting and painter's tape(Seal off affected area to limit spread.)
- HEPA vacuum with pre-filter(Needed for clean-up and debris removal.)
- Stiff-bristled scrub brushes(Use with non-toxic cleaners for hard surfaces.)
- Non-ammonia cleaning products or soap(Mild cleaners are safer for indoor use.)
- Buckets, sponges, and rags(For washing and drying surfaces.)
- Plastic bags for disposal(Seal contaminated materials before disposal.)
- Dehumidifier or portable fans(Aid drying and reduce moisture quickly.)
- Moisture meter (optional)(Helpful for monitoring damp areas.)
Steps
Estimated time: Total time: 3-6 hours depending on area size and material types
- 1
Identify moisture source
Locate leaks, condensation points, or flood damage. Fixing the moisture source is essential before cleaning mold, or the growth will return. Take photos for documentation and plan repairs.
Tip: Address leaks promptly and test the area after repair to confirm dryness. - 2
Contain the affected area
Seal the space with plastic sheeting to prevent spores from spreading. Create a dedicated entry/exit and minimize traffic through the contamination zone.
Tip: Keep door gaps sealed and avoid using fans that blow mold spores into other rooms. - 3
Put on PPE and prepare the area
Put on gloves, goggles, and a respirator. Clear the area of personal belongings and move items to a safe, uncontaminated space.
Tip: Do not reuse contaminated PPE; dispose properly after the job. - 4
Remove damaged porous materials
Carefully bag and remove porous items like drywall, ceiling tiles, or carpet if contaminated beyond cleaning. Seal bags before removal to prevent dispersion.
Tip: Label bags clearly and keep them away from clean areas during disposal. - 5
Clean non-porous surfaces
Wash washable surfaces with mild soap and water or a non-toxic cleaner. Rinse and dry thoroughly to prevent residual moisture that supports regrowth.
Tip: Avoid mixing cleaners that can release harmful fumes. - 6
Address hidden moisture and dry the space
Run dehumidifiers and fans to achieve complete dryness. Target humidity levels near 30-50% and ensure materials reach a stable dry state before reassembling.
Tip: Keep airflow directed to the damp areas until fully dry. - 7
Monitor and verify results
Inspect the area over the next days for signs of regrowth. Use a moisture meter if available, and repeat cleaning if necessary.
Tip: Document progress with photos for your records. - 8
Decide on professional remediation if needed
If mold covers a large area, involves HVAC, or if health symptoms persist, seek licensed remediation. A pro can assess structural damage and hidden moisture.
Tip: Ask for a written plan and expected timelines before work begins.
FAQ
Is it safe to clean small mold patches myself?
For small, contained patches on non-porous surfaces, DIY cleaning with proper PPE is often possible. Avoid disturbing large areas of mold, and stop if symptoms occur or if you see widespread growth.
Yes, small, contained patches can be cleaned safely with PPE, but stop and seek professional help if mold is widespread or health symptoms occur.
How do I tell if mold is hazardous?
Hazardous mold typically appears in large areas, has a strong musty odor, or grows behind walls and insulation. If you have health concerns or persistent symptoms, consult a pro.
If you notice a strong odor, or if growth is behind walls, get a professional assessment.
Should I use bleach to clean mold?
Bleach is not ideal for porous materials and can release harmful fumes. For non-porous surfaces, milder cleaners or specialized mold cleaners are often safer alternatives.
Bleach isn’t the best choice for porous materials; use milder cleaners on non-porous surfaces and consider professional guidance for porous areas.
How long does remediation typically take?
Timeline depends on area size and materials. Small jobs may take a few hours, larger or more damaged spaces can require multiple days with professional oversight.
Timing varies; small spots can be cleaned in hours, bigger jobs take longer and may need a pro.
What should I ask a pro before hiring?
Ask about containment practices, waste disposal, whether they test moisture sources, and provide a written remediation plan and schedule.
Ask for containment details, disposal plans, moisture testing, and a written plan with timelines.
Watch Video
The Essentials
- Identify and fix moisture sources first
- Contain the area to prevent cross-contamination
- Differentiate cleaning approaches for porous vs non-porous surfaces
- Wear proper PPE and ensure thorough drying
- Know when to call a professional for larger infestations