How to Remove Smell of Mold: A Practical Guide
Learn proven, safe methods to remove the smell of mold from homes using practical steps, odor-controlling strategies, and prevention tips from Mold Removal Lab.

According to Mold Removal Lab, to remove the smell of mold you must fix moisture, clean affected areas, dry thoroughly, and ventilate. Start by locating the odor source, addressing leaks, and washing surfaces with mold-safe cleaners. Use activated charcoal or baking soda to absorb remaining odor, and maintain humidity below 50%.
Understanding Mold Odor and How It Lingers
Mold odors are more than just a nuisance; they signal moisture problems and hidden growth behind walls, floors, or stored items. If you're questioning how to remove smell of mold, the core strategy is to interrupt the cycle of moisture, growth, and odor compounds. Mold Removal Lab emphasizes that porous materials can trap odor molecules, so both source control and thorough cleaning are essential. In this section we unpack the science of odors and translate it into practical steps you can implement today to reclaim a fresh indoor environment. By comprehending where odors come from, you can target the root causes rather than fighting a moving target.
Immediate Actions to Take When Odor Is Detected
When you first notice a mold smell, start with fast, visible actions. Identify the likely odor source, check for leaks, and separate affected zones from the rest of the home if possible. Set up ventilation to bring in drier air and activate a dehumidifier to keep relative humidity below 50%. These early moves reduce moisture, slow mold growth, and cut odor intensity quickly. Mold Removal Lab reiterates that moisture control is the foundation of any odor-removal plan, so prioritize drying and airflow before deep cleaning.
Cleaning and Decontamination: Surfaces and Materials
Cleaning methods should match surface type. Clean non-porous surfaces with a mold-safe cleaner or a mild detergent solution. For salvageable porous materials, scrub gently and remove any visibly contaminated items; heavily mold-damaged items should be sealed in bags and discarded if necessary. Never mix bleach with ammonia or other cleaners, as this can release toxic gases. After cleaning, rinse with clean water and dry completely. The goal is to remove both visible mold and lingering odor compounds while preventing re-growth.
Odor Absorption and Air Quality Techniques
Odor control combines active removal with passive absorption. Place baking soda or activated charcoal in open containers around the affected area for 24–72 hours to capture odor molecules. Use a HEPA-filter vacuum to remove settled spores from hard surfaces, then dry thoroughly. An air purifier with a solid activated carbon filter can further reduce odors during and after cleaning, particularly in damp rooms or basements. Remember, odor absorbers are most effective once dampness is controlled.
Moisture Control and Prevention to Stop Recurrence
Preventing a return of the smell hinges on ongoing moisture management. Repair leaks promptly, enhance ventilation, and install vapor barriers where appropriate. Use a dehumidifier in basements or damp rooms and monitor humidity with a reliable meter. Regular inspections of windows, pipes, and bathroom fans help catch moisture issues before odors develop. Consistency is the simplest way to keep odors from resurfacing over time.
When to Seek Professional Help
If the odor persists after drying and cleaning, or if you notice recurring mold growth, a licensed mold remediation professional should evaluate your space. Hidden growth behind drywall or insulation can require specialized equipment and procedures. The Mold Removal Lab Team recommends scheduling a professional assessment to ensure safety, complete remediation, and long-term odor control.
Tools & Materials
- N95 respirator mask(NIOSH-approved; replace if becomes damp)
- Disposable gloves(Latex or nitrile)
- Goggles or protective eyewear(Splash protection)
- Mold-safe cleaner or mild detergent(Avoid ammonia with bleach)
- White vinegar (optional)(Use only as a supplementary cleaner)
- Alcohol or hydrogen peroxide (optional)(For spot cleaning on hard surfaces)
- Bucket, sponge, and soft brush(For cleaning and rinsing)
- Rags or towels for drying(Have plenty on hand)
- Dehumidifier(Keep space below 50% RH)
- Fan(s) for airflow(Use to increase evaporation)
- HEPA vacuum(Vacuum after drying to remove spores)
- Plastic sheeting and tape(Containment if needed)
- Trash bags (heavy-duty)(Seal and dispose of heavily contaminated items)
- Moisture meter (optional)(Helps quantify damp areas)
Steps
Estimated time: 2-4 days depending on space, moisture level, and material condition
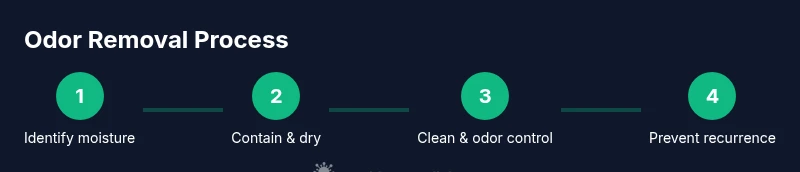
- 1
Identify moisture sources
Inspect the space for leaks, condensation, and moisture traps. Document findings with photos and note any hidden damp areas behind walls or under flooring. The goal is to locate where water is entering and where odors may be anchored.
Tip: Photograph suspected areas from multiple angles to guide repairs. - 2
Contain and assess damaged materials
If porous materials show mold growth, isolate the area with plastic sheeting to prevent spread. Assess whether items can be cleaned or must be removed. Heavily damaged materials should be bagged and disposed of following local guidelines.
Tip: Avoid disturbing moldy materials more than necessary to limit spore release. - 3
Clean hard surfaces
Scrub non-porous surfaces with a mold-safe cleaner or detergent solution. Rinse with clean water and dry completely. For salvageable porous surfaces, gently clean and dry; discard unsalvageable materials.
Tip: Never mix ammonia with bleach; toxic gases can form. - 4
Dry thoroughly
Run dehumidifiers and fans to remove moisture. Target below 50% relative humidity and keep air moving for at least 24–48 hours after cleaning. A dry space reduces odor and prevents regrowth.
Tip: If moisture remains, extend drying time and re-check with a moisture meter. - 5
Absorb odors
Place odor absorbers like baking soda or activated charcoal around the area. Combine with HEPA vacuuming after drying to remove spores and embedded particles. Odors typically lessen as moisture stays controlled.
Tip: Rotate absorbers to maximize contact with air and replace every few days. - 6
Prevent recurrence
Implement ongoing moisture controls: fix leaks promptly, improve ventilation, and monitor humidity. Regular checks after heavy rains or high humidity help catch problems early and keep odors away.
Tip: Set a monthly check routine for humidity and leaks.
FAQ
What causes mold smells to linger after cleaning?
Lingering odors often indicate hidden moisture or mold growth behind walls, under flooring, or within insulation. If moisture remains, the odor compounds can re-form. Thorough drying and addressing hidden sources are essential to stop the cycle.
Odors persist when moisture remains or mold is hidden behind structure. Dry and inspect hidden areas to stop the smell.
Can I remove mold odor without removing mold?
In many cases you can reduce odor by cleaning and drying, but persistent odors may mean unseen mold is present. If you suspect hidden growth, a professional assessment is recommended.
Sometimes cleaning helps, but hidden mold may require expert help.
Is it safe to use bleach to remove mold odor?
Bleach is effective on non-porous surfaces, but it can be hazardous and sometimes ineffective on porous materials. Prefer mold-safe cleaners and proper drying, and avoid mixing with ammonia or acids.
Bleach can be risky and sometimes ineffective on porous materials; opt for safer cleaners.
How long does it take for odors to disappear after cleaning?
Odor reduction happens as moisture is controlled and surfaces dry. In small spaces it may take 24–72 hours; larger areas or heavy contamination can take several days.
Odors fade as things dry and air flows well, usually within a few days depending on space.
When should I call a professional for mold odor issues?
Call a professional if odors persist after cleaning, if there is visible mold reappearing, or if you have structural dampness or health concerns. A pro can assess hidden growth and implement full remediation.
If the smell sticks around after your cleaning, get a pro to check for hidden mold.
Watch Video
The Essentials
- Identify moisture sources before cleaning.
- Dry thoroughly to prevent regrowth.
- Use safe cleaners and avoid mixing chemicals.
- Absorb odors with baking soda or charcoal.
- Seek professional help if odors persist.