How to Remove Mold from Wood: Safe, Practical Guide
Learn how to remove mold from wood safely with practical steps, PPE, cleaners, and moisture-control strategies. Written by Mold Removal Lab for homeowners seeking effective remediation and prevention.

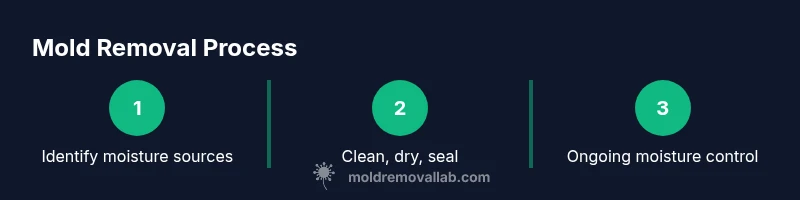
Goal: safely remove mold from wood by stopping moisture, cleaning with non-toxic cleaners, and drying thoroughly. Start with white vinegar or hydrogen peroxide, scrub with a stiff brush, and repeat as needed until visible growth is gone. Dry to the touch, then seal or repaint to prevent recurrence. For extensive infestations or structural damage, hire a professional remediation service.
Understanding the problem: mold on wood
Mold on wood is more than a surface stain; it indicates moisture and porous material that can harbor fungal growth. When moisture is present, wood absorbs it and creates a hospitable environment for mold spores to settle and multiply. If you’re trying to answer how to remove mold from wood, you need a plan that addresses both the visible signs and the underlying moisture source. According to Mold Removal Lab, success starts with identifying where the moisture comes from—leaky pipes, high humidity, or poor ventilation—and then selecting appropriate cleaning methods that won’t damage the wood. Early detection makes remediation simpler and less costly, and it reduces the chance of spores spreading to other areas of the home. As you inspect, document affected areas so you can monitor for recurrence after treatment.
Safety and health considerations
Mold exposure can affect air quality and respiratory health, especially for children, the elderly, and those with allergies. Before you begin any remediation, outfit yourself with proper PPE: nitrile gloves, eye protection, and an N95 respirator. Work in a well-ventilated space, and keep pets and children away from the treatment area. If you have a large growth or you’re unsure about the extent, consult a professional for a risk assessment. Mold Removal Lab emphasizes that safety is the first step; procedures should minimize dust and spore dispersion to the rest of the home.
Selecting the right cleaning method for wood
Wood is porous and can trap moisture, which means some cleaners work better than others. White vinegar (5%) is a popular natural option that can kill many surface mold without harsh chemicals. Hydrogen peroxide (3%) is another effective choice, especially when applied in a spray and left to sit briefly before scrubbing. Bleach is generally not recommended for wood, because it does not reliably reach embedded colonies and can damage wood fibers over time. For stubborn growth, consider a mold-control product labeled safe for wood or a borate-based treatment that penetrates the surface and helps prevent future mold.
Overview of the removal process for wood surfaces
This section provides a practical outline of the steps involved in removing mold from wood, without getting mired in marketing hype. Begin by confirming the moisture source and addressing it before cleaning. Then, clean the surface with a non-toxic solution, gently scrub to remove visible growth, and dry the wood completely before reconditioning or sealing. If the wood is porous and has deep staining, plan for additional steps like light sanding after the area is dry. The process emphasizes discipline—don’t rush the drying phase, and re-check after a few hours to ensure there’s no residual dampness.
Drying, moisture control, and ongoing prevention
Remediation doesn’t end after the visible mold is removed. Wood must dry thoroughly to prevent regrowth. Use fans and a dehumidifier in combination with open windows when weather permits. Aim for indoor humidity below 50%, and consider moisture barriers or sealing porous wood surfaces once they’re completely dry. Regular checks around plumbing, HVAC returns, and crawlspaces help catch moisture problems before they lead to mold again. This is where prevention becomes easier and cheaper than repeated remediation.
Repairing damaged wood and sealing options
Mold can compromise wood strength and appearance. If wood has softened, warped, or shows signs of rot, structural repair or replacement may be necessary. Lightly damaged boards can often be cleaned, dried, and treated, then sealed with a mold-resistant finish to reduce future moisture penetration. For larger areas, you may need to replace sections and treat surrounding wood with a borate-based preservative. After sealing, maintain moisture control to reduce the chance of future mold growth.
When to call a professional and insurance considerations
Not every mold situation is safe or practical to handle on your own. If the affected area is larger than a few square feet, if you suspect hidden growth behind walls, or if there is water damage history, professional remediation is advisable. A licensed mold remediation contractor can assess moisture sources, conduct mold testing if needed, and ensure proper containment. If you have homeowner’s insurance, check your policy details; some jurisdictions require professional remediation for mold damage to optimize coverage and prevent cross-contamination.
Maintenance plan and mold-prevention checklist
Preventing mold on wood is about ongoing moisture control. Maintain indoor humidity below 50%, fix leaks promptly, and ensure proper ventilation in bathrooms, kitchens, and basements. Inspect wood trims, baseboards, and shelves regularly after wet seasons or floods. Use mold-resistant primers or finishes on high-risk surfaces, and store wood products in dry areas with good air circulation. A simple quarterly check can catch rising moisture early and save you from costly remediation later.
Tools & Materials
- Nitrile gloves(Powder-free; avoid latex sensitivity)
- Safety goggles(Wraparound style preferred)
- N95 respirator(Fit-tested if possible)
- Drop cloth or plastic sheeting(Protect adjacent surfaces)
- HEPA vacuum cleaner(Optional but highly recommended for dust control)
- Soft scrub brush(Non-abrasive to avoid wood damage)
- White vinegar (5%)(Natural disinfectant for surface mold)
- Hydrogen peroxide (3%)(Effective mold killer on wood)
- Dish soap(Mild detergent to help lift grime)
- Spray bottle(For even application of cleaners)
- Cloths or microfiber towels(Soft, lint-free drying)
- Dehumidifier or fans(Promotes rapid drying)
- Wood sealer or mold-resistant coating(Optional post-removal protection)
Steps
Estimated time: 60-90 minutes active work, plus several hours of drying
- 1
Prepare and protect
Put on all PPE, isolate the area, and lay down drop cloths to prevent spores from spreading. This keeps you safe and helps you stay focused on a controlled remediation process.
Tip: Double-check respirator fit and ensure you have a clean, well-ventilated workspace. - 2
Identify moisture sources
Inspect for leaks, condensation problems, or high humidity zones. Fixing the moisture source is crucial to prevent re-growth after cleanup.
Tip: Check behind baseboards and inside cabinets where dampness can hide. - 3
Vacuum loose spores
Gently vacuum visible surface with a HEPA-equipped vacuum to capture loose spores before cleaning. Do not dry-brush, as this can aerosolize mold.
Tip: Use slow, steady passes and keep the nozzle close to the surface without pressing hard. - 4
Apply cleaner and dwell time
Spray white vinegar or 3% hydrogen peroxide on the affected area and let it sit for 5–15 minutes to penetrate and kill mold. Avoid mixing cleaners.
Tip: Test a small area first to ensure wood finish isn’t harmed. - 5
Scrub and wipe
Scrub with a soft brush to lift embedded mold, then wipe away residue with a microfiber cloth. Rinse the area with a damp cloth if needed.
Tip: Work from the outer edge toward the center to prevent spreading. - 6
Dry thoroughly
Allow the wood to dry completely—ideally with air circulation and dehumidification. Don’t seal until moisture is under control.
Tip: Check the surface with a moisture meter if available. - 7
Seal and monitor
If the wood has dried, apply a mold-resistant sealer or finish to reduce future moisture absorption. Monitor humidity and re-check periodically.
Tip: Keep the area ventilated after sealing and during seasonal changes.
FAQ
Is it safe to remove mold from wood myself, or should I hire a professional?
DIY removal is feasible for small, surface mold with proper PPE and a careful approach. Larger infestations, hidden growth, or structural damage warrant a professional assessment.
You can handle small patches yourself, but for bigger jobs or hidden mold, a pro is recommended.
What cleaners work best on wood?
White vinegar and hydrogen peroxide are effective, natural options for wood. Bleach is not ideal for wood surfaces as it can damage fibers and may not reach embedded mold.
Vinegar and hydrogen peroxide are good options; avoid bleach on wood.
How long does it take wood to dry after remediation?
Drying depends on humidity, airflow, and wood type. In typical indoor conditions, plan for 24–72 hours of drying with proper ventilation.
Drying can take a day or two with good airflow.
Can mold return after remediation?
Yes, mold can recur if moisture returns. Ongoing moisture control and ventilation are essential to prevent regrowth.
Mold can come back if you don’t control moisture.
Should I replace moldy wood?
If the wood is structurally compromised, visibly rotten, or severely damaged, replacement is usually necessary for safety and long-term integrity.
If wood is damaged, replacement is often best.
What’s the best way to prevent mold on wood long-term?
Maintain humidity below 50%, fix leaks promptly, improve ventilation, and apply mold-resistant finishes to vulnerable wood to deter future growth.
Keep humidity in check and seal vulnerable areas.
Watch Video
The Essentials
- Identify moisture sources to prevent recurrence
- Wear PPE and isolate the remediation area
- Use non-toxic cleaners on wood; avoid bleach
- Dry thoroughly and monitor humidity long-term