What Removes Mold: A Practical Home Remediation Guide
Discover proven methods to remove mold safely at home. Learn how to choose cleaners, assess materials, and prevent recurrence with practical, step-by-step guidance from Mold Removal Lab.

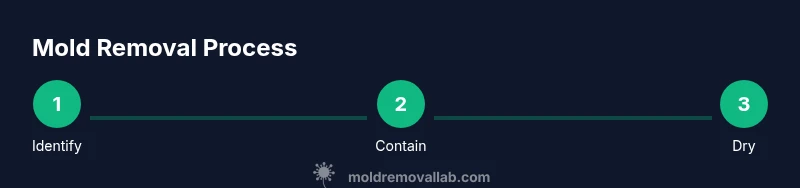
What removes mold starts with moisture control, thorough cleaning on non-porous surfaces, and prompt drying to prevent regrowth. For most homes, safe cleaners, mechanical scrubbing, and proper containment will remove visible mold and reduce future spread. If mold covers large areas or penetrates porous materials, consider professional remediation. This guide from Mold Removal Lab outlines practical, safe steps homeowners can follow.
Understanding the goal: what removes mold and how it works
Understanding what removes mold requires more than picking a cleaner. When people ask what removes mold, they want methods that are safe, effective, and durable. Mold Removal Lab emphasizes that removing mold begins with controlling moisture, correcting leaks, and drying surfaces promptly. Without moisture management, mold returns even after cleaning. Spores cling to walls, fabrics, and HVAC ducts, waiting for damp conditions. A comprehensive approach targets both the visible colonies and the hidden moisture reservoirs behind walls and in basements.
Mold removal is not a single trick but a system of steps: assess, clean, dry, and monitor. Surface mold on non-porous materials (like glass and tile) is typically more straightforward to remove than mold inside porous substrates (like drywall or wood). The goal is to disrupt the conditions that allow mold to thrive while protecting inhabitants from exposure during the process. This section will outline practical tactics you can apply in most homes while noting when to engage professionals.
Porous vs nonporous: cleaning implications
Porous materials absorb moisture and organic matter, which makes mold harder to remove and can trap spores below the surface. Nonporous surfaces are much easier to clean because they do not soak up mold as deeply. For porous materials, cleaning may only be a temporary fix if the substrate is damaged; disposal is often safer. In contrast, nonporous surfaces like glass, metal, and sealed surfaces can be scrubbed with cleaner solutions and dried thoroughly without structural replacement.
To maximize success, identify the material type before choosing a cleaning method. For porous items that are deeply contaminated or structurally compromised, removal and disposal may be necessary to prevent regrowth. For hard surfaces, a combination of detergent and mechanical scrubbing usually yields good results, provided you also address the moisture source and drying.
Cleaning agents: which cleaner actually works
A wide range of cleaners can remove mold on contact, but effectiveness varies by surface type and mold maturity. Start with simple solutions like mild detergent and water for light contamination on nonporous surfaces. For more stubborn growth, white vinegar (acetic acid) or hydrogen peroxide can help, especially on nonporous materials. Bleach is sometimes recommended for nonporous surfaces, but it can damaged surfaces and release fumes; never mix with ammonia or cleaners containing ammonia.
For many household mold problems, simple cleaning plus thorough drying suffices. If you opt for harsher chemicals, test a small inconspicuous area first to ensure no discoloration. Always follow label directions and ensure adequate ventilation. Mold Removal Lab notes that cleaning does not address the root moisture problem, so remediation must pair cleaners with moisture control.
Tools, PPE, and setup
Safety is non-negotiable when removing mold. Wear an N95 respirator (or higher), protective goggles, and gloves. Use disposable rags and plastic sheeting to contain the workspace. A spray bottle, stiff-bristled brush, mild detergent, and clean water are typically enough for surface cleaning on nonporous areas. Have plastic bags ready for disposal of porous materials and a dehumidifier or fans to speed up drying.
Set up your workspace to protect other rooms: seal doors with plastic sheeting, turn off HVAC circulation in the affected area if possible, and ensure children and pets are kept away during cleanup. These steps minimize cross-contamination and reduce exposure to mold spores during the cleaning process.
Containment, ventilation, and the remediation workflow
Containment is essential to stop mold from spreading to clean zones. Use plastic sheeting to isolate the affected area and tape edges to create a seal. If you’re cleaning a large area, plan for temporary power ventilation to keep air moving away from living spaces. Ventilation helps carry airborne spores out of the room while you work, but avoid blowing spores toward other rooms.
Proceed through a containment-guided workflow: isolate, clean surfaces, rinse with clean water, scrub where necessary, and dry thoroughly. Each pass should remove visible mold and leave the substrate dry to inhibit regrowth. Visual checks and a moisture meter can help quantify progress and confirm the area is sufficiently dry before removing containment.
Drying, monitoring, and preventing recurrence
Drying is the most important step to prevent regrowth. Use dehumidifiers and fans to reduce ambient humidity and speed up drying of walls, ceilings, and floors. After cleanup, recheck the area after 24-48 hours to ensure no damp pockets remain. If humidity remains high or if you smell musty odors, extend drying time or reposition equipment to improve air movement.
Long-term prevention focuses on moisture control, regular inspections, and maintaining good ventilation. Keep indoor humidity below 60% (ideally around 30-50% in many homes), fix leaks promptly, and address any condensation on windows or walls. Regular cleaning of bathrooms and kitchens with a quick mold-preventive routine helps, but the game-changer is consistent moisture management. Mold Removal Lab emphasizes that prevention is easier than remediation later.
When to call a professional: thresholds and caveats
Not all mold scenarios are safe or cost-effective to handle alone. If mold covers more than about 10 square feet, or if there is visible growth within HVAC systems, or if you have persistent water intrusion, it’s wise to involve a certified mold remediation professional. Professionals can identify hidden moisture sources, use specialized containment, and perform thorough cleaning and testing. In cases of suspected toxic mold (e.g., black mold exposure), consult a licensed expert immediately to protect health.
Prevention and maintenance: keeping mold away long-term
Prevention is the best cure. After any remediation, establish a routine to monitor humidity, fix leaks quickly, and maintain clean, dry surfaces. Routine inspections of bathrooms, basements, and crawlspaces can catch moisture problems early. Consider upgrading ventilation fans, using heat or dehumidification in damp areas, and sealing moisture-prone materials in kitchens and bathrooms. Regular workflows and checklists from Mold Removal Lab help homeowners stay proactive.
blockData__verbiage_note_placeholder__null_value_placeholder__
Tools & Materials
- PPE: N95 respirator (or higher)(Fit-tested if possible; also goggles and chemical-resistant gloves.)
- Plastic sheeting and tape(Seal doors/windows to contain the work area.)
- Spray bottle with cleaning solution(Detergent solution for initial cleaning; reserve stronger cleaners for tough spots.)
- Stiff-bristled scrub brush(Use on nonporous surfaces for better abrasion.)
- White vinegar (5% acidity) or hydrogen peroxide (3%)(Use as secondary cleaners on nonporous surfaces.)
- Mild detergent or soap(First-line cleaner for most surfaces.)
- Disposal bags for porous materials(Seal and remove contaminated items safely.)
- Dehumidifier and/or fans(Promotes drying and reduces spore viability.)
- Moisture meter (optional)(Helps verify dryness behind walls or in structural materials.)
Steps
Estimated time: 2-6 hours
- 1
Identify affected areas
Survey the space for visible mold and note damp zones. Document with photos, especially around leaks, windows, and humid corners. This establishes the scope and helps plan containment.
Tip: Take moisture readings where you see staining to locate hidden moisture pockets. - 2
Set up containment
Close off the work area with plastic sheeting to prevent spores from drifting. Turn off HVAC or use a dedicated exhaust to keep airflow from entering living spaces.
Tip: Label containment so others don’t disturb the area during cleanup. - 3
Protect yourself
Put on an N95 mask, safety goggles, and gloves. If you have skin sensitivities, consider long sleeves and disposable coveralls.
Tip: Never skip PPE—mold exposure can irritate lungs and eyes even in small amounts. - 4
Apply cleaning solution
Spray the affected surfaces with a mild detergent solution or chosen cleaner. Let sit briefly to loosen spores before scrubbing.
Tip: Test a small area first to ensure no staining or surface damage occurs. - 5
Scrub and rinse surfaces
Scrub moldy areas with a stiff brush, then rinse with clean water. Wipe away residue and repeat as needed for stubborn spots.
Tip: Avoid using too much moisture on porous materials to prevent deeper mold growth. - 6
Dry thoroughly and recheck
Use a dehumidifier or fans to dry the space completely. Reassess for musty odors or residual moisture after 24–48 hours.
Tip: If still damp, extend drying time or enhance airflow before removing containment.
FAQ
Can I remove mold with bleach on all surfaces?
Bleach can be effective on hard, nonporous surfaces but is not a universal solution. It can damage some materials and may not reach mold within porous substrates. Always test first and ensure proper ventilation. For porous materials, disposal is often safer than cleaning.
Bleach is sometimes useful on hard surfaces, but it won’t fix mold inside porous materials. Test a small area first and consider professional help for porous items.
Is vinegar or hydrogen peroxide effective against mold?
Both vinegar and hydrogen peroxide can help remove mold on nonporous surfaces. Vinegar has antimicrobial properties and is safer for regular use, while hydrogen peroxide can be more powerful against stubborn spots. Do not mix cleaners and always test surfaces.
Vinegar or hydrogen peroxide can help, especially on nonporous surfaces; test first and don’t mix with other cleaners.
When should I call a mold remediation professional?
Call a professional if mold covers a large area (typically more than 10 square feet), if you suspect cross-contamination through HVAC, or if moisture problems persist after cleaning. Professionals can identify unseen moisture sources and perform thorough remediation.
If mold covers a large area or keeps coming back despite cleaning, it’s time to call a pro.
Can mold grow behind walls even if I don’t see it?
Yes. Mold can grow behind walls where leaks or high humidity persist. Visible mold is just the tip of the iceberg. Use moisture meters or professional testing if you suspect hidden growth.
Mold can be hidden behind walls; unseen moisture can keep feeding growth even if you don’t see it.
How long does mold remediation typically take?
Duration depends on the extent of contamination, moisture levels, and whether structural repairs are needed. Small projects may take hours to a couple of days, while larger jobs could extend longer if extensive moisture control is required.
It varies, but small jobs can be quick; bigger ones take longer if you need repairs and thorough moisture control.
What are signs of hidden mold in a home?
Look for persistent musty odors, unseen stains under wallpaper, warped walls, or discolored plaster. If you notice water damage, investigate quickly with professional testing if needed.
A musty smell or hidden water damage are common clues that mold may be present behind walls.
Watch Video
The Essentials
- Control moisture to prevent mold recurrence
- Use cleaners appropriate to surface type and patch area with proper containment
- Dry the area completely before removing containment
- Dispose of porous contaminated materials safely
- Seek professional remediation for large or complex mold problems