How Do You Kill Mold in a House: A Practical Guide
A comprehensive, safety-focused guide for homeowners and renters on killing mold in a house through moisture control, safe cleaning, and prevention, with professional guidance when needed.

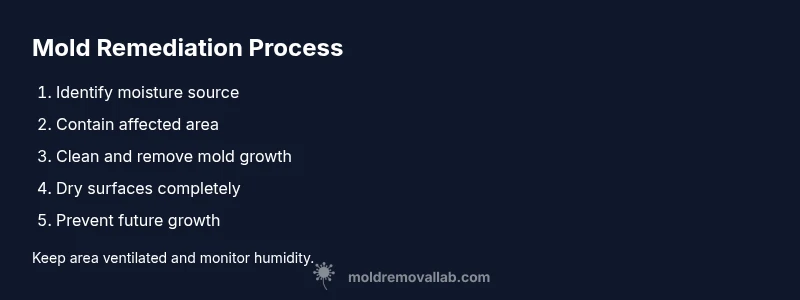
To effectively address mold in a home, stop moisture, isolate affected areas, and follow a clear remediation plan. Start by identifying moisture sources, then contain, clean visible growth with approved products, dry thoroughly, and re-evaluate. For large or hidden infestations, professional remediation is advised. This approach emphasizes moisture control and proper containment to prevent re-growth, with safety as a priority.
What mold is and why it grows
Mold is a type of fungus that thrives in damp, humid environments. It can appear on walls, ceilings, and many porous surfaces. Understanding how mold behaves helps answer the question how do you kill mold in a house. Mold spores are always present in the air; when moisture levels rise and organic materials are available, colonies can form within 24-48 hours. This guide explains practical steps you can take, focusing on moisture management, safe cleanup, and prevention. A homeowner or renter who acts quickly can limit damage to structure and health. From a health standpoint, mold exposure can affect sensitive individuals, and air quality matters. The Mold Removal Lab team emphasizes that successful remediation is not just about scrubbing away visible growth; it requires solving the moisture problem that created the growth in the first place. In this section, you’ll learn the core principles: moisture control, containment, proper cleaning, thorough drying, and ongoing monitoring. If you’re asking how do you kill mold in a house, the fastest path is a systematic, safety-first approach that reduces spores and minimizes regrowth.
Stop moisture: the first and most important step
The core driver of mold is moisture. Before any cleaning, locate and fix leaks, improve drainage, and reduce indoor humidity. Start by inspecting common trouble spots such as bathrooms, basements, under sinks, around windows, and near HVAC ducts. If you don’t stop the moisture, mold will return even after cleaning. Mold Removal Lab recommends documenting all moisture sources and creating a repair plan. The next steps rely on a clear understanding of where excess moisture originates and how long it has persisted.
Safe containment and PPE basics
Containment and personal protective equipment (PPE) are non-negotiable when dealing with mold. Use plastic sheeting to seal off the affected area and create a negative pressure if the infestation is substantial. Wear an N95 respirator or better, gloves, and goggles to prevent exposure to mold spores. Keep children, pets, and nearby occupants out of the area during cleanup. Proper containment minimizes the spread of spores to other parts of the home and reduces recontamination risk.
Cleaning strategies: choosing products and methods
Not all cleaning products are equally effective or appropriate for every surface. For non-porous surfaces, cleaners labeled for mold remediation or household disinfectants can be effective. Porous materials like drywall or insulation that have mold growth deep within may need removal and replacement rather than cleaning. It’s important to follow product directions, use adequate ventilation, and never mix cleaners with ammonia or bleach. The approach you choose should reflect the type of surface, depth of growth, and whether there is visible water damage. If you’re wondering how do you kill mold in a house on porous materials, consider professional advice for material removal and disposal. Mold Removal Lab emphasizes that a well-planned cleaning protocol reduces spore counts and supports safer re-occupation.
Surface mold vs hidden mold: when to worry
Surface mold is usually visible and can often be cleaned with appropriate methods. Hidden mold, including mold behind walls, under flooring, or inside HVAC systems, poses greater health risks and requires careful assessment. If you notice persistent musty odors, recurring moisture, or health symptoms in occupants, hidden growth may be present. A moisture meter and inspection can help pinpoint hidden colonies. How you respond to hidden mold determines whether remediation stays effective or simply buys time; addressing moisture and selecting the right remediation approach is essential. The question how do you kill mold in a house often hinges on recognizing the difference between superficial and concealed growth.
Drying and monitoring: preventing re-growth
Drying the area thoroughly is as important as cleaning. After cleaning, run dehumidifiers and fans to promote evaporation and help lower humidity levels. Keep monitoring humidity levels for several days, and re-check the cleaned area for signs of regrowth. If you observe new growth or dampness, revisit moisture sources and re-trace steps to ensure the environment remains unfavorable for mold. Preventive measures, such as fixing leaks promptly and maintaining proper ventilation, reduce the chance of recurrence. Mold Removal Lab’s guidance emphasizes a proactive, ongoing approach rather than a one-off cleanup.
Materials-specific guidance for common building materials
Different materials react differently to moisture and cleaning. Non-porous surfaces like glass or metal are easier to sanitize, while porous materials such as drywall, fabric, or carpet may require removal and replacement if growth is extensive. Wood can warp or stain if moisture is not controlled, and porous HVAC components can harbor mold if not cleaned. For each material, assess whether cleaning is sufficient or replacement is necessary. Always follow safety procedures and local regulations when disposing of mold-contaminated materials.
When to call a professional and what to expect
If mold covers large areas, recurs after cleaning, or involves HVAC systems, it’s wise to involve a professional remediation service. A pro can perform a thorough assessment, identify moisture sources, and apply industry-standard containment and remediation techniques. Expect a documented plan, proper disposal of contaminated materials, and guidance on preventing future growth. The Mold Removal Lab team notes that professional remediation may be required for structural damage or when health symptoms persist after DIY efforts.
How Mold Removal Lab approaches remediation
Mold Removal Lab advocates a methodical, safety-first approach centered on moisture control and material assessment. Our team conducts a scalable evaluation, uses containment to prevent spread, and applies surface cleaning or material replacement as appropriate. We emphasize documentation, moisture management, and post-remediation monitoring to ensure long-term health and safety in homes. This section illustrates the steps you can take today and when to escalate to professional remediation.
Tools & Materials
- PPE kit (N95 mask, goggles, gloves, coveralls)(Use a well-fitting respirator if mold levels are high)
- Plastic sheeting and tape(Create a containment zone to prevent spores from spreading)
- Scrub brushes (non-damaging to surfaces)(Use stiff-bristle brushes for stubborn growth on non-porous surfaces)
- Disposable bags or sturdy trash bags(Seal and dispose of contaminated materials safely)
- Detergent, approved mold cleaners, or EPA-registered disinfectants(Follow label directions; do not mix cleaners with ammonia)
- Moisture meter/hygrometer(Monitor relative humidity and surface moisture after cleanup)
- Dehumidifier or high-capacity fans(Assist in rapid drying and air exchange)
- HEPA vacuum (if available)(Use with caution; avoid resuspension of spores)
Steps
Estimated time: 4-6 hours
- 1
Identify moisture sources
Begin by locating leaks, condensation points, and water intrusion. Document findings and prioritize repairs that will stop ongoing moisture. This step sets the foundation for effective remediation and helps answer the question how do you kill mold in a house by removing the moisture driver.
Tip: Make a quick map of moisture hotspots to guide repairs and cleaning. - 2
Contain the area
Seal the workspace with plastic barriers to prevent spores from migrating. Create negative pressure if the infestation is significant. Containment reduces cross-contamination and simplifies cleanup.
Tip: Ensure all openings to other rooms are sealed; label the area for household awareness. - 3
Put on PPE and protect others
Wear a proper respirator (N95 or better), gloves, and eye protection. If the area is large, consider additional protective clothing. Protect occupants by keeping doors closed and limiting time in the space.
Tip: Change PPE between rooms to prevent cross-contamination. - 4
Clean visible mold growth
Use approved cleaners on non-porous surfaces. For porous materials that can be cleaned, use specific methods or remove the material. Always follow label directions and rinse or wipe as required.
Tip: Avoid rough scrubbing on delicate finishes to prevent damage. - 5
Remove and replace degraded materials
If growth has penetrated porous materials (drywall, insulation, carpet backing), removal and disposal are often necessary. Treat underlying framing or studs if they show moisture damage. Replacement reduces future mold risk.
Tip: Bag and seal debris to prevent spore release during removal. - 6
Dry thoroughly and monitor
Run dehumidifiers and fans to dry surfaces completely. Re-check humidity and surface moisture with a meter after 24–48 hours. Do not seal in damp conditions or rush the drying process.
Tip: Aim for surfaces to stay dry over several days before concluding remediation. - 7
Evaluate for hidden mold
Inspect behind walls, under floors, and inside HVAC components for hidden growth. If you suspect hidden mold, consult a professional. This step helps determine if more extensive remediation is required and prevents return.
Tip: Use moisture readings and odor cues to guide deeper inspection. - 8
Decide on ongoing prevention
Install or improve ventilation, fix leaks promptly, and manage humidity to deter mold regrowth. Use air purifiers if appropriate and maintain a dry living environment. This step supports lasting mold control.
Tip: Schedule seasonal checks of moisture-prone areas.
FAQ
Can you really kill mold in a house?
Mold cannot be permanently killed in the sense of eradicating all spores. Growth can be removed and regrowth prevented by stopping moisture, cleaning thoroughly, and monitoring humidity.
Mold can be removed and growth prevented, but spores can remain. Stopping moisture and cleaning carefully is essential.
Is bleach effective for mold cleanup?
Bleach can kill some surface mold on non-porous surfaces, but it is not effective for porous materials. Use products labeled for mold remediation and follow safety guidelines.
Bleach works on some surfaces, but not on porous materials. Follow product directions and use appropriate cleaners.
How long does it take to dry after cleaning mold?
Drying times vary with room size, materials, and ventilation. Use dehumidifiers and fans, and re-check moisture after 24–48 hours to ensure the area stays dry.
Drying can take a day or two depending on the space. Keep monitoring until it’s completely dry.
When should I call a professional?
Call a professional for large infestations, hidden mold, or growth involving HVAC systems, or if health symptoms persist after DIY cleanup.
Call a pro if the mold is widespread or you’re unsure about hidden growth.
Can mold return after cleaning?
Yes, mold can return if moisture sources are not fully addressed. Continuous prevention and monitoring are essential.
Mold can come back if you don’t control moisture afterward.
What is the difference between killing and removing mold?
Killing mold reduces active growth, but removing spores and contaminated materials is necessary for long-term safety.
Killing doesn’t remove all spores; you must remove contaminated materials too.
The Essentials
- Stop moisture to halt mold growth
- Contain and protect before cleaning
- Dry thoroughly to prevent re-growth
- Know when to DIY and when to hire a pro
- Maintain ongoing moisture control to protect health