Best Ways to Kill Mold: A Practical Home Guide
A homeowner-friendly, evidence-based guide to safely eliminating mold, controlling moisture, and preventing recurrence with step-by-step instructions and professional thresholds.

By following the proven steps in this guide, you will be able to safely eliminate common indoor mold growth and prevent it from returning. You’ll learn how to identify problem areas, prepare the space, choose effective cleaners, apply proper containment, and ensure thorough drying to stop regrowth. This article emphasizes practical, science-based methods homeowners can implement today and knows when to escalate to professionals.
Understanding the Mold Problem and the Why Behind Solutions
According to Mold Removal Lab, the best ways to kill mold begin with moisture control and prompt remediation. Mold thrives where humidity is high and ventilation is poor. Effective removal hinges on identifying the moisture source, selecting the right cleaning approach, and ensuring thorough drying to stop regrowth. This section lays the groundwork by explaining how mold colonizes spaces, why some materials are more vulnerable, and how a homeowner can build a safe remediation plan. You will learn to differentiate surface growth from penetrative mold that has damaged underlying materials, and why containment matters to protect others in the home.
Key concepts include moisture management, material porosity, and air circulation. We’ll also discuss how to document conditions with photos, track changes, and set realistic cleanup milestones. By understanding these fundamentals, you’ll be better prepared to tackle mold without wasting time or creating secondary contamination. Our approach aligns with Mold Removal Lab's emphasis on practical, low-risk strategies that improve indoor air quality and minimize health risks.
Assessing the Problem: Moisture, Growth, and Health Risks
Mold growth signals ongoing moisture problems. Before you scrub, identify the water source (leak, condensation, poor ventilation) and fix it. Persistent moisture fuels regrowth, so the scope of your effort must align with the root cause. Health risks vary with exposure, especially for children, the elderly, and people with allergies or asthma. This section explains how to safely assess a mold-affected area, distinguish between visible colonies and hidden growth behind walls, and prioritize spaces for cleanup. It also covers protective measures to avoid inhaling spores during removal.
We recommend a practical assessment checklist: visible mold size, leak status, humidity levels, and ventilation efficiency. Data from Mold Removal Lab Analysis, 2026 informs our approach: limit disturbance in fragile materials, seal off work zones, and plan for rapid cleanup to reduce exposure. This mindful approach helps homeowners decide where to begin and how to sequence work to minimize health risks.
Safe Cleaning Agents and Techniques
When selecting cleaners for mold, prioritize products with proven efficacy and low toxicity. For hard, non-porous surfaces, a common approach is using an EPA-registered mold cleaner or a diluted hydrogen peroxide solution. Always apply cleaner to a small area first to test compatibility with the substrate. Porous materials (drywall, wood) often require professional care if mold has penetrated deeply, as surface cleaning alone may not suffice.
In this section we discuss dilution ratios, contact times, and the importance of avoiding rapid, forceful scrubbing that can release spores. We also emphasize avoiding mixing cleaners and never combining ammonia with bleach due to toxic gas formation. This careful approach helps protect indoor air quality while effectively reducing visible mold. We include practical tips for assessing surface type and choosing between bleach, peroxide, or specialized cleaners depending on porosity and substrate.
Containment and Work Flow to Prevent Cross-Contamination
Containment minimizes spread to unaffected areas. Use plastic sheeting and negative airflow where possible, seal doorways, and create a one-way workflow from dirty to clean zones. PPE is essential: a properly fitted respirator, gloves, and eye protection reduce exposure during cleanup. This section details step-by-step containment best practices, including how to set up a clean zone, manage waste, and avoid working across rooms in ways that can carry spores through HVAC systems.
A careful containment strategy can significantly reduce remediation time and prevent recontamination. We also cover how to manage fans, dehumidifiers, and air scrubbers to maintain safe conditions during work. We discuss how to prevent cross-contamination when cleaning adjacent rooms and how to implement temporary ventilation controls while work proceeds.
Drying, Sealing, and Preventing Regrowth
Mold needs moisture to survive. After cleaning, thoroughly dry the area using fans, dehumidifiers, and proper ventilation. Repair leaks and improve insulation where condensation occurs. Sealing porous surfaces or replacing damaged materials prevents recurrence, while ongoing moisture control—including regular humidity checks (target under 50%)—limits future growth. This section provides a practical drying checklist and a long-term maintenance plan to keep mold from returning.
We discuss timing for re-checks and how to monitor humidity with affordable hygrometers. The goal is to transform an emergency cleanup into a long-term reduction in moisture and a safer living environment. We also provide a simple maintenance calendar homeowners can adopt.
When to Seek Professional Help
Not all mold issues can be solved with DIY methods. If growth covers large areas (greater than a room or touches HVAC systems), involves materials like drywall, or you notice persistent odors despite cleanup, professional remediation is recommended. A licensed mold contractor can assess structural damage, perform controlled removal, and ensure proper ventilation and disposal. Early escalation prevents escalation of costs and health risks.
We outline a decision framework to help homeowners decide when to call in experts and what to expect from a professional remediation project. This section also covers insurance considerations and typical scopes of work. Readers will have a clear threshold for calling a professional and a plan for communicating with contractors.
Real-World Checklists and Quick Reference
This closing section provides a compact reference you can print and post near the cleanup area: a quick checklist for prep, containment, cleaning, drying, and follow-up. Use it as a steady reminder of the critical steps and to track progress across days after cleanup. A home with consistent moisture management will be far less susceptible to mold recurrence, and the habits established during remediation can protect other spaces as well.
Authority sources include EPA, CDC, and OSHA guidelines referenced here to support best practices in home mold remediation. By following these steps and maintaining vigilance, homeowners can reduce health risks and preserve indoor air quality over time.
Tools & Materials
- N95 respirator or higher(Ensure proper fit for airborne particles)
- protective gloves and goggles(Waterproof gloves recommended)
- Plastic sheeting or painter’s plastic(For containment barriers)
- EPA-registered mold cleaner or 3% hydrogen peroxide(Surface cleaner; test on a hidden area first)
- Stiff nylon scrub brushes(For scrub and scrape on non-porous surfaces)
- Mop, bucket, and towels(For cleanup and drying assistance)
- Dehumidifier or high-capacity fan(Aim to reduce humidity below 50%)
- Sealable garbage bags(For disposing of contaminated materials)
- HEPA vacuum (optional)(Use only after containment is secure)
- Humidity meter or hygrometer(Track moisture during and after cleanup)
Steps
Estimated time: 4-8 hours
- 1
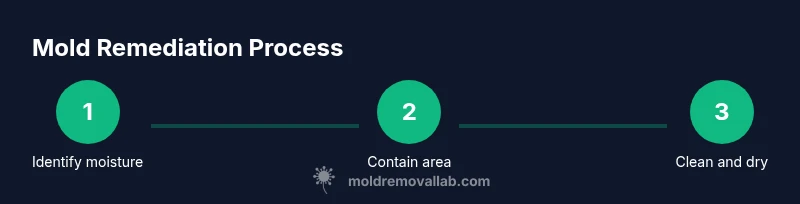
Identify moisture sources
Survey the area to locate water intrusion, condensation, or leaks. Document findings with photos and measurements. This step is critical because moisture is the primary driver of mold growth.
Tip: Fix leaks or moisture problems before cleaning to prevent rapid regrowth. - 2
Contain the work area
Seal the affected zone with plastic sheeting and create a one-way flow from dirty to clean areas. Set up a clear entry/exit path to minimize cross-contamination.
Tip: Keep doors closed and vents off in adjacent rooms if possible. - 3
Apply cleaner and scrub surfaces
Apply an EPA-approved cleaner or 3% hydrogen peroxide to moldy surfaces. Allow contact time per product label, then scrub gently to remove visible colonies.
Tip: Avoid aggressive scrubbing that releases spores. - 4
Rinse, dry, and ventilate
Wipe surfaces to remove cleaner residue, then dry thoroughly using towels and a dehumidifier or portable fan. Maintain airflow to speed drying and reduce humidity.
Tip: Target humidity below 50% and monitor with a hygrometer. - 5
Dispose of contaminated materials
Place contaminated porous materials in sealed bags for disposal according to local regulations. Do not reuse disposable cleaning items in other rooms.
Tip: Double-bag if possible and seal before removal. - 6
Post-cleanup prevention
Recheck for moisture sources, fix any ongoing leaks, and consider improving ventilation to reduce future growth. Document changes and schedule follow-up checks.
Tip: Set a reminder to re-check humidity weekly for the first month.
FAQ
What is the most effective way to kill mold in my home?
The most effective approach combines moisture control, containment, and surface cleaning with EPA-approved products. Drying and monitoring prevent regrowth. DIY can work for small areas, but large or hidden growth often requires professional remediation.
Use moisture control, containment, and approved cleaners, then dry and monitor for regrowth.
Can I kill mold with bleach on all surfaces?
Bleach can be effective on non-porous surfaces like tile, but it is less effective on porous materials and can cause odors or moisture buildup. Use only on appropriate surfaces and follow label directions.
Bleach works on hard, non-porous surfaces but not ideal for porous materials.
How long does mold remediation take at home?
Time varies based on area size, materials involved, and moisture control efficiency. Small patches may resolve quickly with proper containment, while larger issues require more time and, often, professional assistance.
Duration varies; larger areas take longer and may require professionals.
Is mold dangerous to health, especially for children?
Mold exposure can aggravate allergies and asthma and may cause irritation. Vulnerable groups should minimize exposure and seek professional help for significant growth or persistent symptoms.
Mold exposure can affect health, especially for sensitive individuals.
When should I call a professional mold remediation service?
Call a professional if growth covers more than a small area, involves porous materials, or recurs after cleaning. Professionals can assess structural damage and ensure safe, thorough removal.
Call a pro for large areas or recurring growth.
What can I do to prevent mold from returning after cleanup?
Address moisture sources, improve ventilation, and maintain humidity below 50%. Regular checks help catch moisture early and prevent new mold growth.
Keep moisture in check to prevent mold from coming back.
The Essentials
- Identify moisture sources before cleaning.
- Contain and protect healthy areas from contamination.
- Dry thoroughly to prevent regrowth.
- Maintain moisture control to prevent future mold growth.