How to Kill Black Mold: A Practical Remediation Guide
Learn proven, safe methods to kill black mold, stop moisture, and prevent recurrence with practical steps from Mold Removal Lab. Expert guidance for homeowners and renters.

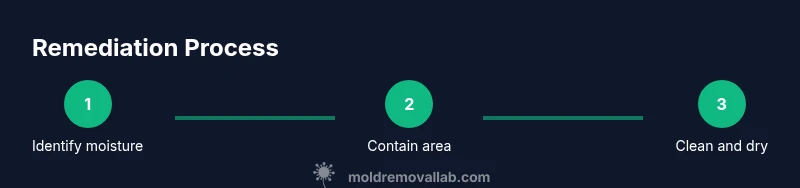
To kill black mold effectively, stop the moisture source, isolate the area, and follow a safe cleanup protocol using detergent, water, and containment. If growth is extensive, or porous materials are involved, seek professional remediation. This is the core approach recommended by Mold Removal Lab. Act quickly to prevent spread, document growth for your records, and ensure proper ventilation during cleanup.
What is black mold and why it's dangerous
Black mold, commonly labeled as Stachybotrys chartarum, thrives in consistently damp conditions and can appear as a dark greenish-black growth on walls, ceilings, or insulation. If you are asking "how do you kill black mold", the safest and most effective answer starts with stopping the moisture source and following a careful cleanup protocol. The Mold Removal Lab team emphasizes that health risks can include respiratory irritation, allergic reactions, and aggravated asthma, particularly for children, older adults, and people with weakened immune systems. Early identification reduces exposure time and limits the spread to adjacent rooms. Remember, the goal is not just to kill the visible growth but to remove the underlying moisture problem and contaminated materials to prevent recurrence.
How black mold spreads and why killing isn't enough
Mold spores spread through the air and can colonize new surfaces when dampness and organic materials are present. Simply wiping a visible spot may remove surface evidence, but it often leaves airborne spores and hidden colonies behind walls or in porous items. A successful remediation plan combines moisture control, containment, and thorough cleaning. The Mold Removal Lab guidance highlights that you must address both the source and the contaminated materials to reduce the chance of a future outbreak. Spores can travel beyond the visible area, so limiting airflow with physical containment is essential during cleanup.
Safety first: PPE and containment
Before touching mold, assemble a safety kit: an N95 respirator or better, eye protection, disposable gloves, and protective clothing. Use plastic sheeting to seal off the room and prevent spores from migrating to other spaces. Ventilate the area if possible, but be mindful of opening interior doors to avoid cross-contamination. Proper containment reduces exposure risk for you and others in the home. The Mold Removal Lab team notes that improper handling increases the likelihood of recontamination and health symptoms.
Surface cleaning vs porous materials
Non-porous surfaces like hard plastics, metal, or sealed countertops can be cleaned more aggressively, while porous materials such as drywall, gypsum board, ceiling tiles, or insulation often require removal and disposal because mold can embed in the fibers. For hard surfaces, a detergent solution with gentle scrubbing is usually sufficient. Porous materials typically need disposal or professional treatment, as cleaning may not remove all spore colonies. The distinction between surface cleaning and material removal is critical to prevent a quick rebound of mold growth.
Cleaning agents and methods that work (and don't)
Effective mold cleanup relies on detergents and mechanical action rather than harsh chemical bathes alone. For non-porous surfaces, a detergent and water solution combined with scrubbing is commonly recommended. Hydrogen peroxide or EPA-registered mold cleaners can be useful on some surfaces, but bleach is not a universal remedy and can damage materials or leave residues. Always follow manufacturer guidelines and ventilate well during application. The Mold Removal Lab approach favors moisture control and thorough drying after cleaning rather than relying solely on chemical sprays.
When to call a professional and what to expect
If mold covers more than a small area (for example, more than 10 square feet), or if moisture intrusion is ongoing, professional remediation is advised. A licensed mold remediation specialist will assess the extent of growth, identify moisture sources, and use controlled containment, specialized equipment, and post-remediation verification. For visible mold behind walls or within HVAC systems, professional intervention is the safest path. The Mold Removal Lab team recommends prompt action to minimize health risks and structural damage.
Prevention: moisture control and maintenance
Prevention centers on keeping humidity low, fixing leaks promptly, and maintaining adequate ventilation in high-moisture areas like bathrooms and kitchens. Regular inspections for dampness, condensation, and hidden leaks can prevent a future outbreak. Quick action when you notice signs of mold—discoloration, musty odor, or peeling paint—helps reduce the chance of large-scale growth. Documentation of repairs and remediation efforts also aids in long-term maintenance and insurance claims if needed.
The Mold Removal Lab approach to safe remediation
Mold Removal Lab advocates a moisture-first remediation strategy that prioritizes safety, containment, and verifiable dryness. Our team stresses that effective cleanup requires addressing both visible mold and the root causes of moisture. We provide homeowners with practical steps, clear safety guidelines, and a plan to prevent recurrence. By combining surface cleaning, appropriate material decisions, and monitoring, you can achieve a safer living environment with confidence.
Tools & Materials
- PPE kit (N95 mask, safety goggles, disposable gloves, coveralls)(N95 or higher; ensure proper fit and seal; include eye protection)
- Plastic sheeting and painter's tape(To seal off the room and prevent cross-contamination)
- HEPA vacuum (portable) or HEPA attachment for vacuum(Use during cleanup to capture fine spores)
- Detergent or EPA-registered mold cleaner(Choose product suitable for non-porous surfaces)
- Spray bottle for diluted cleaner(Label for safety; pre-mix as directed)
- Scrub brushes and disposable rags(Use separate tools for moldy areas to avoid cross-contamination)
- Trash bags (heavy-duty, sealable)(Double-bag porous materials or contaminated pads)
- Dehumidifier or fans(Use to dry the area after cleaning; aim for humidity below 50%)
- Moisture meter or humidity gauge(Helpful for confirming dryness after remediation)
Steps
Estimated time: 2-8 hours total
- 1
Identify moisture source and assess growth
Locate the water intrusion or moisture source driving mold growth. Inspect ceilings, walls, and plumbing for leaks. Document the area and take photos before cleanup to help track progress.
Tip: Address the moisture issue first; without dryness, mold can recur even after cleaning. - 2
Prepare the work zone and PPE
Put on the full PPE kit, lay down plastic sheeting to seal the room, and establish a containment boundary. Move personal items away from the work area to prevent contamination.
Tip: Check respirator fit and ensure ventilation won’t push spores into living spaces. - 3
Isolate the area and control airflow
Close doors, seal joints, and use plastic barriers to limit mold spore spread. If you have HVAC, turn off and seal intake vents to avoid circulating spores.
Tip: Use negative pressure if available to keep contaminated air from escaping. - 4
Clean hard surfaces with detergent
Wipe down non-porous surfaces with a detergent solution, then scrub to remove mold residues. Rinse with clean water and dry thoroughly.
Tip: Work from clean edges toward the center to prevent recontamination. - 5
Assess porous materials
Remove and dispose of porous items that cannot be cleaned (drywall, insulation, ceiling tiles). If removal is not feasible, consult a professional.
Tip: Do not scrub porous materials; spores can become airborne and cling to other surfaces. - 6
Dry the area completely
Use a dehumidifier and fans to reduce humidity and speed drying. Aim to bring relative humidity below 50%.
Tip: Running the equipment during work improves cleanup effectiveness and reduces relapse risk. - 7
Vacuum with HEPA and inspect
Vacuum the cleaned area with a HEPA-equipped vacuum to capture residual spores. Inspect for any remaining stains or odors and re-clean as needed.
Tip: Dispose of contaminated pads and cleaning materials safely after use. - 8
Document and monitor
Record the cleanup process, moisture levels, and dryness checks. Reassess after 24-72 hours to confirm no new growth appears.
Tip: Keep a remediation log for future reference and maintenance planning.
FAQ
Is black mold dangerous to health?
Yes. Prolonged exposure can irritate the respiratory system and trigger allergic reactions, especially for sensitive individuals. It’s important to control moisture and clean carefully.
Yes. Black mold can irritate the lungs and trigger allergies, so control moisture and clean carefully.
Can I kill black mold with bleach?
Bleach is not always effective on porous materials and may not remove embedded spores. Use detergent and appropriate cleaners for hard surfaces, and remove or seal porous materials when necessary.
Bleach isn’t always effective, especially on porous materials; use proper cleaners and remove affected porous items when needed.
When should I hire a professional?
If the growth is extensive, covers large areas, or if moisture intrusion continues, a licensed mold remediation specialist is recommended to ensure safe containment and thorough removal.
If the mold is large or moisture keeps coming back, hire a licensed professional for proper removal.
What should I do after cleaning?
Repair the moisture source, dry the area completely, and monitor humidity. Keep records of remediation and consider periodic inspections to prevent recurrence.
After cleaning, fix leaks, dry the space, and monitor humidity to prevent re-growth.
Will mold return after cleaning?
If moisture remains or porous materials were left in place, mold can return. Address moisture, proper disposal, and drying to lower the risk.
Yes, if moisture is not resolved, mold can come back.
Can black mold grow behind walls?
Yes. Mold can thrive behind walls if there is hidden moisture. Professional assessment may be needed to identify hidden colonies.
Mold can hide behind walls; a professional can check for hidden growth.
Is professional remediation always necessary?
Not always. Small, isolated spots on non-porous surfaces may be managed with careful cleaning and moisture control, but larger or persistent growth warrants professional remediation.
Small spots on non-porous surfaces can be managed, but big or persistent growth needs a pro.
How long does remediation take?
Time varies with area and complexity, from several hours for small projects to days for extensive damage. A professional assessment can provide a clearer timeline.
It depends on the extent, from a few hours to several days.
The Essentials
- Stop moisture first to kill mold at the source
- Contain and isolate during cleanup to prevent spread
- Differentiate cleaning needs for porous vs non-porous materials
- Dry thoroughly and monitor humidity to prevent recurrence
- Consult professionals for large or persistent mold growth