Best Way to Get Rid of Black Mold: A Practical Guide
A practical, safety-focused guide to safely remove black mold and prevent recurrence in homes. Step-by-step remediation, PPE guidance, moisture control, and when to call professionals with Mold Removal Lab.

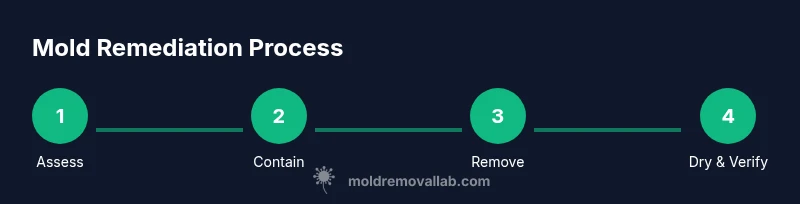
To remove black mold safely, start by locating moisture sources, donning proper PPE, and containing the area. Then remove and bag contaminated materials, clean non-porous surfaces with appropriate solutions, dry completely, and address underlying moisture to prevent recurrence. If mold covers a large area or penetrates porous materials, contact a professional. This guide from Mold Removal Lab outlines practical, safe steps.
Understanding Black Mold: What It Is and Why It Matters
Black mold, often misnamed as a single species, refers to several related mold types that thrive where moisture is present. Most homeowners encounter Stachybotrys chartarum in damp areas, but other species can look similar. The health risks associated with black mold range from mild irritation to respiratory symptoms in sensitive individuals. For homeowners seeking the best way to get rid of black mold, understanding its behavior is the first step. Mold can spread rapidly through hidden pockets behind walls, under floors, or inside insulation, making a quick wipe-down insufficient. The Mold Removal Lab team emphasizes that removal is not only about cleaning visible stains but also about eliminating the moisture source and preventing future growth. Early detection, thorough cleanup, and ongoing moisture control are the triad of effective remediation.
Common signs include musty odors, visible colonies, warped materials, and persistent indoor humidity. In damp basements, bathrooms, laundry rooms, or areas with leaks, mold can colonize on drywall, wood framing, and carpet pad. People with asthma, allergies, or immune suppression are more vulnerable to symptoms, making timely remediation crucial. While many products promise instant results, the best long term approach combines containment, cleaning, drying, and moisture control. The goal is not just to remove visible mold but to break its life cycle by eliminating moisture and repairing entry points. In practice, this means fixing leaks, improving ventilation, and using dehumidification when needed. A comprehensive plan reduces the chance of regrowth.
Safety First: Personal Protective Equipment and Ventilation
Handling black mold requires proper PPE and containment. Wear an N95 respirator or better, safety goggles, and nitrile gloves. Avoid touching mold with bare skin, and never operate power tools near active growth without containment, as spores can disperse. Seal off the work area with plastic sheeting to prevent cross-contamination, and use a dedicated entry/exit to minimize exposure to other rooms. Ventilation is essential but avoid blowing air from the contaminated area into clean spaces. Use a HEPA-filter vacuum and a portable air purifier in adjacent rooms to capture stray spores. When cleaning, avoid mixing ammonia with chlorine bleach, which can release toxic gases. If you have a preexisting health condition, consider professional oversight.
Before you start, identify the extent of contamination and decide whether you can safely handle it. For large areas or extensive damage, immediate professional remediation is advised. Personal protective equipment (PPE) should be well-fitted and disposed after use. Never reuse disposable PPE after mold contact; bag and seal. Keep children and pets out of the area during remediation.
Identify Moisture Sources and Scope of Contamination
Black mold survives wherever moisture lingers. To identify the root cause, inspect for roof leaks, plumbing drips, and condensation in kitchens and bathrooms. Look for staining, bubbling, or musty smells as early indicators. Use a moisture meter to verify hidden dampness behind walls or under flooring; incidents often require non-destructive probing before removal. Together with photos and a simple site map, this helps prioritize containment and repairs.
Based on Mold Removal Lab analysis, the most common drivers of black mold in homes are persistent moisture sources and poor ventilation. Even if mold appears only in a small corner, an unseen leak behind a wall can fuel growth for weeks. By tracing the source, you can decide between a targeted repair and a broader remediation plan. Remember that porous materials absorb moisture and host deeper contamination, so plan removal accordingly.
Before you begin cleanup, ensure you have a path for waste and a plan to keep other rooms dry during the process. If you uncover extensive growth in structural members, or if mold returns after initial remediation, pause and escalate to professional help.
Document areas with high moisture in the cellar or crawl space; these zones often harbor molds that creep into living spaces. In split-level homes, check shared walls and HVAC plenums. After you identify the source and area, you can design a containment plan that minimizes cross-contamination during cleanup.
Step-by-Step Remediation Plan
Remediation should be approached as a sequence of clear actions designed to minimize mold health risks while restoring the affected area. Follow these steps as a practical framework. Note that the exact scope will depend on the size of the growth, the materials involved, and the underlying moisture problem. Always prioritize safety and containment; do not rush through steps in a manner that allows spores to become airborne or spread to clean areas.
Step 1 — Assess and Prepare: Survey the contaminated zone, document what you see with photos, identify leaks or moisture, and assemble your PPE and containment supplies. Make a plan for waste disposal and an alternate route for access to the rest of the home. Tip: write a quick checklist to avoid missing crucial tasks.
Step 2 — Contain and Ventilate: Close off the area with plastic sheeting, seal doorways, and set up negative pressure if possible. Run a HEPA-filtered air purifier in adjacent spaces. Tip: avoid blowing air from the contaminated zone toward clean rooms.
Step 3 — Remove Contaminated Materials: Bag porous materials and discard according to local rules. Nonporous items can be scrubbed and saved if clean. Tip: double-bag waste and place it immediately in an outside bin.
Step 4 — Clean and Disinfect: Clean nonporous surfaces with approved cleaners and rinse thoroughly. Do not mix ammonia with bleach, and ventilate during cleaning. Dry the area as you work to minimize condensation. Tip: use a two-step wipe method for stubborn grime.
Step 5 — Dry and Monitor: Thorough drying is essential; use dehumidifiers and fans judiciously, and check for lingering moisture with a meter. Keep rooms well-ventilated during the process. Tip: aim to bring humidity to normal indoor levels and maintain them.
Step 6 — Repair and Prevent Recurrence: Replace damaged insulation or drywall if needed, seal cracks, and install mold-resistant materials where possible. Address the root cause with repairs, not just surface cleaning. Tip: schedule a follow-up check to verify moisture control remains stable.
Cleaning Methods and Materials: When to Use DIY Solutions
Cleaning methods must balance effectiveness with safety. For nonporous surfaces, soap and water followed by a disinfectant can remove spores and residues. Vinegar can reduce surface mold and is a safer DIY option for light growth, but it may not eradicate deeply embedded colonies. Hydrogen peroxide offers a peroxide-based approach for some materials; spray, wait briefly, then scrub. For porous materials such as drywall, insulation, or fabric, remediation with cleaning alone often is insufficient; these materials are typically removed and replaced to prevent regrowth. Bleach is controversial; while it can kill surface mold on nonporous surfaces, it is less effective on porous materials and can create ongoing health hazards in enclosed spaces. Always ventilate and wear PPE when performing DIY cleanup. If mold covers a large area or if you have health concerns, consult Mold Removal Lab or a professional remediator.
Prevention and Maintenance to Avoid Recurrent Mold
Prevention centers on moisture control, ventilation, and routine inspections. Keep indoor humidity low, fix leaks promptly, and ensure bathroom and kitchen ventilation is functional. Use exhaust fans, especially during showers and cooking, and direct air toward exterior vents. Regularly inspect basement walls, windows, and roofing for signs of moisture intrusion. Clean or replace any damp insulation or damp carpet padding. Consider moisture barriers and mold-resistant drywall in high-risk areas such as bathrooms or basements. Implement a maintenance schedule: check for water leaks after rains, monitor humidity with a simple meter, and address odors that suggest dampness. A proactive approach reduces the chance that a hidden issue evolves into a larger problem.
When to Call a Professional and What to Expect
Professional remediation is advised when mold growth is extensive, covers large areas, or involves porous structural materials such as drywall, insulation, or wood that has been soaked. If you notice persistent musty odors after cleaning, or if there is visible mold behind walls or inside HVAC components, a professional assessment is warranted. A licensed mold remediation contractor will perform containment, removal, cleaning, and moisture restoration using equipment not readily available to homeowners. They will typically conduct moisture measurements to verify success; however, air samples are not always necessary and should be considered on a case-by-case basis. Costs vary depending on scope, but homeowners should expect a plan with containment, waste management, and moisture restoration. The Mold Removal Lab team recommends seeking professional help when uncertain and prioritizing safety throughout the process.
Tools & Materials
- N95 respirator(fit-tested; replace after exposure)
- Goggles or protective eyewear(eye protection during removal and cleaning)
- Nitrile gloves(double-glove recommended when handling contaminated materials)
- Plastic sheeting (6 mil or thicker)(to create containment barriers)
- Duct tape and tape measure(for sealing plastic sheeting)
- HEPA vacuum(for cleanup and spore capture)
- Mild detergent and scrub brushes(for nonporous surfaces)
- White vinegar and hydrogen peroxide(DIY disinfection options (do not mix))
- Disposal bags (heavy-duty)(seal and bag contaminated materials)
- Moisture meter or hygrometer(to verify dryness and humidity)
- Dehumidifier or fans(to accelerate drying)
Steps
Estimated time: 4-12 hours
- 1
Assess and Prepare
Survey the contaminated zone, document what you see with photos, identify leaks or moisture, and assemble PPE and containment supplies. Create a waste-disposal plan and determine an alternate route for access to the rest of the home.
Tip: Write a quick checklist to avoid missing crucial tasks. - 2
Contain and Ventilate
Close off the area with plastic sheeting, seal doorways, and set up negative pressure if possible. Run a HEPA-filtered air purifier in adjacent spaces to capture airborne spores.
Tip: Avoid blowing air from the contaminated zone toward clean rooms. - 3
Remove Contaminated Materials
Bag porous materials and discard according to local rules. Nonporous items can be scrubbed and saved if clean.
Tip: Double-bag waste and place it immediately in an outside bin. - 4
Clean and Disinfect
Clean nonporous surfaces with approved cleaners and rinse thoroughly. Do not mix ammonia with bleach, and ventilate during cleaning. Dry the area as you work to minimize condensation.
Tip: Use a two-step wipe method for stubborn grime. - 5
Dry and Monitor
Thorough drying is essential; use dehumidifiers and fans as needed, and check for lingering moisture with a meter. Keep rooms well-ventilated during the process.
Tip: Aim to bring humidity to normal indoor levels and maintain them. - 6
Repair and Prevent Recurrence
Replace damaged insulation or drywall if needed, seal cracks, and install mold-resistant materials where possible. Address the root cause with repairs, not just surface cleaning.
Tip: Schedule a follow-up check to verify moisture control remains stable.
FAQ
Is black mold dangerous to health?
Yes, black mold can affect health, especially for sensitive individuals. Symptoms vary and may include irritation, coughing, or allergic reactions. If you have health concerns, seek medical advice and reduce exposure while planning remediation.
Yes, black mold can affect health, especially for sensitive people. Seek medical advice if you notice symptoms and limit exposure during cleanup.
Can I remove black mold myself?
Small, contained areas on nonporous surfaces may be cleaned with proper PPE and safe cleaners. Large areas, porous materials, or uncertain sources should be handled by a professional to reduce health risks and prevent recurrence.
You can clean small, contained areas with the right PPE, but large or porous mold requires a professional.
What cleaners are safe for mold removal?
Nonporous surfaces respond to soap, water, and approved disinfectants. Vinegar and hydrogen peroxide are common DIY options, but avoid mixing cleaners and follow label directions. Porous materials typically must be removed rather than cleaned.
Use soap and water with a disinfectant on nonporous surfaces; for porous materials, removal is often necessary.
How long does remediation typically take?
Timeline depends on the extent of growth and moisture problems. Small, contained spots may be cleaned in hours, while larger, ongoing moisture issues can take longer and require repairs and monitoring.
Remediation time varies; small cleanups take hours, bigger jobs can take days, especially with moisture repairs.
Should I ventilate during cleanup?
Yes, but direct ventilation should be controlled to prevent spreading spores to clean areas. Use exhaust fans toward the outdoors and keep doors closed to other rooms.
Ventilate toward the outdoors and keep clean areas protected during cleanup.
The Essentials
- Identify moisture sources before cleanup
- Contain mold to prevent spread
- Dry thoroughly to prevent regrowth
- Know when to call a professional