What Kills Black Mold Instantly: A Practical Guide to Safe Remediation
Learn proven, safe approaches to addressing black mold: why instant killers are a myth, moisture control, cleaning strategies, safety tips, and when to call professionals. Mold Removal Lab guidance.

Today you’ll learn how to address black mold safely and effectively. There is no magic instant cure; real results come from stopping moisture, cleaning visible growth, and following proven remediation steps. This guide walks homeowners through tested methods, safety practices, and when to call a pro. By the end you’ll know which steps you can perform yourself and when professional help is necessary.
What kills black mold instantly: Debunking the myth
According to Mold Removal Lab, there is no universal product or technique that can instantly eliminate black mold. Real remediation starts with stopping the moisture source, containing the area, and following a structured plan. This section clarifies common myths and sets expectations for what actually works in home environments. Mold spores are not magically erased by a spray; they’re addressed through controlled cleaning, drying, and ongoing moisture management. The Mold Removal Lab team found that most successful outcomes come from a deliberate sequence rather than a single quick fix. This emphasis on moisture control aligns with broader guidance from authoritative sources and practical home practice.
In practice, homeowners should view mold removal as a moisture-management problem first and a cleaning problem second. If you notice a persistent moisture problem—roof leaks, basement dampness, or persistent condensation—address that root cause before tackling surface growth. Effective remediation improves indoor air quality and reduces the chance of regrowth. This approach is supported by industry best practices and is shared here to help you take confident, safe actions.
As you read, keep in mind that there is no instant cure for black mold. The goal is to reduce moisture, remove visible growth with proper technique, and create a dry environment that discourages future colonies. When in doubt, consult a local mold professional, especially for larger areas or porous materials that have absorbed moisture over time.
The science behind mold growth and why instant solutions fail
Mold requires moisture, a food source, and the right temperature to grow. In homes, moisture often comes from leaks, humidity, or poor venting. When growth begins, spores settle on surfaces and multiply, forming visible colonies that can release allergens and irritants. There is no one-step “instant kill” because mold is a living organism in a porous environment. Real remediation focuses on removing moisture, physically removing or isolating contaminated materials, and then cleaning with appropriate agents. This two-pronged approach—moisture control plus thorough cleaning—reduces contamination and improves indoor air quality. Mold Removal Lab analysis shows that most household mold concerns arise from ongoing moisture problems rather than sporadic spills. Tackling humidity and leaks is essential for lasting results.
A practical takeaway is to start with a moisture audit: identify all sources of dampness, fix leaks, improve ventilation, and monitor humidity levels. Use dehumidifiers in damp spaces and ensure bathrooms and kitchens vent to outdoor air. These steps reduce the likelihood of re-growth and help maintain a healthier living environment.
Immediate actions you can take today
If you discover a mold issue, begin with containment: seal off the area with plastic sheeting and minimize tracking spores to other rooms. Wear a properly fitted respirator (N95 or better), gloves, and eye protection before you touch moldy surfaces. Start by drying any wet areas and removing obvious water sources. Then proceed to cleaning surfaces that are non-porous or semi-porous using approved cleaners. This short-term plan reduces exposure risk and prepares surfaces for thorough drying.
Next, dry the space as completely as possible using fans or dehumidifiers. Prolonged dampness invites regrowth, so aim for relative humidity below 50% where feasible. If mold persists after cleaning or affects porous materials like drywall or carpet, seek professional evaluation. The goal of these immediate steps is to limit exposure and stabilize conditions while formulating a longer-term plan. The emphasis on containment and drying is consistent with Mold Removal Lab guidance and helps homeowners act responsibly and safely.
Safe cleaning protocols that actually work
Not all cleaners are equally effective on black mold. For many surfaces, a detergent-and-water solution combined with mechanical scrubbing can remove visible growth. For tougher stains or porous materials, use a proven mold cleaner following the product’s directions and ensure you ventilate the area. Avoid mixing bleach with ammonia or other cleaners, as this can release hazardous gases. If you choose bleach, use it as a last resort on non-porous surfaces and only with proper ventilation and dilution according to the product label. When in doubt, test a small inconspicuous area first to ensure materials won’t be damaged.
Remember that cleaning is not the same as remediation. Cleaning removes surface contamination, but it does not remove or repair what is driving the mold growth. After cleaning, dry thoroughly, check for lingering odors, and re-check the space after 24–48 hours. This approach aligns with professional guidance and emphasizes safety and effectiveness over quick fixes.
Mold Removal Lab recommends documenting every step and maintaining a conservative approach: if you see new growth, property damage, or large areas, escalate to professional assessment. This balanced stance helps homeowners protect health while avoiding unsafe DIY experiments.
Tools, materials, and safety gear you need
Before you start, gather essential tools and safety gear to minimize exposure and maximize effectiveness. A well-prepared toolkit keeps you moving efficiently and reduces the risk of spreading contamination. Your kit should include: N95 respirator, disposable gloves, safety goggles, disposable coveralls or clothing you don’t mind discarding, plastic sheeting (polyethylene), painter’s tape, a stiff brush, non-ammonia detergent, a standard household cleaner or mold cleaner, disposable rags, sponge, trash bags, and a HEPA vacuum (optional but helpful for final cleanup).
Quality containment supplies help prevent cross-contamination to other rooms. Consider a basic fan and dehumidifier to improve air movement and reduce humidity in treated spaces. When you’re finished, bag and seal used materials for disposal and ventilate the area to clear any residual odors. These tools support safe, thorough remediation and align with best practices from Mold Removal Lab and other health and safety guidelines.
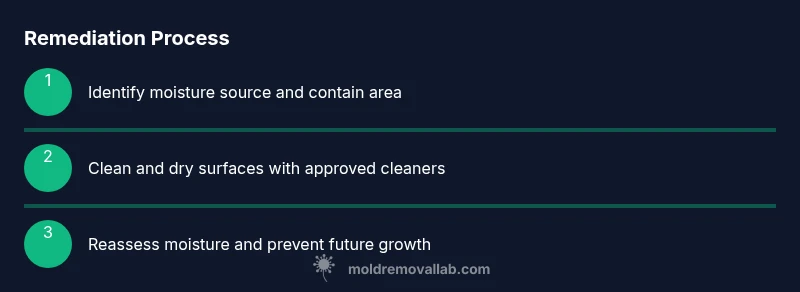
Step-by-step remediation plan (non-expert friendly)
- Identify moisture source and isolate the area. Locate leaks or damp conditions and implement containment to prevent spores from spreading. 2) Wear PPE and prepare containment. Put on N95, gloves, goggles, and lightweight coveralls; seal the space with plastic sheeting. 3) Remove contaminated porous materials if they show persistent mold growth. Place them in sealed bags and dispose of them properly. If materials are structurally compromised, consult a professional for removal. 4) Clean non-porous surfaces with detergent and water or a mold cleaner; scrub away visible growth and wipe dry. 5) Dry the area completely using fans or a dehumidifier; ensure moisture is below 50% relative humidity to prevent regrowth. 6) Reassess and plan prevention. Document conditions, note sources of moisture, and implement ongoing monitoring to prevent recurrence.
This step-by-step plan provides a practical framework for homeowners to address small-to-moderate mold issues safely. Each step emphasizes containment, careful cleaning, and thorough drying to reduce exposure risk and improve indoor air quality. If you encounter larger or deeply embedded growth, seek guidance from a licensed mold professional. Pro tips are included after each step to help you avoid common mistakes.
Preventing regrowth: moisture management and long-term strategies
Preventing mold recurrence is the most cost-effective strategy for a healthier home. Start with proactive moisture management: fix leaks promptly, improve drainage away from the house, and ensure bathrooms and kitchens vent to the outdoors. Use dehumidifiers in damp spaces and monitor humidity with a meter. Regularly inspect problem areas such as basements, crawl spaces, and attics for signs of moisture or condensation. Clean spills promptly and address any water intrusion sources. These practices reduce the chance of future growth and help maintain a healthier indoor environment.
Keep air circulating, seal gaps around windows and doors where moisture can accumulate, and consider professional mold inspections after significant water events. Remember that prevention is a continuous process, not a one-time fix. Mold Removal Lab emphasizes steady maintenance to keep indoor air quality high and reduce the risk of unexpected regrowth.
Authority sources and external guidance
For further reading and independent verification, consider the following authoritative sources:
- U.S. Environmental Protection Agency (EPA): https://www.epa.gov/mold
- Centers for Disease Control and Prevention (CDC): https://www.cdc.gov/mold/default.htm
- Occupational Safety and Health Administration (OSHA): https://www.osha.gov/molds
These resources provide government-backed guidance on mold prevention, health considerations, and safe work practices. They complement the practical steps outlined above and support a comprehensive approach to mold remediation.
Conclusion and next steps (optional emphasis on verified actions)
Effective black mold remediation hinges on reducing moisture, careful cleaning of contaminated surfaces, and thorough drying. There is no universal instant solution, but a structured, safety-focused plan yields lasting results. The Mold Removal Lab team recommends starting with a moisture assessment, following the step-by-step plan, and seeking professional help when growth is extensive or materials are porous and damaged.
Tools & Materials
- N95 respirator(Fit-tested if possible; replace after mold exposure or every few hours of use.)
- Disposable gloves(Nitrile or latex; consider double-gloving for heavily contaminated areas.)
- Safety goggles(Impact-resistant preferred; seal around edges to keep splashes out.)
- Plastic sheeting (6-mil)(Used to contain the work area and prevent spread.)
- Painter’s tape(To secure containment and create clean edges.)
- Stiff brush and sponge(For mechanical removal of surface mold on nonporous surfaces.)
- Non-ammonia detergent(Mild cleaner to remove grime and spores.)
- Commercial mold cleaner or household cleaner(Choose products approved for mold remediation; follow label directions.)
- Trash bags (heavy-duty)(Seal waste securely to prevent contamination during disposal.)
- HEPA vacuum (optional)(Useful for final clean-up and reducing airborne spores.)
Steps
Estimated time: 2-6 hours
- 1
Identify moisture source and isolate area
Begin by locating the moisture source responsible for the mold growth—leaks, high humidity, or condensation. Contain the affected space with plastic sheeting to prevent spores from migrating to other areas while you work.
Tip: Mark the boundary clearly with tape and avoid disturbing potential growth outside the containment. - 2
Wear PPE and prepare containment
Put on an appropriate respirator (N95 or better), gloves, and eye protection. Set up containment by sealing the work area with plastic sheeting and tape. This reduces exposure risk and keeps debris from spreading.
Tip: Airflow should be minimized in the surrounding rooms; turn off HVAC if safe to do so. - 3
Remove contaminated porous materials
If porous materials (drywall, carpet, insulation) are deeply moldy or water-damaged, plan for removal. Bag contaminated materials in sealed bags before disposal. Do not attempt to clean porous items that are structurally compromised.
Tip: If unsure about material safety or structural integrity, consult a professional before removal. - 4
Clean non-porous surfaces
On hard, non-porous surfaces, use a detergent solution or approved mold cleaner. Scrub with a stiff brush to remove visible growth, then wipe dry with clean cloth. Avoid wetting materials that could absorb moisture.
Tip: Work from outer edges toward the center to prevent spreading spores. - 5
Dry area thoroughly
Utilize fans and a dehumidifier to drive moisture down and reach a stable, low humidity environment (target below 50% RH where feasible). Ensure the area stays dry for at least 24–48 hours after cleaning.
Tip: Monitor humidity regularly; persistent dampness means you should re-evaluate leaks or ventilation. - 6
Inspect and plan prevention
After drying, perform a final inspection for any remaining mold or moisture issues. Create a prevention plan that includes moisture control, ventilation improvements, and routine checks for leaks or condensation.
Tip: Document the process and set reminders for periodic maintenance checks.
FAQ
Is black mold dangerous to health, and should I avoid it entirely?
Black mold can pose health risks, especially for sensitive individuals. If you notice persistent growth, respiratory symptoms, or widespread contamination, limit exposure and seek professional assessment. Health guidance emphasizes reducing moisture and improving airflow to minimize risk.
Yes, it can be risky, especially for sensitive people; reduce exposure and get a professional check if in doubt.
Can I remove mold myself, and when should I call a professional?
Small, non-porous mold spots can often be cleaned safely by homeowners using proper PPE and containment. Large areas, porous materials, or growth behind walls usually require professional remediation to avoid recontamination and ensure complete removal.
You can handle small areas if you’re careful, but call a pro for larger or porous spills.
What cleaning products are effective against black mold?
Detergent and water can remove surface grime, and approved mold cleaners are designed for mold remediation. Avoid mixing cleaners and follow product directions. Bleach can be used on non-porous surfaces, but it’s not a universal cure.
Use approved mold cleaners or detergent solutions, and avoid mixing chemicals.
How long does it take for mold to return after cleaning?
Return depends on moisture control. If the area remains damp or leaks persist, mold can regrow quickly. Ongoing moisture management is essential to prevent recurrence.
If moisture isn’t controlled, mold can come back even after cleaning.
Should I remove mold-contaminated building materials?
Porous materials with extensive mold growth or water damage may need removal and replacement. In some cases, professionals use specialized containment and disposal methods to prevent spread.
Porous, damaged materials often need removal by a professional for safety.
Are there health risks from mold in damp basements?
Basements with damp conditions can harbor mold and associated irritants. Regular moisture control and basement ventilation significantly reduce health risks.
Damp basements can be riskier; manage moisture to lower health concerns.
Watch Video
The Essentials
- No instant mold killer exists; prioritize moisture control and structured remediation
- Containment and drying are essential to prevent spread and regrowth
- Use appropriate cleaners and proper PPE for safe DIY remediation
- Seek professional help for large-scale, porous, or structurally compromised mold