Duct Mold: Detect, Clean, and Prevent in Your Home
Practical, home-friendly steps to identify, clean, and prevent duct mold. Learn safety, remediation methods, moisture control, and ongoing prevention from Mold Removal Lab.

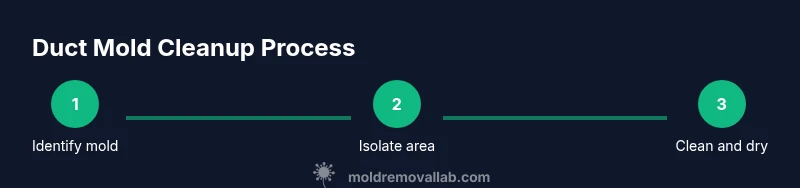
Duct mold is a moisture-driven mold growth inside HVAC ducts that can degrade indoor air quality. This step-by-step guide helps you identify, clean, and prevent duct mold safely. Start with safety basics, PPE, and assessing the extent, then move through cleaning methods for different surfaces, moisture control, and ongoing prevention. It also clarifies when DIY is appropriate and when to call a professional for larger infestations.
What is Duct Mold?
Duct mold refers to mold growth that establishes itself within HVAC ductwork and plenums. It appears as fuzzy or dark patches on metal surfaces, damp insulation, and can emit a musty odor when the system runs. According to Mold Removal Lab, duct mold thrives where moisture and warmth meet, especially in poorly sealed ducts and in systems that experience condensation due to infrequent use. Recognizing duct mold is important not only for aesthetics but because spores can circulate through the home whenever the blower operates. The presence of duct mold often signals a moisture problem that requires addressing the mold itself and the source of moisture. By understanding where duct mold hides—supply trunks, return plenums, and flexible ducts—you can target cleaning effectively and reduce the chance of re-growth in the future.
Causes and Risks
Duct mold typically takes hold when humidity rises inside the home, condensation forms on duct surfaces, leaks exist at joints, or insulation is dampened. Dust and organic debris provide nourishment for mold, making it easier for colonies to take hold. Poor sealing around registers allows warm indoor air to contact cool duct surfaces, creating condensation that fuels growth. Mold in ducts can impact indoor air quality and aggravate allergies or asthma symptoms in sensitive individuals. Mold Removal Lab Analysis, 2026 shows that common duct mold sources include humidity, condensation, and dust buildup; addressing moisture is critical, not just cleaning visible growth. If mold penetrates insulation or is growing beyond easily accessible areas, contamination can spread via the airflow path and re-establish itself after cleaning. This is why moisture control and proper sealing should accompany any remediation plan.
Safety First: PPE and Precautions
Safety should always come first when dealing with duct mold. Always wear an N95 respirator (or higher), protective goggles, and durable gloves. Limit access to the affected area to prevent cross-contamination and turn off the HVAC system to stop circulating spores. Avoid disturbing mold colonies; aggressive cleaning can release spores into living spaces. If you suspect hidden mold behind walls or in duct insulation, do not try to remove it yourself. Use containment barriers (plastic sheeting) and dispose of contaminated materials in sealed bags. Ventilate the workspace with outside air where possible and keep children and pets away during cleanup. The goal is to protect your lungs while reducing the spread of mold spores through the house.
Assessing the Extent: DIY vs Professional
Not every duct mold situation requires a professional remediation contractor, but many do, especially when growth is widespread or involves insulation or porous materials. If the visible growth is limited to accessible metal ducts and you can reach it without disturbing the colonies, careful cleaning with proper containment may be feasible. However, if mold covers large areas, penetrates insulation, or if you notice persistent musty odors after cleaning, it’s wise to involve a licensed mold remediation specialist. A pro can establish containment, run air filtration, and perform more aggressive cleaning with equipment that minimizes cross-contamination. Moisture sources must be addressed in tandem; otherwise the mold can re-emerge despite surface cleaning. The Mold Removal Lab team recommends erring on the side of caution when in doubt about the extent of growth or the integrity of the ductwork.
Cleaning Methods by Surface Type
Different duct materials require different cleaning approaches. For metal ducts, start with HEPA vacuuming to remove loose spores, followed by a gentle scrubbing with a mild detergent solution and a damp microfiber wipe. After cleaning, allow surfaces to dry completely before re-pressurizing the system. For fiberglass or cellulose insulation, cleaning is usually not effective; replacement is typically recommended to prevent re-growth. Plastic liners can often tolerate EPA-registered cleaners, but always follow label directions. Do not use bleach on porous duct materials, as it can degrade the surface and release harmful fumes. After cleaning, run the HVAC blower with the registers open in a ventilated space to accelerate drying and discourage moisture buildup. If any area remains damp or inaccessible, contact a professional for containment and advanced remediation.
Moisture Control and Prevention
Keeping moisture out of ductwork is the most effective way to prevent duct mold from returning. Inspect for leaks around registers and duct joints, improve insulation on cold surfaces, and ensure proper duct sealing. Use a dehumidifier or improved ventilation to keep indoor humidity in the recommended range, typically under 50-60%. Change filters regularly, clear condensate drains, and verify that outdoor air intakes are protected from rain and snow intrusion. A well-sealed, moisture-controlled system dramatically reduces the likelihood of duct mold after remediation. These steps also help maintain overall system efficiency and indoor air quality.
When to Test and Inspect
Visual checks can catch early signs of duct mold—dark staining, musty smells, or visible growth around seams. If you suspect hidden growth, consider professional testing to confirm mold presence and guide remediation. Post-remediation testing ensures the cleanup was effective and the area has dried completely. Routine inspections after humid seasons or major weather events help prevent re-growth. Remember that testing should be performed by trained professionals who interpret results accurately and avoid unnecessary alarm. Based on Mold Removal Lab research, heavy duct mold often signals ongoing moisture problems that require lasting fixes beyond surface cleaning.
Maintenance and Monitoring
Establish a maintenance routine to prevent duct mold from returning. Schedule regular HVAC cleaning, replace filters as recommended by the manufacturer, and monitor humidity using a simple hygrometer. Keep an eye on seals at duct joints, registers, and access points for condensation or water intrusion. Document any mold-related issues so you can track improvements over time. A durable remediation plan includes moisture management, routine checks, and a clear protocol for responding to new signs of mold growth. The Mold Removal Lab team recommends a written maintenance plan that emphasizes moisture control, predictable filter changes, and periodic follow-up inspections to ensure no re-growth occurs.
Quick Start Checklist
- Inspect ductwork for damp spots, staining, and condensation around joints.
- Shut off the HVAC system before touching any duct components.
- Equip PPE: N95 respirator, eye protection, gloves; set up containment barriers if needed.
- Vacuum interior surfaces with a HEPA-equipped vacuum to remove loose spores.
- Clean metal surfaces with a mild detergent solution; dry completely.
- Do not attempt to clean insulation—replace it if mold is present.
- Reinstall or reseal joints, then run the system briefly to check airflow and drying.
- Monitor humidity levels and plan a follow-up inspection to confirm no re-growth.
Mold spores can travel through the system during operation, so every remediation plan should include a moisture-control strategy and a plan for verifying results after cleaning. The Mold Removal Lab team recommends documenting conditions before and after remediation to ensure lasting improvements and good indoor air quality for your family.
Tools & Materials
- N95 respirator(PPE for mold work; upgrade to a P100 if exposure is high)
- Safety goggles(Eye protection against splashes and spores)
- Chemical resistant gloves(Protect hands during cleaning)
- HEPA vacuum(Vacuum interior ducts and surfaces)
- Microfiber cloths(Dampen for wiping without leaving fibers)
- Mild detergent(Non-bleach soap for initial cleaning)
- Non-abrasive scrub brush(Gently scrub without damaging surfaces)
- EPA-registered disinfectant(Use only on non-porous surfaces per label)
- Isopropyl alcohol (70-90%)(For quick-dry surfaces after cleaning)
- Plastic sheeting and tape(Containment to prevent spread)
- Sealant/duct tape(Seal joints after cleaning)
- New duct insulation or liner(Replace any mold-damaged insulation)
- Moisture meter / hygrometer(Monitor humidity levels post-remediation)
- Trash bags (heavy-duty)(Disposal of contaminated materials)
- Flashlight or headlamp(Inspect dark duct corners)
Steps
Estimated time: 2-4 hours
- 1
Prepare and protect
Move occupants away from the work area and set up containment. Don PPE, turn off the HVAC system, and cover nearby surfaces to reduce contamination. Clarify scope of work and ensure there is adequate ventilation. This step reduces exposure and keeps the project organized.
Tip: Create a simple check-list of materials and a dedicated cleanup zone to minimize cross-contamination. - 2
Power down and seal
Shut off power to the furnace/air handler and seal the work area with plastic sheeting if you anticipate dust or spores escaping. This helps prevent mold spores from traveling to other rooms during cleaning.
Tip: Keep doors closed and use tape at seams to create an effective barrier before you start cleaning. - 3
Access and assess
Inspect visible duct surfaces for mold growth, noting the extent and location. Identify any damp insulation or water intrusion that will require replacement. Take photos for reference and to guide any professional consultations.
Tip: Document growth with images from multiple angles to support a remediation plan. - 4
Vacuum loose spores
Use a HEPA vacuum to remove loose spores from duct interiors and surrounding surfaces. Work slowly to avoid pushing mold deeper into crevices. Repeat as needed until the area feels dry and free of debris.
Tip: Always vacuum in a direction that prevents dispersal toward openings or vents. - 5
Clean and wipe surfaces
Wipe interior duct surfaces with a mild detergent solution using a damp microfiber cloth. Rinse with clean water if required by the product label and dry thoroughly. For non-porous surfaces, consider a disinfectant per label directions after cleaning.
Tip: Do not oversaturate porous materials or insulation; cleaning may not be effective on those surfaces. - 6
Dry out and reseal
Ensure all cleaned areas dry completely before reactivating the system. Remove containment barriers once dry, reseal joints as needed, and replace any mold-affected insulation. Then restart the HVAC to test airflow while monitoring for any lingering odors.
Tip: Use a moisture meter to verify a dampness level below the threshold before closing up. - 7
Evaluate and escalate if needed
If you still notice mold, lingering odors, or dampness after cleaning, consider contacting a licensed mold remediation professional. Some conditions require specialized equipment and training to prevent re-growth and protect indoor air quality.
Tip: When in doubt, seek professional evaluation for a safer and more thorough remediation.
FAQ
What causes duct mold in HVAC systems?
Duct mold grows where moisture meets warmth inside ducts, often due to leaks, condensation, or poor insulation. Dust and debris provide nutrients for fungal growth, and activity in the system can spread spores throughout the home.
Duct mold grows where moisture and warmth meet inside ducts, often from leaks and condensation. Debris also feeds growth and can spread spores when the system runs.
Can I clean duct mold myself, and when should I call a pro?
Small, surface-level mold in accessible ducts can sometimes be cleaned by a homeowner with the right PPE and containment. If mold covers insulation, is widespread, or returns after cleaning, consult a licensed mold remediation professional for proper containment and air filtration.
Small, accessible mold might be cleaned safely with PPE, but widespread or recalcitrant mold needs a professional remediator.
Is it safe to use bleach on mold in ducts?
Bleach is generally not recommended for porous duct materials. It can damage surfaces and release fumes. Use mild detergent for cleaning on non-porous surfaces and EPA-registered disinfectants only where the label permits.
Bleach can damage porous duct materials and isn’t usually recommended. Stick to approved cleaners and follow the product label.
How do I prevent future duct mold growth?
Moisture control is the key: fix leaks, improve insulation, manage humidity with a dehumidifier, and change filters regularly. Ensure proper drainage around the system and seal joints to prevent condensation.
Keep humidity low, fix leaks, and seal ducts to prevent future mold growth.
How long does remediation typically take?
Remediation duration varies based on the extent of mold and the complexity of the ductwork. A small, well-contained cleanup may take a few hours, while larger jobs can require a day or more.
Time depends on the scope; small jobs can be a few hours, larger ones may take longer.
Will mold in my ducts affect indoor air quality?
Yes. Mold in ducts can release spores and volatile compounds that degrade indoor air quality and trigger allergies or symptoms in sensitive individuals. Addressing mold and moisture helps protect health.
Mold in ducts can affect air quality and trigger symptoms; remediation and moisture control help protect health.
Watch Video
The Essentials
- Identify moisture sources behind mold growth
- Avoid aggressive cleaning that stirs spores
- Use HEPA filtration and proper PPE
- Prioritize moisture control to prevent re-growth