Cleaning Up Black Mold: A Practical Home Guide for Safety
Safe, practical steps to clean up black mold, protect your family, and prevent recurrence with PPE, moisture control, and professional thresholds.

According to Mold Removal Lab, this guide helps homeowners safely Clean up black mold in living spaces. You will identify moisture sources, isolate the affected area, don proper PPE, remove contaminated materials, clean surfaces with appropriate cleaners, dry the space thoroughly, and implement prevention strategies to minimize recurrence.
What is black mold and why it matters
Black mold (Stachybotrys chartarum) is a common name for a mold species that proliferates in consistently damp environments. It often appears dark green to black and can develop on materials with high cellulose content, such as drywall, wallpaper, and ceiling tiles. The health risks vary by person, but exposure can irritate airways, trigger allergies, and aggravate asthma in sensitive individuals. The Mold Removal Lab team emphasizes that the presence of visible growth signals an underlying moisture problem, not just a surface issue. Addressing moisture is essential to prevent regrowth, which is why remediation plans typically focus on both cleanup and moisture control. For homeowners, recognizing the link between humidity, water intrusion, and mold growth is the first step toward a safer living space.
This section also highlights that mold is a symptom of a larger problem—water intrusion. Without fixing leaks, roof or plumbing issues, cleaning alone will offer only a temporary fix. As you read, remember that the goal is not just to remove visible colonies but to create conditions where mold cannot reestablish itself. The Mold Removal Lab analysis shows that moisture management combined with proper cleaning yields the most durable results.
Safety first: PPE and indoor air safety
Before you touch any moldy surfaces, set safety as your priority. Personal protective equipment (PPE) forms the first line of defense against inhalation or skin contact with mold spores. The standard kit includes gloves, goggles, a respirator rated for mold (such as an N95 or higher), and a disposable coverall to minimize skin exposure. Work in well-ventilated spaces but avoid spreading spores to other areas by sealing the work zone with plastic sheeting and tape. If you have a preexisting respiratory condition or if mold covers a large area, consider delaying cleanup and consulting a professional. The health risks vary by individual, so err on the side of caution and monitor for symptoms after exposure.
In this section, you’ll learn how to prepare your space safely, reduce exposure, and understand the role of air exchanges in minimizing contamination.
Assessing moisture and containment
Effective cleanup begins with moisture assessment. Look for active leaks, condensation on cold surfaces, or high indoor humidity. Use a hygrometer to check relative humidity; aim to bring indoor RH below 60% in the affected area and ideally under 50% to prevent regrowth. Containment is critical to prevent cross-contamination: seal doors and vents with heavy-duty plastic, create a negative pressure if possible, and turn off HVAC supply to the contaminated zone. Remove or isolate porous materials that are saturated or visibly moldy (such as drywall or carpeting) if they cannot be cleaned. This step reduces the amount of fungal material that can become airborne during cleanup and helps protect other indoor spaces from contamination.
Containment also supports a safer cleanup process by limiting exposure to you and family members. The goal is to create a controlled work zone where workers can perform remediation with minimal risk to others.
Surface preparation and cleaning approach
Preparation reduces the risk of disturbing mold and spreading spores. Vacuum the area with a HEPA-filtered vacuum to pick up loose spores from hard surfaces before wet cleaning. Wipe surfaces with a detergent or soap and water to physically remove mold residues, then apply a EPA-registered mold cleaner or a suitable alternative for non-porous surfaces. Porous materials that are deeply infested must be removed and disposed of properly. Do not attempt to “spot-clean” extensively damaged drywall or wallpaper; instead, follow local guidelines or professional advice for disposal.
For painted or sealed non-porous surfaces (like tile or glass), use a cleaner that you can rinse and dry thoroughly. After cleaning, allow the area to dry completely before evaluating for hidden mold or recessed moisture sources. This step helps ensure that any residual moisture does not linger and that clean surfaces remain uncontaminated.
Throughout the process, avoid mixing cleaners and never combine bleach with ammonia or hydrogen peroxide. Ventilate the area or wear a respirator if odors are strong or you anticipate substantial aerosolization.
Cleaning methods by surface type
- Non-porous surfaces (glass, metal, sealed concrete): Use detergent, then a disinfectant or EPA-approved cleaner. Rinse and dry with a clean towel.
- Porous materials (drywall, insulation, carpeting): If wet and moldy, these typically require removal and disposal to prevent regrowth. You may salvage minor, dry parts if professional assessment confirms they are mold-free after cleaning and drying.
- Wood surfaces: Light cleaning with soap and water followed by a wood-safe disinfectant can be effective; however, porous wood may require sealing or replacement if severely damaged.
- Fabrics and upholstery: Remove and launder or discard if mold has penetrated the fibers. Consider professional cleaning for delicate fabrics.
Remember: the choice of method should reflect the surface type and the extent of contamination. When in doubt, prioritize safety and consult a remediation professional.
Drying, ventilation, and moisture management
Drying is a critical phase. Use dehumidifiers and fans to reduce humidity and promote air movement, but avoid creating strong drafts that could disperse spores to other rooms. Inspect the area within 24–48 hours to confirm that humidity remains low. Continuous humidity control—like fixing leaks, improving insulation, and using exhaust fans in bathrooms and kitchens—helps prevent recurrence. If you discover recurring moisture, address the underlying cause (such as a roof leak or poor ventilation) before reintroducing moisture or finishing repairs. Keeping hygrometer readings in check can help you maintain a dry, mold-resistant environment.
In this section we emphasize that thorough drying cannot be rushed. Rushing may trap moisture and allow mold to regrow after cleanup.
When to call professionals and regulatory considerations
Not all black mold infestations are suitable for DIY cleanup. If you see mold covering more than about a square foot, or if you have known water damage, neurotoxic symptoms, or underlying health issues, consult a licensed professional. Professionals have specialized equipment, containment strategies, and proven remediation protocols that minimize health risks. In some jurisdictions, there are building codes and environmental health regulations governing mold remediation; failing to comply can lead to legal consequences or unsafe conditions. If you suspect structural damage or contamination across multiple rooms, a professional assessment is strongly recommended. The Mold Removal Lab Team advises caution and suggests a conservative threshold for seeking expert assistance.
Preventing recurrence and long-term maintenance
Prevention hinges on moisture control and ongoing monitoring. Repair leaks promptly, improve ventilation in bathrooms and kitchens, and keep indoor humidity low using dehumidifiers. Regularly inspect areas prone to dampness—basements, crawl spaces, and closets—for signs of moisture or mildew. Use mold-resistant products when renovating and maintain clean, dry surfaces. Remember that mold often reappears if moisture issues are not addressed; therefore, periodic checks are essential. A small investment in prevention reduces the risk of large infestations and the need for extensive remediation later on.
Authoritative sources and practical notes
For additional guidance, consult reputable sources such as the Centers for Disease Control and Prevention (CDC) mold basics, the Environmental Protection Agency (EPA) mold remediation guidelines, and the National Institute for Occupational Safety and Health (NIOSH) recommendations on indoor air quality. These resources provide up-to-date, evidence-based practices to supplement home remediation efforts: CDC Mold Basics, EPA Mold Remediation in Your Home, NIOSH Mold Safety.
By aligning your cleanup with these authoritative sources, you can ensure a safer and more effective remediation process.
Tools & Materials
- Nitrile gloves (at least 6 mil)(Disposable, powder-free preferred)
- Respirator (N95 or higher)(Fit-tested if possible)
- Goggles or protective eyewear(Side shields recommended)
- Disposable coveralls(Full-body protection; choose zip-front if possible)
- HEPA-filter vacuum(Post-cleanup use only; do not use for food or household debris)
- Detergent or soap(Mild soap for initial cleaning)
- EPA-registered mold cleaner or hydrogen peroxide (3%)(Follow label directions)
- Non-ammonia cleaners(Avoid mixing with bleach)
- Disposal bags (heavy-duty)(Plastic bags for contaminated materials)
- Plastic sheeting and tape(Create containment barrier)
- Dehumidifier(Set to keep RH below 50-60%)
- Fans(Place to promote airflow without blowing spores into other rooms)
- Moisture meter / hygrometer(Helpful for monitoring humidity)
Steps
Estimated time: Estimated total time: 1-3 hours for small areas; longer for larger infestations depending on moisture, materials, and containment needs.
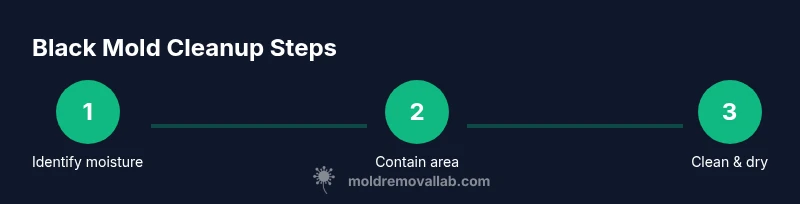
- 1
Identify moisture source
Locate leaks or condensation sources and understand how moisture enters the space. Fixing the root cause is essential to prevent recurrence.
Tip: Document with photos before cleanup so you can track improvements. - 2
Contain the area
Close off the affected zone with plastic sheeting to prevent spores from drifting to other rooms. Turn off HVAC in the contaminated zone if safe to do so.
Tip: Seal door gaps and vents with tape to create an effective barrier. - 3
Put on PPE
Wear gloves, goggles, and a properly fitted respirator. Ensure clothing covers skin to minimize exposure.
Tip: Double-check respirator fit and replace filters if they become damp. - 4
Remove contaminated porous materials
If drywall, carpet, or insulation is moldy and damp, remove and seal it for disposal. Avoid disturbing mold deeply in place if uncertain.
Tip: Place removed materials directly into sealed bags to prevent spore release. - 5
Clean remaining surfaces
Wash non-porous surfaces with detergent, then apply an EPA-approved cleaner. Rinse if required and dry thoroughly.
Tip: Never mix cleaners; use a clean cloth for each surface to avoid cross-contamination. - 6
Dry and ventilate
Use dehumidifiers and fans to dry the space completely. Check humidity levels and ensure all surfaces are dry before proceeding.
Tip: Aim for RH below 50-60% and keep the area ventilated during the next 24-48 hours. - 7
Re-inspect and seal gaps
Inspect for hidden mold and reseal or replace materials as needed. Address any additional moisture sources found during re-inspection.
Tip: If mold reform appears, pause and reassess moisture management before continuing. - 8
Restore and monitor
Once dry, perform any rebuilding tasks with mold-resistant materials and monitor the area for signs of moisture for several weeks.
Tip: Document any changes and re-check humidity after rain events or season changes.
FAQ
Is black mold dangerous to my health?
Black mold can cause health issues for some people, especially those with allergies or asthma. Minimize exposure and seek medical advice if you notice symptoms after exposure.
Black mold can affect health for some individuals; minimize exposure and consult a professional if symptoms appear.
Can I clean black mold myself?
Small, contained areas (less than about a square foot) may be cleaned by a careful homeowner with proper PPE and ventilation. Larger infestations should be handled by professionals.
Yes for small areas with the right PPE, otherwise call a professional.
What cleaners are best for black mold?
Use EPA-registered mold cleaners or a simple soap and water solution to remove residues. For non-porous surfaces, rinse and dry; for porous materials, removal is often required.
EPA-registered cleaners or soap and water work well; rinse and dry thoroughly.
Will bleach kill black mold?
Bleach can kill surface mold on non-porous surfaces, but it is not a cure-all. It may not reach mold embedded in porous materials and can produce harmful fumes if misused.
Bleach can kill surface mold on non-porous surfaces, but is not always effective on porous materials.
How long does cleanup take?
Time varies with area size and moisture issues. Small jobs may take a few hours; larger infestations or structural repairs can take days.
It depends on size, moisture, and materials; expect hours to days for bigger jobs.
Should I test for mold after cleanup?
Testing is not usually necessary for small, well-contained cleanups. If you suspect hidden mold or ongoing moisture, a professional assessment can confirm the area is safe.
Testing isn't always needed for small areas; consider a pro if you suspect hidden mold.
Watch Video
The Essentials
- Identify and fix moisture sources to stop mold growth.
- Wear proper PPE before handling mold.
- Use EPA-approved cleaners and avoid mixing chemicals.
- Dry the area completely within 24-48 hours.
- Seek professional help for large infestations or ongoing moisture.