Can Mold Problems Be Fixed? A Practical Home Guide
A practical, step-by-step guide for homeowners and renters on fixing mold problems. Learn moisture control, removal, drying, and prevention to keep your home safe.

Yes, most mold problems can be fixed with a clear plan that stops moisture and removes growth safely. This guide shows a practical approach: identify moisture sources, remove active mold, repair leaks if present, dry the area thoroughly, and monitor for recurrence. You'll find step-by-step actions, required tools, and safety considerations.
Understanding the question: can mold problems be fixed?
According to Mold Removal Lab, fixing mold problems is achievable when moisture is controlled, active growth is removed, and the area is thoroughly dried. This principle underpins practical remediation: you won't permanently fix mold if the moisture source isn't addressed. The goal is to remove existing colonies safely, seal off moisture entry points, and establish ongoing monitoring to catch returns early. The definition of “fixed” here is twofold: elimination of visible mold and prevention of recurrence through moisture management, surface restoration, and regular checks. Homeowners and renters can pursue this with a clear plan, appropriate PPE, and a measured safety approach. The process may range from simple cleaning and sealing to professional interventions for larger jobs. can mold problems be fixed is a common question, and the answer is generally yes when you follow a structured strategy.
Common mold culprits and moisture sources
Mold needs moisture to thrive, so fixing the problem starts with identifying where water is entering your home. Look for roof leaks, plumbing drips, condensation on cold surfaces, high humidity in bathrooms, and poor ventilation in crawl spaces. Materials like drywall, wood, and fabric support mold growth and should be prioritized for inspection. Mold often hides behind wallpaper, under floorboards, or inside HVAC ducts; these areas require careful examination and, if found, targeted remediation. By addressing the moisture source and removing the affected materials where necessary, you set the stage for safe cleanup and long-term prevention. The Mold Removal Lab team emphasizes that moisture control is the most reliable predictor of success.
DIY scope: when you can fix it yourself vs when to call a pro
Small, non-porous surface mold (like tile grout) is often manageable with protective gear, proper cleaning agents, and careful drying. Porous materials such as drywall or insulation that have mold growth deeper than a few millimeters usually require removal and replacement. If you notice mold across multiple rooms, persistent dampness, or growth near electrical wiring or structural elements, seek professional remediation. A licensed contractor can assess moisture intrusion, contain the area, and ensure safety while removing contaminated materials. Remember that improper cleaning can spread spores and worsen the problem, so know your limits and act accordingly.
A step-by-step remediation workflow
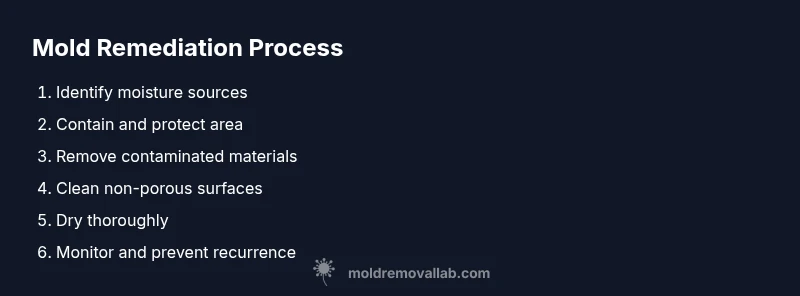
A systematic workflow helps ensure you don’t miss critical steps. Start with securing the area to prevent cross-contamination, then isolate the problem by turning off HVAC or using plastic barriers. Identify moisture sources and fix leaks, improve ventilation, and lower humidity. Remove and dispose of porous materials with visible mold, clean non-porous surfaces with approved cleaners, and sanitize the area to reduce residual spores. Finally, dry thoroughly with fans/dehumidifiers and re-check humidity levels to confirm stabilization. Throughout, document progress with photos and monitor for any signs of return. Properly staged remediation reduces health risks and protects occupants, especially for homes with children or respiratory sensitivities.
Surface-specific guidance: wood, drywall, fabric, and tile
Different materials require tailored strategies. Wood that’s cracked or damp should be dried, treated, and sealed; if structural rot is visible, replacement is often necessary. Drywall with mold typically needs removal and replacement, followed by sealing to prevent future intrusion. Fabrics and upholstery can sometimes be cleaned and treated if mold only affects surfaces and is not embedded; however, deeply contaminated fabrics are better discarded. Tiles and shower grout are usually cleaned with mold-killing cleaners and kept dry with ongoing ventilation. For all surfaces, use a non-abrasive approach and avoid scrubbing mold spores into the air. Consistency in drying and humidity control remains critical regardless of material.
Drying, dehumidification, and monitoring
Drying is a critical step that prevents regrowth. After cleaning, use dehumidifiers and high-airflow fans to reduce relative humidity to under 60% where possible. Keep air moving to evaporate residual moisture from walls and floors. If your home experiences recurring dampness after rain or seasonal changes, consider inspecting the exterior envelope for leaks and adding insulation to cold surfaces. A hygrometer can help you track humidity levels and trigger additional drying if they rise. Regular checks every few weeks for a few months can catch subtle signs of reappearance early and stop mold before it spreads.
Safe cleaning products, safety considerations, and disposal
Choose products that are appropriate for the surface and mold type. For non-porous surfaces, a diluted detergent solution or a specialty mold cleaner may suffice; for porous materials, removal is often safer. Avoid mixing ammonia and bleach, which can create dangerous gases. Wear appropriate PPE: gloves, goggles, and an N95 respirator at minimum. Seal the work area to prevent spores from circulating through your home, and bag contaminated materials securely for disposal. After cleanup, wash tools and clothing separately to prevent cross-contamination. If you have chemical sensitivities, review product labels and consider gentler formulations.
Maintenance plan to prevent future mold growth
Prevention centers on moisture control. Use exhaust fans in kitchens and bathrooms, fix leaks promptly, and keep indoor humidity low with dehumidifiers or air conditioning. Improve drainage away from your foundation and repair any cracks that allow water intrusion. Regularly inspect areas prone to dampness—basements, crawl spaces, and under sinks—and address issues quickly. If you want ongoing assurance, install monitoring sensors and schedule seasonal inspections. Establishing a routine now reduces the effort and cost of future mold remediation.
Authoritative sources
- EPA mold information: https://www.epa.gov/mold
- CDC mold health information: https://www.cdc.gov/mold/default.html
- OSHA mold safety page: https://www.osha.gov/molds
Tools & Materials
- HEPA vacuum cleaner(HEPA filter; essential for containment)
- Spray bottle with approved cleaner(Mold-killing cleaner or detergent solution)
- N95 respirator(Fit-tested if possible)
- Protective gloves and goggles(Chemical-resistant gloves)
- Plastic sheeting or tarps(To seal off the area)
- Scraper or hand tool(For non-porous surfaces)
- Dehumidifier or fans(Reduce humidity and dry area)
- Trash bags and sealable containers(For contaminated materials)
- Moisture meter or hygrometer(Optional but helpful)
- Mild detergent or pH-neutral cleaner(Safe surface cleaning)
Steps
Estimated time: 2-6 hours
- 1
Identify moisture sources
Inspect for leaks, condensation, and ventilation problems. Document with photos to guide repairs.
Tip: Take before/after photos for records. - 2
Contain and protect the area
Close off the space to prevent spores from spreading; use plastic barriers and seal HVAC registers.
Tip: Turn off HVAC to minimize spread. - 3
Remove mold-impacted porous materials
Carefully take out drywall or insulation if mold has penetrated; bag and seal for disposal.
Tip: Do not reuse contaminated materials. - 4
Clean non-porous surfaces
Wipe with detergent solution or designated mold cleaner; avoid abrasive scrubbing that disperses spores.
Tip: Rinse and dry promptly to prevent residue. - 5
Dry the area thoroughly
Run dehumidifiers and fans; monitor humidity and ensure surfaces are dry before reoccupation.
Tip: Aim for RH under 60% where feasible. - 6
Rebuild and monitor
Replace removed materials and re-seal. Recheck humidity and signage for any new moisture problems.
Tip: Set reminders to inspect monthly for the first quarter.
FAQ
Can all mold problems be fixed?
Most non-extensive mold issues can be fixed when moisture is controlled and growth is removed. Severe cases may require professional remediation. Always assess safety needs first.
Most home mold problems can be fixed with moisture control and proper cleanup, but severe cases may need professionals.
What if mold keeps returning after cleaning?
Recurring mold usually signals ongoing moisture intrusion. Re-check leaks, ventilation, and humidity; consider professional assessment if the problem persists.
If mold keeps coming back, look for hidden moisture sources and consider a pro.
Is bleach safe for mold cleanup?
Bleach can kill surface mold on non-porous surfaces but is not effective on porous materials. Use appropriate cleaners and follow safety guidelines.
Bleach works on hard, non-porous surfaces but isn’t ideal for porous materials.
How long does it take to dry a mold-affected area?
Drying times vary by humidity and space, but most areas should reach low moisture levels within 24-72 hours with proper airflow and dehumidification.
Drying usually takes a day or two with proper airflow and dehumidification.
Do I need professional help for drywall mold?
If drywall is moldy beyond a light cleaning or covers a large area, professional remediation is advised to ensure safe removal and prevent spread.
For extensive drywall mold, a pro is recommended.
Is DIY mold remediation safe for kids or allergies?
DIY remediation can be feasible with proper PPE and ventilation, but consider health risks and seek a professional if anyone has asthma, allergies, or a compromised immune system.
DIY is possible for healthy individuals, but be cautious if kids or allergies are involved.
Watch Video
The Essentials
- Identify moisture sources and fix leaks promptly
- Differentiate between cleaning and material removal needs
- Dry thoroughly to prevent recurrence
- Monitor humidity and inspect regularly