Black Mold Removal Near Me: Safe, Practical Guide
Learn practical, safe steps for black mold removal near you. This Mold Removal Lab guide covers risks, PPE, DIY vs pro decisions, and prevention to keep your home healthy.

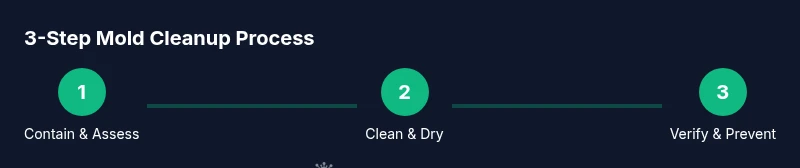
Take control of black mold removal near you by safely assessing moisture sources, isolating the affected area, and using EPA-registered cleaners. Start with small, contained jobs in dry, ventilated spaces and wear proper PPE. For widespread or porous material contamination, contact a licensed professional promptly. This approach minimizes exposure and prevents cross-contamination in your home.
What black mold is and why it matters
Black mold removal near me usually involves addressing a moisture problem that allows mold to thrive on a variety of building materials. The most common trigger is water intrusion from leaks, high humidity, or condensation. Exposure can irritate the eyes, skin, and airways, and in some people may trigger allergic reactions or asthma-like symptoms. According to Mold Removal Lab, taking early, deliberate steps to control moisture and reduce exposure dramatically lowers health risks and protects the home long-term. This guide uses practical, action-oriented language and real-world steps you can take today to assess, contain, and begin safe remediation. Remember, not every mold problem is identical, but a cautious, informed approach always pays off when dealing with black mold found in living spaces. If you’re searching for black mold removal near me, you’re likely looking for a practical, safe plan that you can implement with your own tools while minimizing exposure.
Key takeaways at a glance: reduce moisture, isolate the area, use non-porous surface cleaners where appropriate, and seek professional help for large or porous contamination.
Assessing scope: DIY vs professional help
Not every mold scenario requires a licensed contractor, but the decision depends on several factors: the size of the affected area, whether porous materials are involved, and any preexisting health conditions in the occupants. Mold Removal Lab analysis shows that many cases are underestimated because hidden growth occurs behind walls, under flooring, or inside HVAC components. If the contaminated area is more than a few square feet, or if the mold has penetrated porous materials like drywall, insulation, or ceiling tiles, professional remediation becomes more appropriate. For smaller, self-contained spots on non-porous surfaces, a careful DIY cleanup following proper PPE and containment protocols can be effective. Always verify moisture sources and address them to prevent a relapse.
If you’re looking for black mold removal near me, ensure the plan prioritizes containment and safety, not just surface cleaning. A thorough assessment will save time and reduce the risk of recontamination.
PPE and protective practices you should follow
Proper PPE is essential for any mold cleanup. Start with a well-fitting respirator (N95 or P100), protective goggles, and chemical-resistant gloves. A disposable coverall helps keep you from transferring mold to clean areas, while plastic sheeting and tape create a containment barrier. Work slowly and avoid disturbing mold matierial more than necessary, which can release spores into the air. If symptoms like coughing, wheezing, or eye irritation occur, stop and reassess the safety of the environment. Ventilate by bringing in fresh air from outside while keeping the contaminated area contained. This section emphasizes the human-health-first approach necessary for safer, effective work.
Mold Removal Lab analysis notes that proper PPE not only protects the cleaner but also reduces the likelihood of cross-contamination to other rooms.
Tools, products, and containment strategies
Choosing the right tools makes cleanup safer and more effective. Essential items include a HEPA vacuum, a high-quality respirator, disposable coveralls, nitrile gloves, protective eyewear, and chemical cleaners approved for mold. Use plastic sheeting to build a containment zone at doorways or vents, and seal the space with tape to prevent spores from drifting. For non-porous surfaces, a labeled mold cleaner or detergent can be effective; on porous materials, removal may require disposal. After cleaning, consider an EPA-registered disinfectant to reduce residual spores. Avoid mixing cleaners and never use bleach on porous surfaces, as it may not reach embedded spores. These steps help ensure thorough cleaning while protecting residents.
The routine maintenance of baseline moisture control is essential for long-term success and is a central theme in Mold Removal Lab guidance.
Step-by-step approach for small, contained areas
For small, contained mold spots in a single room, a structured, step-by-step approach minimizes risk and improves outcomes. Start by turning off HVAC in the affected area and setting up containment with plastic sheeting. Remove and bag any porous materials that show extensive mold growth, if safe to do so. Clean non-porous surfaces with approved cleaners, dry thoroughly, and re-check for any signs of lingering growth. Drying times will vary; use dehumidifiers to maintain low humidity and promote rapid drying. Finally, re-inspect the area for any regrowth and address underlying moisture sources to prevent recurrence.
Tip: Document the cleanup with photos before and after so future remediation, if needed, has a solid record.
When to hire a professional and what to expect
Certain scenarios clearly demand professional remediation: large affected areas, hidden growth behind walls, structural materials like drywall or insulation, or when health symptoms persist after cleaning. A licensed remediator uses specialized containment, equipment, and proven processes to restore safe conditions. Expect a thorough site assessment, containment setup, controlled removal or cleaning of affected materials, centralized air filtration, and a verification check after the space dries. Communication and documentation are crucial for insurance purposes or future property management considerations.
If you’re unsure about the scope or safety, contact a professional quickly. Mold Removal Lab recommends erring on the side of safety when black mold is involved.
Recovery, prevention, and long-term moisture control
After cleanup, the focus shifts to recovery and prevention. Restore humidity to comfortable levels, fix leaks promptly, and improve ventilation to curb moisture buildup. Regular inspections of problem areas, such as basements, bathrooms, and laundry rooms, help catch issues early. Consider upgrading insulation, using exhaust fans, and running dehumidifiers in damp seasons. Ongoing monitoring with a moisture meter and routine cleaning with non-toxic cleaners can support a mold-free environment. With a proactive maintenance plan, you reduce the chance of future infestations and keep your living spaces healthier for everyone. The Mold Removal Lab team emphasizes that prevention is the most economical and effective defense against reoccurrence.
Tools & Materials
- N95 respirator or P100 respirator(Fit-tested if possible; ensure seals are intact)
- Safety goggles or face shield(Eye protection to prevent exposure from spores)
- Chemical-resistant gloves(Nitrile preferred; avoid latex that may tear)
- Disposable coveralls(Long sleeves; ensure a snug fit at wrists)
- Plastic sheeting (6 mil) for containment(Seal edges with duct tape to create a barrier)
- Duct tape for containment(High-adhesion, non-residue tape)
- HEPA vacuum(Use with attachment to avoid dust blow-back)
- HEPA air purifier(Place in or near the work area to improve air quality)
- EPA-registered mold cleaner or detergent(Follow label directions; avoid mixing chemicals)
- Non-porous surface disinfectant(Use after cleaning porous materials depending on surface type)
- Heavy-duty trash bags(Seal bags before removal to prevent spores escaping)
- Moisture meter or hygrometer(Optional but helpful for tracking humidity)
Steps
Estimated time: 2-8 hours total
- 1
Identify moisture sources
Locate leaks, condensation points, or sources of humidity. Fixing these issues is essential before any cleanup. Without eliminating moisture, mold is likely to return.
Tip: Document problem areas with photos for future reference. - 2
Set up containment
Close the area off with plastic sheeting and seal all seams. Restrict access to prevent cross-contamination to other rooms.
Tip: Use a dedicated entrance for contaminated work if possible. - 3
Wear PPE and prepare surfaces
Don PPE before touching mold. Cover nearby furniture and floors with plastic to catch any debris.
Tip: Don't wander from the containment zone with contaminated gear. - 4
Clean or remove affected materials
Clean non-porous surfaces with approved cleaners. Porous materials showing extensive growth should be removed and bagged if safe.
Tip: Avoid spreading spores by working from clean to dirty sections. - 5
Dry and recheck the space
Run dehumidifiers and fans to dry the space completely. Reinspect for any remaining growth or moisture pockets.
Tip: Keep the space dry for at least 24–48 hours after cleanup. - 6
Disinfect and seal the area
Apply a disinfectant to reduce residual spores on non-porous surfaces. Re-seal the area to prevent recontamination if applicable.
Tip: Do not mix cleaning products; follow label instructions. - 7
Document and plan prevention
Take final photos, record humidity levels, and establish a simple maintenance plan to prevent future growth.
Tip: Address root causes to avoid recurrence.
FAQ
What counts as black mold and why is it dangerous?
Black mold can cause health issues, especially for sensitive individuals. It should be addressed promptly, with attention to moisture control and safe cleanup practices. If symptoms persist, consult a medical professional.
Black mold can raise health concerns, especially for sensitive people. Address moisture and cleanup safely, and seek medical advice if symptoms linger.
Can I remove black mold myself?
Small, contained mold on non-porous surfaces may be manageable with proper PPE and containment. Large areas, porous materials, or hidden growth typically require professional remediation.
Small, contained mold on non-porous surfaces might be doable with the right gear, but larger or hidden growth should be handled by pros.
What PPE should I wear for DIY cleanup?
Wear an N95 or P100 respirator, protective eyewear, disposable coveralls, and gloves. Use plastic sheeting for containment and a HEPA vacuum to minimize airborne spores.
Put on a proper respirator, eye protection, and disposable coveralls, plus gloves. Create containment and use a HEPA vacuum.
Is bleach effective for black mold?
Bleach can be effective on non-porous surfaces but does not reach mold roots embedded in porous materials. It should be used with caution and never mixed with other cleaners.
Bleach works on non-porous surfaces but may not reach mold within porous materials. Use safely and follow label directions.
How long does remediation take?
Remediation time varies with area size, moisture source, and materials involved. A small, contained cleanup might take a few hours, while larger projects extend over days as drying and monitoring occur.
Time depends on the space and materials; small jobs are usually a few hours, bigger jobs take longer as drying occurs.
Watch Video
The Essentials
- Identify and fix moisture to stop mold growth.
- Contain the area to prevent cross-contamination.
- Use PPE and EPA-approved products for safety.
- Dry thoroughly and monitor for re-growth.
- Know when to call a professional for large or porous areas.