Black Mold Cleanup: Safe, Practical Remediation
Learn safe, practical steps for black mold cleanup, including PPE, containment, cleaning methods, moisture control, and when to hire a professional for comprehensive remediation.

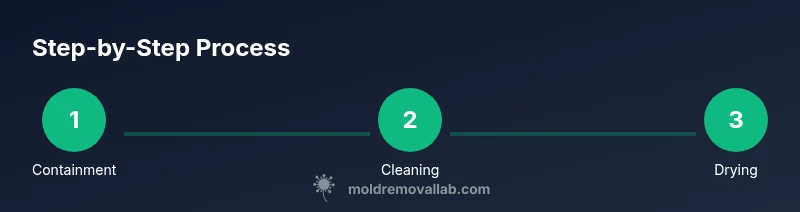
This guide helps you perform black mold clean up safely and effectively. You’ll learn essential safety gear, containment basics, cleaning methods, and moisture control steps. For small, non-porous areas, DIY cleanup is possible with proper PPE and precautions; for large patches, hidden spores, or porous materials, professional remediation is recommended.
What Is Black Mold? Risks & Health Impacts
Black mold refers to several species of mold that appear dark green to black and typically thrive in damp, poorly ventilated spaces. The phrase black mold clean up describes the remediation process used to remove growth and prevent reoccurrence. It can produce mycotoxins and irritants that affect air quality and trigger allergies, asthma symptoms, and respiratory irritation in sensitive people. The Mold Removal Lab team emphasizes that risk depends on exposure duration, concentration, and material affected. In homes, common hotspots include basements, bathrooms, and areas with chronic moisture. Clean up strategies should prioritize moisture control, containment, and thorough cleaning of nonporous surfaces. Always assume contamination when you see growth and avoid disturbing the colonies unnecessarily, which can release spores into surrounding rooms. Early action minimizes spread and reduces health risks for occupants. If anyone in the home has a weakened immune system or chronic lung disease, treat any suspected contamination as high priority and seek professional guidance promptly.
Safety Precautions You Must Take
Before touching any mold growth, prepare the space and put on proper PPE. Use a tight-fitting respirator or NIOSH-approved N95/P100 mask, safety goggles, and chemical-resistant gloves. Wear disposable coveralls to prevent carrying mold through the home. Close off the area with plastic sheeting, seal doors and vents, and post warning signs to limit access. Work slowly and avoid dry scraping, which can aerosolize spores. If you feel dizzy, short of breath, or unusual headaches while working, stop immediately and seek medical or professional help. Remember that containment is essential to prevent cross-contamination to clean areas.
Scoping the Contamination: Visible vs Hidden Colonies
Visible mold is only part of the story. Hidden growth behind walls, under floors, or in HVAC systems can drive ongoing exposure. Start with a careful visual survey, noting any musty odors, persistent moisture, or staining. Use a moisture meter or humidity readings to identify damp zones, and inspect for leaks, condensation, or poor ventilation. Even small patches can be a sign of a larger problem, especially in sealed or porous materials. Document locations with photos and notes to guide cleanup and any future remediation efforts.
Cleaning Methods: DIY vs Professional Options
DIY mold cleanup can be appropriate for small, non-porous areas with limited visible growth and good ventilation, but large areas, porous materials, or contaminated HVAC systems require professional remediation. For DIY cleanup, use detergent and water on nonporous surfaces, followed by thorough drying to prevent regrowth. Porous materials like drywall, insulation, or carpet often require removal and disposal to prevent lingering spores. Professionals use containment barriers, controlled negative air pressure, HEPA equipment, and proven protocols to address both visible and hidden mold and to stabilize humidity and moisture sources.
Step-by-Step Cleanup Plan for Small Areas
In small areas, you can proceed with a methodical approach that minimizes disturbance to surrounding spaces. Remove any loose items from the area, seal off the door, and establish a clean-to-dirty workflow. Clean surfaces with a detergent solution and scrub gently to lift mold growth. Dry thoroughly with fans or dehumidifiers, then vacuum with a HEPA-equipped vacuum to capture residual spores. Bag and dispose of contaminated materials in sealed bags, and perform a final wipe-down before removing containment.
Step-by-Step Cleanup Plan for Larger/Advanced Contamination
For larger or porous-contaminated areas, professional help is strongly advised. The process involves establishing a robust containment zone, isolating the space from the rest of the home, and performing controlled mold removal with negative air pressure. Contaminated porous components should be removed and disposed of, while non-porous surfaces get cleaned with EPA-approved cleaners and dried rapidly to prevent regrowth. A post-remediation test or clearance assessment may be recommended to verify that mold levels have returned to normal.
Dehumidification and Moisture Control to Prevent Recurrence
Mold thrives where moisture remains. After cleanup, run dehumidifiers and ensure good ventilation to maintain indoor humidity below 50-60% as a practical target. Repair leaks, fix condensation points, and improve bathroom and kitchen exhaust. Regularly monitor humidity levels and perform quick checks after rain or heavy use of humid spaces. Keeping moisture under control is the most effective long-term prevention measure.
Documentation and Verification: Ensuring a Safe Finish
Document the cleanup process with before-and-after photos, notes on what materials were removed, and moisture readings. If you used professionals, keep a copy of the remediation report and any air-testing results. Conduct a final inspection for musty odors, visible staining, and dampness. If any signs of regrowth appear, address them promptly and consider a professional follow-up assessment.
Common Pitfalls and Myths Debunked
Myth: Bleach is a universal mold killer. Truth: Bleach can be effective on nonporous surfaces but may not reach porous materials or embedded spores. Myth: All mold is dangerous in every situation. Truth: Exposure severity varies; protective measures and professional guidance are recommended for higher exposure scenarios. Myth: If you don’t see it, it’s not a problem. Truth: Hidden mold can cause ongoing issues; inspect behind walls and in HVAC for hidden colonies.
Tools & Materials
- NIOSH-approved respirator or P100 respirator(Ensure a proper seal and replaceable filters suitable for mold spores)
- Protective goggles or face shield(Avoid eye irritation and protect against splashes)
- Disposable coveralls or mold-rated protective suit(Maintain clean clothes and prevent cross-contamination)
- Latex or nitrile gloves(Double-glove approach in wet cleaning for added protection)
- Plastic sheeting (6-mil or thicker)(Create containment zones and seal doors/windows)
- Duct tape and painter’s tape(Secure containment and seal seams)
- HEPA vacuum with certified filters(Contain and capture fine spores during cleanup)
- Detergent or EPA-approved mold cleaner(Used for effective surface cleaning; follow label directions)
- Non-ammonia cleaner or soap solution(Useful for initial wiping and debris removal)
- Trash bags rated for biohazard or heavy-duty disposal(Seal and discard contaminated materials safely)
- Drying equipment (fans/dehumidifiers)(Promote rapid drying to prevent regrowth)
- Moisture meter or hygrometer(Track humidity and drying progress)
- Scrub brushes and disposable rags(Scrub and wipe contaminated surfaces)
Steps
Estimated time: 4-8 hours for typical small areas; 1-2 days for larger or porous contamination
- 1
Seal off the work area
Close doors to the affected space and cover vents with plastic sheeting to create a containment zone. This reduces the spread of spores to clean areas and helps maintain controlled conditions during cleanup.
Tip: Do not bypass containment; even a small opening can carry spores throughout the home. - 2
Put on PPE and prepare supplies
Put on the respirator, goggles, gloves, and disposable coveralls. Gather all cleaning agents, tools, and waste bags before starting to minimize trips in and out of the containment.
Tip: Check respirator fit and replace filters if they feel saturated. - 3
Remove porous materials if contaminated
Carefully remove drywall, insulation, or carpet if they are severely contaminated or structurally compromised. Place removed materials in sealed bags and dispose of them as waste.
Tip: Label bags clearly and avoid tearing to prevent releasing spores. - 4
Clean hard surfaces with detergent
Wipe and scrub non-porous surfaces with a detergent solution, then rinse with clean water. Repeat if any mold remains. Do not mix cleaners with bleach unless the product label allows it.
Tip: Use upper body strength and a fresh cloth for each pass to avoid recontamination. - 5
Apply a mold cleaner or soap solution
Apply EPA-approved cleaner or mild soap to surfaces and scrub with a brush until visible mold is removed. Rinse after cleaning and wipe dry.
Tip: Avoid saturating surfaces; dampness invites new mold growth. - 6
Dry the area thoroughly
Run fans and a dehumidifier to dry the space. Aim to bring relative humidity below 50-60% and continue until completely dry, which may take several hours.
Tip: Keep air moving in all directions and monitor progress with a moisture meter if available. - 7
Vacuum with a HEPA filter
Once surfaces are dry, use a HEPA vacuum to capture remaining spores from floors and surfaces. Dispose of the vacuum bag or canister outside the living area.
Tip: Do not reuse contaminated bags inside the home; seal and dispose immediately. - 8
Inspect and re-clean as needed
Check for any residual staining or odor. Repeat cleaning steps on stubborn spots and re-dry until the area shows no signs of growth.
Tip: Address underlying moisture sources to prevent recurrence. - 9
Dispose of waste and decontaminate tools
Bag all contaminated materials and tools, seal securely, and dispose of them according to local waste guidelines. Wipe reusable tools with a mold cleaner before storing.
Tip: Do not reuse disposable PPE; discard it after cleanup. - 10
Verify dryness and plan for re-inspection
Confirm the space is dry and free of visible mold. Schedule a professional re-inspection if there are lingering concerns or hidden contamination suspected.
Tip: Keep documentation of moisture readings for future reference.
FAQ
Is black mold dangerous to health, and should I be worried for my family?
Exposure to black mold can irritate the eyes, skin, and lungs, especially for sensitive individuals. Prolonged exposure or high contamination requires caution and often professional assessment. If anyone has breathing problems or immune compromise, seek guidance promptly.
Yes, it can be risky, especially for sensitive people. If in doubt, get a professional assessment.
Can I clean black mold myself, or should I hire a professional?
Small, non-porous areas with good ventilation can be cleaned by a knowledgeable homeowner using proper PPE and cleaners. Large, porous, or hidden growth, or contaminated HVAC systems should be handled by a licensed remediator.
DIY is possible for small areas, but larger jobs should be done by pros.
What PPE is required for black mold cleanup?
At minimum, wear an NIOSH-approved respirator, eye protection, gloves, and a disposable suit. Seal off the area and avoid disturbing the mold to minimize spore spread.
Wear a respirator, eye protection, gloves, and a protective suit, and keep the area contained.
How do I know if the cleanup is complete?
Ensure the area is dry, there is no odor, and there are no visible stains or mold growth. A final inspection or moisture test can confirm the space is safe.
Check for dryness, absence of odor, and no visible growth; consider a professional clearance test if unsure.
How long does black mold cleanup typically take?
Time varies by area size and material type. Small jobs may take several hours; larger or porous areas can require days and professional coordination.
It depends on size; small jobs take hours, larger ones can take days.
What should I do about moisture sources to prevent recurrence?
Identify and repair leaks, improve ventilation, and control indoor humidity. Ongoing moisture management is essential to prevent mold from returning.
Fix leaks, improve airflow, and keep humidity low to prevent recurrence.
Watch Video
The Essentials
- Contain the area to prevent spread of spores
- Use proper PPE and follow EPA guidelines for cleaners
- Dry the space thoroughly to prevent regrowth
- Porous materials with mold usually require removal
- Seek professional help for large or hidden contamination