How to Identify and Remediate Black Mold Safely
A practical, step-by-step guide for homeowners and renters to identify, assess, and safely remediate black mold, with safety tips and expert guidance from Mold Removal Lab.

You will learn how to safely identify and remediate black mold in your home, including how to locate moisture sources, select PPE, isolate the affected area, and choose cleaning methods. This guide emphasizes when to DIY and when to call a pro, and provides evidence-based steps to reduce health risks and prevent recurrence.
What black mold is and why it matters
Black mold refers to a group of molds that commonly appear as dark patches on walls, ceilings, or ducts in damp environments. In many homes, black mold growth signals a chronic moisture problem rather than a single spill. The Mold Removal Lab team notes that moisture control is the first defense against spread. Early detection and proper containment reduce health risks for residents, especially children, the elderly, and those with asthma or allergies. With practical steps, this guide helps you identify, assess, and safely remediate black mold while preserving building materials and indoor air quality. The goal is to both remove visible growth and prevent future recurrence by correcting the moisture source and improving ventilation.
Health risks and symptoms associated with black mold
Exposure to black mold can irritate the skin, eyes, nose, and throat, and may worsen respiratory conditions for allergy sufferers. In sensitive individuals, symptoms include coughing, sneezing, wheezing, and shortness of breath. Some people report fatigue, headaches, or sinus pressure when exposed to moldy environments for extended periods. It is important to minimize exposure during remediation by sealing off the area and using proper PPE. This section provides practical context so homeowners understand why safe remediation matters for long term health and indoor air quality.
How to assess scope and decide when to call a pro
Begin with a visual scan for dark patches and moisture sources such as leaks or condensation. If the growth is localized and the area is small, a careful DIY approach may be possible; otherwise, professional remediation is advised. Consider the extent of contamination, whether the mold has invaded porous materials, and if water damage is involved. Document the area with photos and notes to guide any professional assessment and ensure that remediation targets moisture sources, not just surface cleanup.
PPE and safety precautions before you start
Before you touch any mold, put on a properly fitted respirator (N95 or better), non-porous gloves, and eye protection. Do not sand or dry brush moldy surfaces, which can release spores into the air. Prepare a dedicated cleaning zone, and keep pets and children out of the area. These precautions protect your health and help prevent cross-contamination to other parts of the home.
Containment and moisture control to stop spread
Contain the room with plastic sheeting and seal doors and vents to prevent spores from traveling to other areas. Address the moisture source first, repairing leaks or improving ventilation to reduce humidity. Run a dehumidifier and fans to promote rapid drying, aiming to keep humidity levels below the threshold recommended for mold control. Proper containment minimizes cleanup difficulty and protects indoor air quality.
Cleaning strategies: what works and what to avoid
Use EPA-registered mold cleaners on nonporous surfaces, following label directions. Clean hard, nonporous materials with a detergent solution, rinse, and dry completely. Porous materials such as drywall or insulation that have been moldy for more than a short period typically need removal and replacement. Avoid using bleach on porous materials and never mix cleaners with ammonia or bleach; strong fumes can pose health risks and create toxic chloramines.
Porous materials and when replacement is required
Porous materials like drywall, insulation, or carpet that have mold growth beyond surface staining are usually not salvageable. When contamination penetrates the material, recontamination risk remains even after cleaning, so replacement is the safer option. Careful disposal of contaminated materials in sealed bags reduces the chance of dispersing spores to clean areas.
Drying, restoration, and prevention of recurrence
After cleanup, thoroughly dry all surfaces and reintroduce ventilation to prevent moisture buildup. Repair any structural issues contributing to dampness and consider a moisture barrier for walls or floors if applicable. Maintain indoor humidity levels below the range recommended for mold prevention and consider ongoing moisture management strategies, such as repairing leaks promptly and improving air exchange.
Tools & Materials
- Respirator (N95 or better)(Fit-tested preferably; avoid relying on paper masks alone)
- Nitrile gloves(Chemical-resistant and disposable)
- Protective eyewear(Goggles or face shield)
- Plastic sheeting (6 mil or thicker)(Seal rooms to contain spores)
- Duct tape / painter's tape(Secure plastic barriers)
- Detergent and EPA-registered mold cleaner(Follow label directions)
- Microfiber cleaning cloths(Non-abrasive for surfaces)
- Disposable trash bags (heavy-duty)(Seal and dispose of contaminated materials)
- Moisture meter or hygrometer(Helps track humidity levels)
- Dehumidifier and portable fans(Promotes drying and air circulation)
Steps
Estimated time: 2-6 hours
- 1
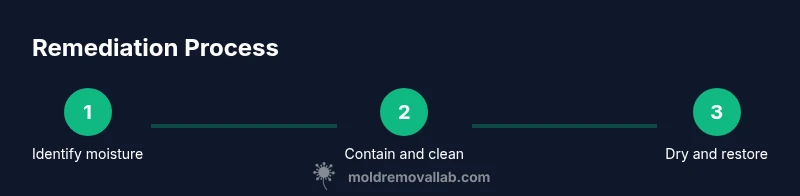
Identify moisture source
Locate leaks, condensation points, or poor ventilation fueling mold growth. Repair the moisture issue before or during remediation to prevent recurrence.
Tip: Document the source with photos to guide repairs. - 2
Protect yourself and the area
Put on PPE, seal the space, and isolate the work area to minimize exposure and cross-contamination.
Tip: Do not skip respirator use; mold spores can irritate airways. - 3
Contain the affected space
Install plastic barriers to prevent spores from drifting to other rooms. Seal all seams and create a single entry point for cleanup.
Tip: Double-check doors and vents for leaks. - 4
Assess contamination extent
Visual inspection plus moisture readings help determine if removal of porous materials is necessary.
Tip: Take before-and-after photos for documentation. - 5
Remove contaminated porous materials
Carefully remove drywall, insulation, or carpeting that shows mold growth and dispose of in sealed bags.
Tip: Place removed material in sealed bags to minimize spore release. - 6
Clean nonporous surfaces
Wash hard surfaces with detergent or EPA-registered cleaner, rinse, and dry completely before reoccupation.
Tip: Do not mix cleaners with ammonia or bleach. - 7
Dry the area thoroughly
Run a dehumidifier and fans to reach stable humidity levels and speed drying of all surfaces.
Tip: Aim for humidity below the mold-friendly threshold. - 8
Restore and monitor
Repair damaged structures, repaint if needed, and maintain humidity and ventilation to prevent recurrence.
Tip: Revisit the area after a few weeks to ensure no regrowth.
FAQ
Is black mold always dangerous?
Black mold can pose health risks, especially for sensitive individuals. Visible growth should be addressed promptly to reduce exposure and health impacts, and remediation should target moisture sources as well as the mold itself.
Black mold can be risky for some people. If you see it, address moisture and begin safe cleanup, and consult a professional if you’re unsure.
Can I DIY black mold remediation?
Small, contained areas with proper protective gear can be DIY, but larger growth or unknown extent should be handled by a professional to ensure safety and prevent recontamination.
If the growth is small and you have good protective gear, you can attempt DIY cleanup, otherwise call a pro.
What areas are most prone to black mold?
Bathrooms, basements, kitchens, and areas around leaks or condensation prone to dampness are common spots for black mold growth.
Mold tends to show up in damp areas like bathrooms and basements, especially where leaks exist.
What cleaners should I use for black mold?
Use EPA-registered mold cleaners or detergent solutions on nonporous surfaces. Avoid mixing cleaners with ammonia or bleach and follow product directions.
Choose approved mold cleaners and follow the label; never mix cleaners with ammonia or bleach.
How long does remediation take for a small area?
Remediation time for a small area can be a few hours to a day depending on moisture control and material removal, with follow-up monitoring to ensure dryness.
Small-area remediation can take a few hours to a day, but follow-up checks are important.
When should I call a professional?
Call a professional if mold covers a large area, if you suspect structural damage, or if you have health concerns or underlying moisture problems that are hard to manage.
Call a pro if the mold is extensive or if you’re dealing with structural issues or ongoing moisture problems.
How can I prevent mold recurrence after remediation?
Control moisture by fixing leaks promptly, improving ventilation, and using dehumidification when necessary. Regularly monitor humidity and inspect for signs of dampness.
Prevent recurrence by reducing moisture and monitoring humidity regularly.
Watch Video
The Essentials
- Identify moisture source to stop mold growth
- Wear proper PPE and follow safety guidelines
- Contain and dry quickly to prevent spread
- Use EPA-approved cleaners on nonporous surfaces
- Monitor humidity to prevent recurrence