Black Mold Removal: Safe, Step-by-Step Guide for Homes
A practical, safety-forward guide to removing black mold at home. Learn PPE, containment, cleaning methods for nonporous and porous surfaces, moisture control, disposal, and long-term prevention with Mold Removal Lab.

This guide helps you remove black mold safely by outlining essential PPE, containment, and cleaning steps. You’ll learn when DIY is appropriate, how to treat both nonporous and porous surfaces, and strategies to dry and prevent regrowth—plus safety cautions to protect occupants. Use this as a practical, home-based plan, and call a pro for extensive or hidden contamination.
What is black mold how to remove and why it matters
Black mold, or Stachybotrys chartarum, thrives in damp spaces and can trigger allergic reactions, asthma symptoms, and other health concerns for residents. In this guide on black mold how to remove, you’ll find practical, safety-first steps for identifying growth, reducing moisture, and cleaning affected areas. Mold Removal Lab emphasizes that the root cause is moisture—address that first to prevent recurrence. You’ll also learn how to decide when to DIY and when to call a professional, especially for growth behind walls, large patches, or areas near occupants with health issues. By following careful steps, you reduce exposure while restoring a healthier home environment.
Assessing scope and deciding between DIY and professional help
Start by mapping the affected area with a simple checklist: where the mold is, how large the patch appears, and whether you notice a musty odor. If growth is extensive, involves HVAC ducts, or covers more than a small patch, professional remediation is often the safest option. According to Mold Removal Lab, the decision to DIY should hinge on scale, accessibility, and occupant health. For small spots on nonporous surfaces, careful cleaning may be feasible, but any sign of growth behind walls or in moisture-prone zones warrants professional assessment.
Safety gear and containment basics
Before you touch any mold, put on appropriate PPE: a well-fitted respirator (N95 or better), protective gloves, goggles, and disposable coveralls. Isolate the area with plastic sheeting taped to door frames and vents to limit spores spreading to other rooms. Avoid disturbing the mold more than necessary, as agitation can release spores into the air. If you have pets or small children, relocate them during cleaning. Always work from the outside of the affected area inward to minimize cross-contamination.
Controlling moisture: the root cause
Mold thrives where moisture lingers. Repair leaks promptly, run dehumidifiers, and improve ventilation to keep humidity levels below about 50-60%. If you see condensation on windows, run a dehumidifier or increase airflow. Fixing the source of moisture is a prerequisite to successful removal; without it, mold will regrow even after cleaning. Mold Removal Lab highlights that moisture control is the most important long-term prevention step.
Cleaning methods for nonporous surfaces
Nonporous surfaces like glass, metal, tiles, and sealed countertops can be cleaned with soap and water or a mild detergent solution. Scrub with a brush or cloth, rinse, and dry completely to prevent new growth. Avoid using bleach on porous materials, but for nonporous surfaces, a diluted bleach solution can be used carefully following label directions. Always ventilate the area well and wear your PPE during cleaning.
Cleaning porous materials: drywall, insulation, fabrics
Porous materials such as drywall, insulation, and fabrics can harbor hidden mold colonies. If the growth is visible on porous materials or behind walls, removal and replacement are often required. Seal off the area, carefully remove the affected materials, bag them in double layers, and dispose according to local guidelines. After removal, the area should be thoroughly dried to minimize residual moisture and the chance of regrowth.
Drying and preventing regrowth
After cleaning or removing contaminated materials, dry the area quickly. Use fans, dehumidifiers, and good air circulation until surfaces are thoroughly dry. Once dry, re-inspect for any remaining damp spots and continue moisture control measures. A dry, well-ventilated environment reduces the likelihood of mold returning and supports long-term safety.
When to replace materials and disposal guidelines
If materials show persistent mold damage, discoloration, or structural weakening, replacement is often necessary. Place contaminated waste in sealed bags and dispose of them per local regulations. Do not reuse removed porous materials in living spaces; instead, consider certified replacement options with moisture-resistant builds to help prevent recurrence.
Cleaning schedule and long-term prevention plan
Create a routine for moisture checks: inspect bathrooms, kitchens, basements, and any spaces prone to dampness. Maintain gutters and downspouts, fix leaks promptly, and ensure proper ventilation in moisture-prone rooms. Regularly run dehumidifiers during humid seasons and consider air purifiers with HEPA filters in high-risk areas. A proactive maintenance plan is essential to sustain a mold-free home.
Tools & Materials
- N95 or P100 respirator(Fit-tested if possible; replace if damaged)
- Disposable gloves(Nitrile or latex, disposable)
- Safety goggles or protective eyewear(Splash protection)
- Disposable coveralls(Full-body protection)
- Plastic sheeting (6-mil or thicker)(Create containment zone)
- Shipping tape or painter's tape(Seal containment and corners)
- Detergent and water(Mild soap for cleaning)
- Broom, scrubbing brush, or sponge(Non-abrasive; avoid damaging surfaces)
- Trash bags (heavy-duty, 6-8 mil)(Double-bag for contaminated materials)
- Dehumidifier or high-capacity fans(Aid rapid drying)
- Moisture meter (optional)(Track humidity levels)
- Sealant or mold-resistant paint (for afterwards)(Used when finishing exposed areas)
Steps
Estimated time: 8-16 hours
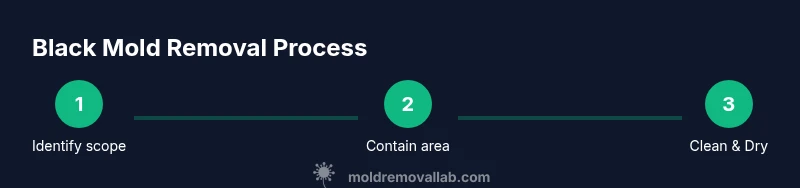
- 1
Identify scope and secure the area
Survey the affected zone, outline the boundaries of contamination, and prevent spread by sealing off the space with plastic sheeting. Turn off HVAC systems to limit airflow carrying spores. Document the area for reference.
Tip: Mark doorways with caution tape and label the contained space to avoid accidental intrusion. - 2
Put on PPE and prepare containment
Don your respirator, gloves, goggles, and coveralls before touching moldy surfaces. Set up containment with plastic sheeting to minimize cross-contamination and keep clean areas clean.
Tip: Check respirator fit and replace any compromised gear before starting. - 3
Address moisture sources
Identify and repair any leaks or sources of humidity in the area. Use a dehumidifier or fans to lower humidity and promote quick drying after cleaning.
Tip: Moisture control is the most important long-term prevention step. - 4
Clean nonporous surfaces
Scrub nonporous surfaces with detergent solution, rinse, and dry completely. If you use bleach, apply it only to nonporous surfaces and follow label directions carefully.
Tip: Avoid splashing water outside the containment zone. - 5
Handle porous materials
For drywall, insulation, and fabrics with mold, evaluate whether cleaning is possible or if removal is required. If removal is necessary, bag and dispose of affected materials following local guidelines.
Tip: Do not attempt to salvage heavily damaged porous materials. - 6
Dry the area thoroughly
Run dehumidifiers and fans until all surfaces are fully dry. Recheck moisture levels and address any latent damp spots.
Tip: Ventilate during drying to avoid condensation buildup on other surfaces. - 7
Dispose of contaminated waste
Seal moldy materials in double bags and place them in exterior trash cans as per local rules. Do not mix waste with regular debris.
Tip: Label bags clearly to prevent accidental exposure. - 8
Inspect for regrowth and reseal
After drying, re-inspect the area for any remaining mold or moisture issues. Re-clean as necessary and repaint or seal treated areas with mold-resistant products if appropriate.
Tip: Keep moisture control ongoing to prevent recurrence. - 9
Decide if professional help is needed
If growth remains behind walls, in HVAC, or covers large areas, contact a certified mold remediation professional. Document findings for any insurance considerations.
Tip: An earlier professional assessment can prevent costly future repairs. - 10
Create a prevention plan
Implement a moisture-control routine: fix leaks promptly, maintain indoor humidity around 50%, and ensure adequate ventilation in moisture-prone rooms.
Tip: Schedule seasonal inspections for areas like basements and bathrooms.
FAQ
Is black mold dangerous, and should I be worried?
Exposure to mold can cause health issues for sensitive individuals. If you have persistent symptoms or large growth, consult a professional. Small, well-contained areas cleaned properly pose less risk when moisture is controlled.
Black mold can affect health, especially for sensitive people. If symptoms persist or growth is large, seek professional help.
Can I remove black mold myself, and when is it unsafe to DIY?
Small patches on nonporous surfaces can often be cleaned safely with proper PPE and containment. If mold covers porous materials, or if you have underlying moisture problems or health concerns, hire a professional.
You can DIY small nonporous patches, but call a pro for porous materials or big areas.
Should I replace drywall or insulation after mold removal?
If mold has penetrated porous materials deeply, replacement is usually recommended. Cleaning is rarely effective on extensively damaged drywall or insulation. Always dry the area thoroughly before deciding.
Replace heavily mold-damaged drywall or insulation; dry thoroughly before finishing.
What about using bleach to remove mold?
Bleach can be effective on nonporous surfaces but is not a cure-all. Do not use it on porous materials. Always follow label directions and ensure good ventilation and PPE.
Bleach is sometimes used on nonporous surfaces only; avoid porous materials.
How long does it take for areas to dry after cleaning?
Drying depends on the space and airflow, typically ranging from several hours to a couple of days. Use dehumidifiers and fans to speed up the process and monitor humidity levels.
Drying usually takes hours to a couple of days with good airflow.
How can I prevent mold from returning after removal?
Maintain moisture control, fix leaks promptly, improve ventilation, and routinely inspect high-risk areas like bathrooms and basements. A proactive maintenance plan is essential for long-term safety.
Keep humidity down, fix leaks, and check damp areas regularly.
Watch Video
The Essentials
- Contain the area to prevent spread
- Address moisture before cleaning
- Use appropriate PPE and follow safety guidelines
- Differentiate cleaning methods for porous vs. nonporous materials
- Plan for long-term prevention to avoid recurrence