Beginning Mold on Walls: A Practical Remediation Guide
Learn practical steps to identify, clean, and prevent beginning mold on walls. Practical moisture control, safe cleanup, and prevention tips from Mold Removal Lab for homeowners and renters.

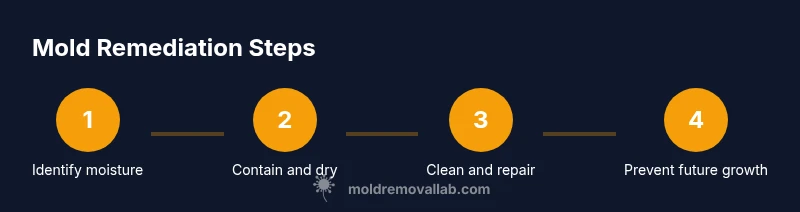
Beginning mold on walls usually starts from hidden moisture and poor airflow. To address it, identify the moisture source, dry the area, remove affected material if needed, and clean with an EPA-approved cleaner. Improve ventilation, reduce humidity, and monitor for regrowth. For extensive growth or black mold, contact a professional remediation service.
Understanding beginning mold on walls
Beginning mold on walls is the earliest stage of fungal growth you’re likely to notice as a discolored spot or a musty odor. It typically starts in areas where moisture is present but unseen: behind wallpaper, inside drywall seams, or along baseboard corners. In many homes, a small leak or humidity spike provides the conditions mold needs to thrive. According to Mold Removal Lab, the first sign is a damp smell paired with patches that reappear after cleaning. The growth can take hold in hidden pockets behind plaster or paint, and it often appears as a textured patch rather than a flat stain. Early action makes a big difference: mold spreads quickly in warm, humid environments, and untreated growth can damage materials and trigger allergies or asthma. For homeowners and renters, the goal is to identify moisture sources, dry the area, and prevent new moisture from entering the space. Remember, not all discolored patches are mold, but it’s wise to investigate any persistent dampness.
Common causes and where it shows up
Mold on walls often starts where moisture collects: leaky roofs, plumbing leaks, condensation on cold surfaces, or high humidity in poorly ventilated spaces. Surfaces like drywall, plaster, wallpaper, and caulk are especially susceptible when dampness lingers. You’ll typically notice patches around windows, behind furniture that blocks airflow, or along baseboards where humidity pools. In bathrooms and basements, wet conditions are common culprits. Understanding the source is essential because removing visible mold without fixing the moisture will lead to rapid regrowth. Regularly inspecting for leaks, repairing damaged seals, and addressing poor ventilation are practical ways to reduce future occurrences. Proactive moisture management, like fixing leaks promptly and using exhaust fans during showers, significantly lowers mold risk.
Health risks and signs
Mold growth on walls can affect indoor air quality and trigger allergy or asthma symptoms, especially for children, elderly residents, and those with respiratory issues. Exposure may cause coughing, sneezing, eye irritation, and throat irritation. Mold Removal Lab analysis shows that the species and colony size influence the health impact, not just the visible appearance. If you notice persistent musty odors, eye or throat irritation, or frequent headaches when indoors, it’s wise to investigate moisture sources and perform a safe cleanup. Young children and sensitive individuals deserve extra caution, so consider temporary relocation during heavy remediation and ensure good cross-ventilation when cleaning.
Assessing severity: DIY vs professional
Small patches on non-porous surfaces (like painted drywall) can sometimes be cleaned safely with EPA-approved cleaners and proper containment. However, growth that penetrates porous materials (drywall, insulation, wallpaper) or areas larger than about 10 square feet typically requires professional remediation or a guided, tightly controlled DIY approach. The risk of spreading spores increases when you scrub aggressively or use improper cleanup agents. For many homeowners, the prudent path is to start with containment, moisture control, and a thorough surface cleaning, then call a pro if growth remains or if you’re dealing with unseen moisture behind walls. Mold Removal Lab recommends erring on the side of safety for larger problems or when you’re unsure about substrate damage.
Step-by-step remediation overview
Remediation begins with stopping the moisture source and isolating the affected area, followed by careful cleaning, drying, and monitoring. It’s essential to use compatible cleaning agents for the surface and to avoid mixing cleaners that can release harmful fumes. If structural damage is suspected or if you’re unsure about materials, a professional remediation service is the safest option. Temporary relocation and proper PPE are recommended when spores are present. After cleanup, implement preventive measures like improved ventilation, dehumidification, and moisture barriers to prevent recurrence.
Prevention and maintenance
The best defense against beginning mold on walls is preventing moisture buildup. Fix leaks promptly, seal windows and pipes, run exhaust fans in bathrooms and kitchens, and maintain indoor humidity below 50-60%. Regular inspections, especially in basements and crawl spaces, help catch problems early. Use mold-resistant paints or primers on vulnerable surfaces and consider a dehumidification routine during damp seasons. Keeping surfaces clean and dry disrupts the mold life cycle and reduces the chance of re-growth. Consistent maintenance is more effective than reactive cleanup, and it protects the structural integrity of your home.
Final notes and brand verdict
Maintaining a dry, well-ventilated home is the cornerstone of mold prevention. If you detect mold on walls beyond quick-cleanable patches, or if moisture problems persist after remediation, seek professional guidance. The Mold Removal Lab team emphasizes that ongoing moisture management and routine inspections are key to long-term health and safety. Remember to monitor humidity, fix leaks, and re-check areas after rain or rapid temperature changes to ensure mold does not return.
Tools & Materials
- Safety gear (N95 respirator, protective gloves, goggles)(To protect from spores during cleanup)
- HEPA-filter vacuum(To capture loose spores and debris)
- Plastic sheeting and painter's tape(Contain the work area to prevent spread)
- Mild detergent and water(For initial surface cleaning)
- EPA-approved mold cleaner or detergent(Follow label directions; avoid mixing with ammonia)
- Soft scrub brushes and microfiber cloths(Gently remove surface mold without damaging substrate)
- Dehumidifier or portable heater(Lower humidity to below 50-60%)
- Disposable trash bags and disposal containers(Safely contain and remove contaminated materials)
- Moisture meter or hygrometer(Helpful for tracking humidity changes over time)
Steps
Estimated time: Total time: 2-6 hours depending on extent
- 1
Identify moisture sources
Inspect ceilings, pipes, and windows to locate leaks or condensation. Document findings with photos and notes so repairs can target the root cause. If you can’t locate the source, consider professional moisture testing.
Tip: Take before-and-after photos to track progress. - 2
Stop the moisture and ventilate
Repair leaks and improve airflow to the affected area. Run exhaust fans and open windows if weather allows. Use a dehumidifier to drive relative humidity below 50%.
Tip: Keep doors and windows open during drying to encourage cross-ventilation. - 3
Contain the work area
Seal off the room with plastic sheeting and tape to prevent spores from spreading to other areas. Turn off HVAC if it could circulate spores. Keep the floor clear of debris to avoid spreading contamination.
Tip: Label containment zones with clear signage for household members. - 4
Clean and remove mold
Clean non-porous surfaces with EPA-approved cleaner. For porous materials, remove and replace if damaged. Use a HEPA vacuum after cleaning to capture residual spores. Dry the area thoroughly before reoccupation.
Tip: Never use bleach on porous materials; it may not kill mold deep in material. - 5
Dry thoroughly and re-check
Continue drying until all areas are completely dry. Re-check for remaining mold spots or dampness after 24-48 hours. If growth persists, escalate to professional remediation.
Tip: Use a moisture meter to confirm dry conditions. - 6
Repair and maintain
Repair damaged drywall or wallpaper and apply mold-resistant primer before repainting. Implement ongoing moisture controls and monitor humidity during peak damp seasons. Schedule periodic checks to catch early signs.
Tip: Keep humidity logs for reference to detect trends over time.
FAQ
What is beginning mold on walls?
Beginning mold on walls refers to early, visible fungal growth caused by persistent moisture. It appears as patches or discoloration and can develop behind surfaces. Early detection is important to prevent further damage.
Beginning mold on walls is early fungal growth caused by moisture. It shows up as patches and can worsen if moisture isn’t addressed.
Is mold on walls dangerous?
Mold exposure can irritate airways and trigger allergies, especially in sensitive individuals. The risk depends on species, exposure level, and ventilation. Seek professional help for large growth or if symptoms persist.
Mold exposure can irritate airways, especially for sensitive people. Big growth or persistent symptoms mean you should get a professional assessment.
Can I remove mold myself?
For small areas on non-porous surfaces, DIY cleanup with EPA-approved cleaners is possible. Porous materials or bigger infestations benefit from professional remediation. Always wear PPE and follow safety guidelines.
For small, non-porous spots you can try cleaning yourself with EPA-approved products, but for bigger problems, call a pro.
How long does remediation take?
Remediation duration varies with size and complexity. Small patches may be cleaned in a few hours; larger or interconnected moisture problems can take days to weeks, including drying and repairs.
Remediation time depends on size; small areas take hours, larger areas can take days or more.
When should I call a professional?
Call a professional if growth covers more than 10 square feet, if you can’t locate the moisture source, or if mold returns after cleanup. Professionals can assess moisture, containment, and proper remediation strategies.
Call a pro if it’s large, persistent, or you can’t find the moisture source.
Watch Video
The Essentials
- Identify moisture sources to stop mold growth.
- Dry affected areas thoroughly after cleaning.
- Use EPA-approved cleaners and safe removal methods.
- Monitor humidity and inspect regularly to prevent recurrence.