Attic Black Mold: Identification and Safe Remediation
A practical, safety‑oriented guide to identifying attic black mold, stopping moisture, and completing remediation. Learn when to DIY, when to hire a pro, and how to prevent recurrence—backed by Mold Removal Lab insights.

This guide helps you identify attic black mold, assess moisture sources, and follow a practical remediation plan. You’ll learn safety basics, containment strategies, and when to escalate to a professional. Expect a clear, step‑by‑step approach, plus checklists, timelines, and sources for trusted guidance.
Understanding attic black mold
Attic black mold is a common mold growth in spaces with limited ventilation and persistent moisture. In many homes, attics become susceptible due to roof leaks, poorly sealed ducts, insufficient insulation, or venting that doesn’t move moist air out of the attic. When moisture lingers, spores can colonize and appear as dark, smudgy patches on wood, insulation, or drywall. According to Mold Removal Lab, attic mold growth is often driven by moisture intrusion from roof leaks, improper insulation, or poor attic ventilation. Recognizing the signs—musty odor, staining, or visible growth—helps you act quickly and prevent structural damage or health risks. Early detection allows you to interrupt the life cycle of the mold, reducing spore spread into living spaces. Remember: mold can spread rapidly in an enclosed attic, especially when warm, humid air from living spaces backs up through attic vents.
In many cases, the issue isn’t purely cosmetic. Attic mold can indicate ongoing moisture problems that, if ignored, may worsen wood rot, insulation degradation, and air quality in the home. While not every mold species presents the same health risk, exposure to airborne spores can irritate the eyes, nose, and throat, and prolonged contact may affect sensitive individuals. A cautious, measured approach is essential, prioritizing safety and drying the space before attempting remediation.
Signs of attic mold and when to investigate further
Visible mold patches are the most obvious cue, but you should also watch for damp insulation, warped or discolored wood, and a persistent musty odor. If you notice water stains from a roof leak or condensation on rafters during colder months, those are likely moisture sources fueling mold growth. In attics, moisture can come from multiple pathways: roof leaks, attic ventilation issues, coat‑level insulation gaps, or HVAC duct condensation. Because attics are often hard to access and can harbor hidden moisture, a thorough inspection—preferably with a flashlight and a moisture meter—helps you map the problem before any cleanup. Mold can reappear if moisture isn’t controlled, so documenting findings with photos is a smart, low‑risk first step.
According to Mold Removal Lab analysis, addressing moisture sources reduces recurrence risk. This underscores a key principle: successful attic mold remediation starts with stopping the moisture, not just cleaning the visible patches. By combining a careful inspection with controlled moisture management, you set the stage for a safer, healthier attic and home environment.
Health considerations and protective measures
Even in closed spaces like attics, mold exposure should be treated seriously. People with allergies, asthma, or immune compromises may experience coughing, wheezing, or skin irritation when exposed to mold spores. For this reason, protective equipment is essential before touching anything moldy. Use a properly fitted respirator (NIOSH‑approved P100 or N95), disposable coveralls, eye protection, and gloves. Never disturb mold‑y materials with bare hands, and avoid air rushing through the attic during cleanup, which can disperse spores into living areas. Ventilate the space to the outside whenever possible, and keep interior living spaces closed off while you work. If the attic contains damaged or porous materials (drywall, fiberglass insulation) that have become moldy, plan for safe disposal. While some cleaners can help, the primary goal is to remove the mold and dry the space thoroughly, not simply to “kill” the mold on contact.
In addition to PPE, set up containment barriers. Use plastic sheeting to seal off the work area from the rest of the home. This limits cross‑contamination and makes cleanup more manageable. A clean, organized work area also reduces the risk of accidental exposure. Safety should always guide your decisions about what to scrub, what to discard, and how long to ventilate. If you feel uncertain at any point, pause and reassess—mold remediation is as much about stopping moisture as it is about removal.
DIY vs professional remediation: decision criteria
Many attic mold scenarios are manageable for a careful homeowner, especially when the affected area is small (less than a few square feet) and moisture sources are clearly identified and controllable. DIY remediation emphasizes containment, thorough cleaning of non‑porous surfaces, and rapid drying of the space. However, larger infestations, mold growth behind walls, signs of hidden moisture, or uncertain asbestos presence require professional remediation. A key decision criterion is the extent of contamination: if you can visually confirm that mold has penetrated porous materials (insulation, drywall) or you cannot determine the full scope without specialized tools, seek expert help.
Professional remediation includes detailed moisture assessment, safe removal of porous materials when needed, and post‑remediation verification to ensure spores have been reduced to safe levels. The Mold Removal Lab team recommends erring on the side of caution: start with containment and moisture control, then escalate to pro services if the mold area expands beyond your initial assessment. When you hire a pro, ask about containment methods, air filtration, disposal procedures, and post‑remediation verification to ensure lasting results.
Moisture sources in attics: a closer look
The root cause of attic mold is moisture, so a thorough moisture audit is essential. Roof leaks can persist for months, allowing water to saturate insulation and structure. Condensation arises when warm indoor air meets cold attic surfaces, particularly in winter. Inadequate ventilation or blocked vents can trap humid air, increasing relative humidity and triggering mold growth. Insulation that is compressed, damaged, or poorly installed reduces the attic’s ability to dry after a humidity spike. A practical approach is to inspect the attic for leaks, test for dampness in wood and insulation, and evaluate ventilation effectiveness. Resolving these moisture issues often requires roof repairs, updating insulation, and improving air flow through soffit and ridge vents or powered ventilation if recommended by a professional. The goal is to maintain a dry, well‑ventilated attic space to prevent mold from returning after remediation.
Prevention and long‑term moisture management in the attic
Preventing attic mold recurrence hinges on ongoing moisture control. Start with a leak‑free roof and well‑sealed attic joints. Improve ventilation by ensuring air can move from the living space into the attic and out through exhaust vents. When feasible, install or upgrade attic insulation to minimize condensation and heat transfer that raise surface temperatures where mold can grow. Regular inspections after heavy rain or snowmelt help catch leaks early. Consider using a hygrometer to monitor humidity levels, and address any readings above the recommended range with improved airflow or dehumidification. By pairing moisture control with routine maintenance, you reduce the probability of mold returning and preserve attic integrity over time.
When to call a professional and what to expect
If you’re unsure about the extent of contamination, detect moisture behind walls, or encounter pungent odors that persist despite cleaning, it’s time to call a mold remediation professional. A qualified specialist will perform a moisture assessment, establish containment, remove affected porous materials if needed, clean non‑porous surfaces, and perform post‑remediation testing or inspections to verify that mold spore counts are under acceptable thresholds. Expect a written remediation plan, safety precautions, and a clear scope of work with timelines. Professional remediation may involve structural repairs, insulation replacement, and improved ventilation—investing in these steps can prevent future mold growth and protect indoor air quality over the long term.
Tools & Materials
- Respirator (NIOSH‑approved, P100 or N95)(Ensure a proper fit; use full‑face if exposure is high)
- Protective coveralls(Disposable; prevents tracking mold to living spaces)
- Nitrile gloves(Double‑gloving is optional but can help)
- Goggles or safety glasses(Eye protection against splashes and spores)
- Plastic sheeting and tape(Create containment barriers around the work area)
- HEPA vacuum and HEPA air filter(Use for cleanup and filtration; avoid standard vacuums)
- Mild detergent or mold‑safe cleaner(For cleaning non‑porous surfaces)
- Scrub brushes, microfiber cloths, and bucket(Non‑porous surface cleaning kit; dispose if contaminated)
- Biohazard/heavy‑duty trash bags(Double‑bag moldy materials for safe disposal)
- Moisture meter or hygrometer (optional)(Helpful for tracking drying progress)
- Ladder or stable access(Ensure safe attic entry and exit)
Steps
Estimated time: varies depending on attic size, extent of contamination, and moisture control
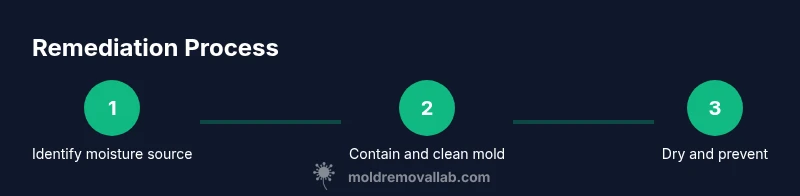
- 1
Stop the moisture source
Identify and repair the moisture source first, such as roof leaks or insulation gaps. This stops ongoing water entry and makes cleanup more effective. Document the source with photos to guide repairs and to show evidence for any contractors you hire.
Tip: Prioritize roof and insulation fixes before cleaning to reduce re‑contamination. - 2
Contain the work area
Seal off the attic from the living space with plastic sheeting and tape. Close doors and use a dedicated entry/exit path for workers. This containment helps minimize spore migration and protects occupants.
Tip: Keep the containment zone slightly negative relative to adjacent spaces if possible. - 3
Protect yourself and ventilate
Put on PPE before touching any moldy material. Use fans that exhaust air to the outside to promote ventilation, but avoid blowing air from the attic into living areas.
Tip: Check respirator fit and replace disposable masks if they become damp or soiled. - 4
Remove and dispose of porous materials
If insulation or drywall is visibly moldy and structurally compromised, remove and seal it in double bags for disposal. Do not salvage heavily contaminated porous materials.
Tip: Plan disposal logistics in advance to minimize attic downtime and contamination risk. - 5
Clean and disinfect non‑porous surfaces
Scrub solid surfaces with detergent and water, rinse, and dry completely. Avoid mixing cleaners with ammonia or bleach; use cleaning methods that do not disperse spores.
Tip: Follow up withHEPA vacuuming to capture remaining spores after cleaning. - 6
Dry and monitor moisture levels
Use fans and dehumidification as needed and monitor moisture levels until surfaces are dry to the touch and humidity readings stabilize within a safe range.
Tip: Drying times vary; recheck after 24–72 hours and adjust ventilation as needed.
FAQ
What is attic black mold and why does it grow?
Attic black mold refers to fungal growth in an attic driven by moisture and poor ventilation. It grows where roof leaks, insulation problems, or restricted airflow keep humidity high. Prompt moisture control and careful cleanup are essential for safety.
Attic mold is a common issue caused by moisture and poor ventilation in the attic. If you see it, address moisture first and proceed with careful cleanup to protect your home and health.
Can I remove attic mold myself?
Small, clearly contained mold growth can often be addressed by a knowledgeable homeowner with proper PPE and containment. Large areas, porous materials, or uncertainty about hidden moisture should be handled by a professional.
DIY is possible for small patches, but don’t DIY a large infestation or suspect hidden moisture. When in doubt, hire a pro.
How can I tell if attic moisture is present?
Look for standing water, damp insulation, discolored wood, and a musty odor. Use a moisture meter if available to measure humidity in attic framing and insulation areas.
Check for damp spots, insulation saturation, and odors. A moisture meter helps confirm where moisture persists.
Is attic mold dangerous to health?
Exposure can irritate eyes, nose, and throat, especially for sensitive individuals. Long‑term exposure may worsen asthma or allergies. Always minimize exposure during cleanup with proper PPE and containment.
Mold can irritate health and worsen allergies; protect yourself and others during cleanup.
When should I hire a professional?
If mold covers more than a few square feet, if you suspect it’s behind walls, or if moisture sources are ongoing, a professional remediation team is usually the safest option.
Call a professional if the infestation is large, behind walls, or moisture isn’t controlled.
Will attic mold return after remediation?
Mold can return if moisture is not fully eliminated or if there’s new water intrusion. Ongoing moisture control and regular attic checks reduce the chance of recurrence.
If moisture isn’t fully controlled, mold may come back. Ongoing prevention is key.
Watch Video
The Essentials
- Identify and stop moisture sources first.
- Use proper PPE and containment before touching mold.
- Dry thoroughly to prevent regrowth; monitor humidity.
- Decide between DIY scope vs professional remediation based on extent
- Plan for prevention to protect the attic and home over time