Black Mold in a House: Practical Remediation Guide
Comprehensive, step-by-step guidance for safely identifying, containing, and remediating black mold in a house. Includes PPE, containment, cleaning methods, moisture control, and post-remediation checks to protect indoor air quality.

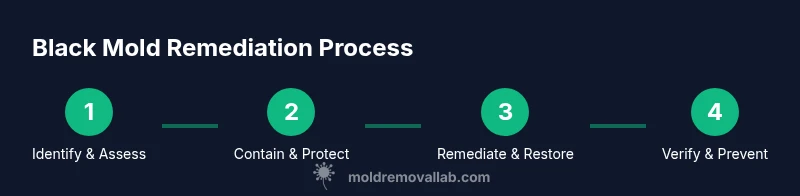
Learn how to safely identify and remediate black mold in a house. This step-by-step guide helps homeowners decide when DIY is safe, how to contain spores, and how to restore indoor air quality after removal. You’ll find practical spacing, equipment, and safety tips to protect your family and home from this serious mold issue.
Understanding Black Mold in Homes
Black mold is a common term for several dark molds that grow in damp places. In many houses, visible colonies signal chronic moisture problems. If you suspect black mold in your home—especially around bathrooms, basements, or crawlspaces—act quickly. According to Mold Removal Lab, early detection and proper containment dramatically reduce exposure and limit cross-contamination. The presence of visible black mold in a house is not a minor cosmetic issue; it points to a moisture problem that invites fungal growth and potential health risks. This guide explains how to assess the extent, decide between DIY cleanup and professional remediation, and take action to restore a safe indoor environment. For families with kids and pets, a cautious, methodical approach matters. Addressing a black mold house problem promptly protects health, protects property, and reduces long-term remediation costs.
Health Risks and Why It Matters
Exposure to black mold can trigger allergic reactions, coughing, and eye irritation. In sensitive individuals—children, the elderly, or people with asthma—the effects can be more pronounced. Mold particles released during cleanup can become airborne if containment is poor. Based on Mold Removal Lab analysis, proper containment and ventilation during cleanup significantly reduce exposure and the spread of mold spores to other rooms. Moisture issues that sustain black mold growth often indicate structural problems like a leaky roof, pipe leaks, or groundwater intrusion. By addressing moisture first, you reduce the chance of recurrence and improve overall indoor air quality. This section lays the groundwork for practical steps, from PPE to cleaning strategies that minimize risk to your family.
Early Detection: Signs of Black Mold
Common signs include a musty odor, visible dark growth on walls or ceilings, water stains, warped materials, and condensation on windows. Areas around leaky pipes, sinks, or roofs are frequent hotspots. If anyone in the home experiences persistent coughs, itchy eyes, or headaches when indoors, take those symptoms seriously and inspect for moisture and mold. Keep in mind that black mold can spread quickly through porous materials like drywall, insulation, and fabric. Catching it early makes cleanup safer and more effective, and it helps prevent costly structural damage down the line.
Assessing the Situation: DIY vs Professional Remediation
Small, isolated patches on non-porous surfaces may be achievable with careful cleaning and containment. However, larger growth (often described as more than a few square feet) or growth on porous materials usually requires professional remediation to ensure thorough removal and proper containment. If moisture problems persist, or if the HVAC system is contaminated, hiring a licensed mold remediation contractor is strongly advised. Use a decision framework: scope of mold, access to affected areas, presence of water damage, and your comfort with PPE and containment. Remember, the goal is safe, thorough removal and preventing recurrence, not just masking the issue.
Safe Containment and Personal Protective Equipment (PPE)
Containment starts before any cleanup. Seal off the affected area with plastic sheeting (6 mil or thicker) and tape, creating a barrier to prevent spores from migrating. Inside the space, wear an N95 respirator (or a higher-grade mask for larger jobs), protective goggles, disposable coveralls, and thick gloves. Avoid mixing cleaners, and do not use fans that blow air from the moldy area into other rooms. Ventilate the work area by bringing fresh air in from outside, if possible, but keep the mold zone contained. Proper PPE and containment dramatically reduce exposure and protect occupants during cleanup.
Cleaning Techniques: What Works (And What Doesn’t)
For non-porous surfaces, use a detergent solution and warm water to remove visible mold, then dry thoroughly. White vinegar or hydrogen peroxide can be effective on some surfaces, but avoid mixing chemical cleaners. Porous materials like drywall or insulation that have been deeply penetrated by mold may need to be removed and discarded. Bleach is sometimes suggested, but it can be harsh on skin and releases strong fumes; use it only if you understand the surface and ventilation requirements. After cleaning, wipe surfaces dry and re-check for residual moisture.
Drying and Moisture Control to Prevent Recurrence
Mold regrows where moisture remains, so drying is critical. Use dehumidifiers and fans to reduce ambient humidity, and ensure good cross-ventilation. A hygrometer or moisture meter helps verify that humidity levels are within safe ranges (generally below 50-60% in most homes). Repair leaks promptly and address condensation by insulating cold surfaces and improving air circulation. The goal is to create an environment unfavorable to mold growth and to prevent future moisture-driven failures.
Post-Remediation Verification: Ensuring Safety
After cleanup, re-inspect the area for visible mold and re-measure moisture levels. If the musty odor persists or symptoms return, further evaluation may be needed. In some cases, air sampling or surface swab testing by a qualified professional provides additional assurance. Documentation of the remediation work (photos, receipts, and moisture readings) can be useful for homeowners, insurers, and future contractors. The emphasis remains on a clean, dry, and well-ventilated space.
Costs and Timeframes: What to Expect
Remediation costs and timelines vary with the extent of growth, moisture sources, and required materials. In general, small, contained mold issues can be addressed relatively quickly, while extensive mold under structural elements or within HVAC systems will take longer and may require multiple visits. Timeframes depend on moisture control efficacy, the complexity of the area, and access to affected spaces. Always prioritize safety and thoroughness over speed.
When to Call a Mold Remediation Professional
If mold growth covers a large area, involves HVAC systems, or if moisture sources are ongoing, a licensed professional is the safest option. Professionals have specialized equipment and proven containment and cleanup protocols to prevent cross-contamination and ensure complete removal. If you experience persistent health symptoms or if you are unsure about the extent of contamination, seek expert evaluation promptly. A professional remediation plan can save time, reduce risk, and provide lasting peace of mind.
Preventing Future Black Mold Growth in a House
Address moisture sources fast: fix leaks, improve drainage around the foundation, and ensure proper bathroom ventilation. Regularly inspect damp spaces, especially after heavy rains or changes in humidity. Keep surfaces dry, use a dehumidifier in moist areas, and consider mold-resistant materials in high-risk zones. A proactive maintenance plan helps keep your home healthier over time.
Your Action Plan: Quick Start Checklist
- Identify suspect areas and moisture sources
- Put on PPE and establish containment
- Remove or clean damaged materials safely
- Dry area thoroughly and monitor humidity
- Plan follow-up inspections and maintenance
Tools & Materials
- N95 respirator (or better)(Fit-tested if possible; consider P100 for added protection)
- Protective goggles(Secure to prevent splashes)
- Disposable coveralls(Long sleeves and pants; boot covers optional)
- Chemical-resistant gloves(Use multiple layers if necessary)
- Plastic sheeting (6 mil)(To seal off the work area)
- Tape (duct or painter)(For sealing plastic barriers)
- Detergent and warm water(Basic cleaning solution)
- White vinegar or hydrogen peroxide(Optional for surface treatment)
- Non-ammonia soap(Gentle cleaner for mold removal)
- Stiff brush and sponge(For scrubbing surfaces)
- Bucket and towels(For cleanup and wiping up moisture)
- Scale: moisture meter or hygrometer(To monitor humidity levels)
- Dehumidifier or air mover(To dry the space quickly)
- HEPA-filter air purifier (optional)(Useful for improving air quality during cleanup)
- Heavy-duty trash bags(For disposal of contaminated materials)
- Glove disposal bags(Seal contaminated PPE before disposal)
Steps
Estimated time: 6-12 hours
- 1
Assess scope
Inspect the area for visible mold and underlying moisture issues. Note water sources and determine the extent of growth. This helps you choose a safe remediation path.
Tip: Document findings with photos for records and contractor references. - 2
Contain the space
Seal the area with plastic sheeting to prevent spores from entering other rooms. Close doors and block HVAC vents if possible.
Tip: Avoid creating negative pressure that pulls air from moldy areas. - 3
Put on PPE
Don N95 respirator, goggles, gloves, and a disposable coverall before touching any moldy surfaces.
Tip: Inspect PPE fit and replace if damaged. - 4
Stop moisture sources
Repair active leaks and reduce humidity at the source. This is essential to prevent re-growth during cleanup.
Tip: Address both obvious leaks and hidden moisture issues. - 5
Remove damaged materials
Discard severely mold-infested porous materials like drywall or insulation. Use sealed bags to minimize containment breach.
Tip: Do not cut large areas; containment should be maintained during removal. - 6
Clean hard surfaces
Clean non-porous surfaces with soapy water, then rinse and dry completely. For some surfaces, vinegar or hydrogen peroxide can be used.
Tip: Never mix cleaners; keep one cleaner on hand at a time. - 7
Treat remaining porous areas
Lightly treat non-porous surfaces as appropriate, but consider professional guidance for porous areas that might harbor unseen mold.
Tip: If in doubt, consult a mold remediation professional. - 8
Dry the space
Run dehumidifiers and fans to reduce moisture quickly, aiming for stable humidity below 50-60%.
Tip: Place meters at multiple heights to monitor moisture changes. - 9
Verify moisture balance
Re-check with a moisture meter after drying to ensure levels are safe before re-occupying.
Tip: Keep doors closed to reduce air exchange during moisture checks. - 10
Dispose of waste
Seal and dispose of any contaminated materials promptly to prevent re-contamination.
Tip: Label bags clearly and keep away from living spaces during transport. - 11
Plan follow-up checks
Schedule a follow-up inspection to ensure no hidden mold remains and humidity stays controlled.
Tip: Set a reminder for seasonal moisture checks. - 12
Document remediation
Keep records of moisture readings, photos, and contractor notes for future reference.
Tip: This documentation helps with insurance claims and future prevention.
FAQ
What is black mold and how dangerous is it?
Black mold refers to several mold species that appear dark and thrive in damp environments. It can cause allergic reactions, respiratory symptoms, and other health issues in sensitive individuals. Proper cleanup and moisture control reduce risk, and professional remediation is advised for large or unknown growth.
Black mold is a dark mold that grows in damp spaces and can affect health, especially for sensitive people. Clean it safely with containment, or call a pro for larger areas.
Can I do black mold cleanup myself?
Small, contained patches on non-porous surfaces may be cleaned by careful DIY methods, but larger growth or mold on porous materials should be handled by professionals. Always ensure proper containment and PPE before starting.
You can handle small, contained patches, but large or porous mold is best left to pros.
What PPE is essential for mold cleanup?
Essential PPE includes an N95 respirator or higher, protective goggles, disposable coveralls, and gloves. Use a well-fitting mask and avoid skin contact with contaminated materials.
Wear a good mask, goggles, gloves, and coveralls when cleaning mold.
How long does remediation typically take?
Time varies with the extent of growth and moisture issues. Minor, contained mold may be cleaned in hours, while extensive contamination and moisture repair can take days. Always plan for sufficient time and safety.
Cleanup time depends on how big the mold problem is and how quickly moisture issues are fixed.
When should I hire a professional?
Call a professional when mold coverage is extensive, moisture sources are ongoing, or the HVAC system is affected. Professionals have specialized containment procedures and can verify complete remediation.
Call a pro if the mold is widespread or the moisture problem persists.
Can mold return after cleanup?
Mold can return if underlying moisture issues are not resolved. Proper drying, moisture control, and routine checks are essential to prevent recurrence.
Yes, if you don’t fix moisture and dry the space, mold can come back.
Watch Video
The Essentials
- Identify moisture sources first, then address them.
- Wear proper PPE and contain the work area.
- Use appropriate cleaning methods for surfaces; avoid unsafe combinations.
- Dry thoroughly and verify moisture levels after cleanup.
- Document remediation steps and plan follow-up checks.