Anti mildew: A Practical Guide to Removal and Prevention
Practical steps to remove mildew and prevent regrowth by mastering moisture control, safe cleaning, and long-term maintenance for homes.

Anti mildew cleanup combines moisture control, proper cleaning, and thorough drying. Start by locating leaks, clean surfaces with an appropriate cleaner, dry completely, and monitor humidity to prevent regrowth. If the area is large or persistent, seek professional remediation.
What anti mildew means for a healthy home
According to Mold Removal Lab, anti mildew isn’t just about cleaning surfaces; it’s about stopping the moisture that feeds mildew growth. Mildew thrives in damp, warm spots and can cause musty odors and potential health symptoms. The Mold Removal Lab team found that the most durable solutions combine moisture management with effective cleaning and thorough drying. In this guide, you’ll learn how to identify moisture sources, choose safe cleaners, and establish a maintenance routine that prevents recurrence. While household cleaners remove visible spores, addressing structural moisture is the real key to long-term success with anti mildew strategies.
Key ideas to remember:
- Moisture control is foundational
- Physical cleaning must be followed by thorough drying
- Regular checks prevent return
How mildew forms and why moisture is the driver
Mildew is a surface mold that grows on damp organic materials and thrives under stagnant air. The main driver is persistent moisture from leaks, high humidity, or condensation. Even small, unseen leaks can sustain mildew for weeks. Understanding this helps you design an effective plan: fix leaks, improve airflow, and reduce humidity to a safe level. Mold Removal Lab findings emphasize that a humidity target of 30-50% is a practical range for many homes, though it can vary with climate. This section explains how to spot humidity problems, track them with simple indicators, and integrate moisture control into daily routines. By focusing on anti mildew fundamentals, you reduce the risk to family members sensitive to indoor air quality.
Common hotspots and how to inspect them
Mildew loves bathrooms, basements, kitchens, laundry rooms, and any area with recurring moisture. Inspect corners, behind toilets, under sinks, and along window sills. Look for fuzzy growth or slimy patches, and pay attention to musty smells. A flashlight can reveal hidden colonies in dark corners; a moisture meter can quantify hidden dampness. Document findings with photos to guide remediation and track improvement over time. The goal is not only to remove visible mildew but to identify moisture sources and address them at the root. Anti mildew work succeeds through both cleaning and moisture strategy.
Safe preparation and personal protective equipment
Before you start, prep the space to minimize spread and protect your health. Wear disposable gloves, a reusable mask or respirator, eye protection, and long sleeves. Ventilate the area with open windows or a fan set to exhaust mode. Cover furniture and floors with plastic sheeting to prevent cross-contamination. Keep children and pets away from the work zone. These precautions align with general health guidelines and help reduce exposure to mold spores during cleaning.
Cleaning methods: DIY cleanup vs professional remediation
Small, well-contained mildew spots (<10 square feet) can often be managed with a DIY approach. Use a cleaner labeled for mildew, scrub with a stiff brush, rinse, and dry completely. For larger areas, complex contamination, or structural moisture issues, professional remediation may be necessary. The choice depends on spread, surface type, and whether moisture problems are addressed. The Mold Removal Lab team recommends starting with DIY steps for minor cases, but not delaying professional help for persistent or extensive growth.
Choosing cleaners: what works on mildew and what to avoid
- Hydrogen peroxide and dish soap are common DIY options for non-porous surfaces.
- Bleach can be effective on hard, non-porous surfaces but must be diluted and never mixed with ammonia or other cleaners.
- Vinegar is a mild option for some surfaces but may not kill all mildew on porous materials.
- Always follow label directions, wear PPE, and ventilate the area.
- For porous materials like drywall or fabric, cleaning may be less effective and replacement could be necessary.
Safety note: never mix cleaners. Some combinations release dangerous gases and can cause respiratory irritation.
Drying, ventilating, and moisture control after cleanup
After cleaning, dry surfaces thoroughly within 24-48 hours. Use fans, dehumidifiers, and air movers to speed drying. Keep humidity below 50% where feasible and repair any leaks promptly. Consider installing moisture barriers or insulated vapor barriers in damp spaces. Ongoing ventilation helps reduce condensation and repeated mildew cycles.
Prevention: practical steps to minimize recurrence
Prevention is easier than cure when you implement predictable routines. Regularly inspect problem areas, fix leaks promptly, and monitor humidity with a simple gauge. Use exhaust fans in bathrooms and kitchens and ensure warm, dry spaces circulate air. Maintain clean surfaces with routine cleaning to prevent new mildew growth. Mold Removal Lab's approach emphasizes long-term strategies rather than one-off cleanups.
When to call a professional and what to expect
If mildew recurs after cleaning or covers a large area, professional remediation is warranted. A licensed mold remediation contractor will assess moisture, perform containment, and restore affected areas with proper materials. Expect a written scope of work, clear cost estimates, and a timeline for remediation and follow-up checks. The Mold Removal Lab team recommends seeking help when there’s any doubt about safety or structural involvement.
Tools & Materials
- Nitrile gloves(Chemical-resistant, non-latex; replace if torn.)
- Safety goggles(Eye protection for chemical splashes.)
- N95 respirator or equivalent(Filters mold spores; ensure proper fit.)
- Soap and water(Initial debris removal before cleaners.)
- Hydrogen peroxide 3%(Alternative cleaner for non-porous surfaces.)
- Bleach (sodium hypochlorite) diluted(Follow label; never mix with ammonia.)
- Dish soap(Assist cleaning with peroxide or bleach.)
- Stiff nylon scrub brush(For textured or painted surfaces.)
- Microfiber cloths(Absorbent drying and wiping.)
- Spray bottle(Mix cleaners or rinse water.)
- Plastic sheeting/drop cloths(Contain debris and protect items.)
- Fan or dehumidifier(Promotes air movement and moisture removal.)
- Moisture meter (optional)(Helps track humidity trends.)
- Trash bags(Seal contaminated materials for disposal.)
- Painter's tape(Mask off areas during cleanup.)
Steps
Estimated time: 3-6 hours
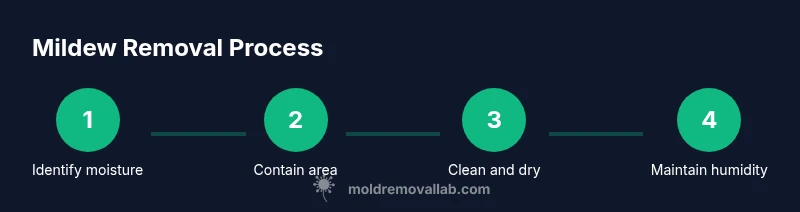
- 1
Identify moisture sources
Inspect for leaks, condensation, or high humidity. Use a moisture meter if available and document findings to guide repairs. Resolving moisture first reduces mildew spread.
Tip: Document leaks with photos and plan repairs before cleaning. - 2
Protect yourself with PPE
Put on gloves, a respirator or mask, and eye protection. Ventilate the space and limit exposure during cleaning to protect health.
Tip: Ensure a proper fit on the respirator and seal around the nose. - 3
Contain the work area
Isolate the affected zone with plastic sheeting and tape. This keeps spores from moving to clean areas and makes cleanup easier.
Tip: Label the area as restricted to prevent cross-contamination. - 4
Prepare cleaners and apply
Mix or apply cleaners per label instructions to the mildew-affected surfaces. Use a spray bottle for even coverage and avoid soaking porous materials.
Tip: Never mix cleaners; read labels for safe combinations. - 5
Scrub mildew and rinse
Scrub with a stiff brush on non-porous surfaces; rinse with clean water and wipe dry. Avoid over-wetting porous materials to prevent deeper penetration.
Tip: Work from top to bottom to prevent runoff. - 6
Dry surfaces thoroughly
Use fans and a dehumidifier to dry all cleaned areas within 24-48 hours. Moisture must be reduced to discourage regrowth.
Tip: Aim for humidity below 50%. - 7
Address ongoing moisture
Repair leaks, improve ventilation, and consider moisture barriers in damp spaces to stop recurrence.
Tip: Seal gaps around windows and pipes where condensation forms. - 8
Monitor for regrowth
Check cleaned areas weekly for signs of mildew and re-clean promptly if needed. Persistent growth indicates underlying moisture problems.
Tip: Set calendar reminders for monthly checks. - 9
Maintain long-term humidity control
Keep indoor humidity within a safe range and perform seasonal inspections on problem rooms.
Tip: Establish a routine maintenance plan and stick to it.
FAQ
What is anti mildew?
Anti mildew refers to strategies and products that stop mildew growth by removing moisture, cleaning surfaces, and maintaining dry conditions.
Anti mildew means stopping mildew by reducing moisture and cleaning, with ongoing maintenance.
Can mildew be cleaned with household bleach?
Bleach can disinfect hard, non-porous surfaces but may not be effective on porous materials and can be hazardous if misused.
Bleach can help on hard surfaces, but it’s not a universal fix and must be used carefully.
Is mildew harmful to health?
Yes, mildew can irritate the lungs and trigger allergies or asthma in some people, especially with prolonged exposure.
Yes, mildew can affect health; use PPE and ensure good ventilation.
How long does mildew remediation take?
Time depends on area size and moisture levels. Small, contained jobs may take a few hours; larger or hidden moisture issues may require days.
It depends on the size and moisture; plan for a few hours to several days if needed.
Should I hire a professional for mildew cleanup?
Consider a professional when growth is extensive, moisture problems persist, or contamination is behind walls.
If growth is big or ongoing, getting a professional helps ensure safety and thoroughness.
What humidity level helps prevent mildew?
Lower humidity helps; many homes aim for 30-50% depending on climate and season.
Aim for 30-50% humidity to reduce mildew risk.
Watch Video
The Essentials
- Control moisture to prevent mildew recurrence.
- Clean thoroughly, then dry completely within 24-48 hours.
- Address leaks and improve ventilation to sustain results.
- Use appropriate PPE and follow label instructions for cleaners.
- Seek professional help for large or persistent growth.