How to Keep Mold from Coming Back: A Practical Guide
Learn proven strategies to keep mold from returning, including moisture control, ventilation, cleanup, and when to call pros. Mold Removal Lab shares practical, safe steps for homeowners and renters aiming to keep homes healthy.

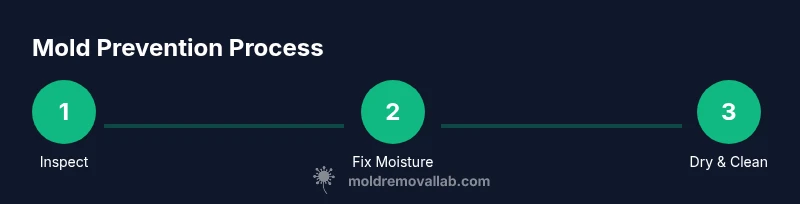
To keep mold from returning, identify and fix moisture sources, maintain indoor humidity below 50%, and use proper ventilation. Regularly inspect problem areas, repair leaks promptly, and clean affected surfaces with mold-safe products. Implement ongoing maintenance like bathroom exhaust fans, dehumidifiers in damp basements, and annual inspections. Consistent moisture control is key to preventing regrowth.
Why preventing mold regrowth matters
Mold growth thrives on moisture, and a small damp pocket can hide behind walls or under flooring for months. The health impact is real, especially for kids, seniors, and anyone with allergies or asthma. According to Mold Removal Lab, preventing regrowth is essential because persistent moisture pockets can sustain unseen mold growth and quietly affect indoor air quality. A proactive approach reduces future cleaning, renovation costs, and health risks. The Mold Removal Lab Team emphasizes that lasting success comes from consistent moisture control, rapid leak repair, and drying-out after any damp event. In practice, this means prioritizing moisture-safe design in bathrooms, basements, kitchens, and laundry areas where humidity concentrates. A simple start is to fix leaks, dry wet spots within hours, and monitor spaces that tend to stay damp.
Identify and fix moisture sources
Root-cause fixes beat cosmetic cleaning every time. Begin with a thorough check of ceilings, walls, windows, plumbing, and appliances for leaks or condensation. Even tiny drips can create enough moisture to fuel regrowth over time. Patch leaks with proper sealants, repair faulty flashing, and replace worn-out seals on doors and windows. After any water intrusion, dry the area completely using towels, fans, or a dehumidifier, aiming for a relative humidity below 50%. Document persistent moisture in a home-maintenance log to track patterns and respond quickly when new leaks appear.
Control humidity and ventilation
Humidity control is a frontline defense. Aim to keep indoor relative humidity between 30% and 50% in living spaces, and adjust lower in basements and areas prone to dampness. Use a dehumidifier in humid rooms and ensure bathroom exhaust fans vent outside rather than into attic spaces. Improve air exchange with appropriately sized exhausts and operable windows when weather allows. Regularly monitor humidity with a hygrometer and reset dehumidifiers as seasons change. Consistent humidity management makes mold spores harder to settle and multiply, reducing the chances of a second growth cycle.
Clean correctly to prevent re-contamination
When visible mold appears, wear PPE—gloves, eye protection, and a mask. For non-porous surfaces (like tile or glass), a detergent solution followed by a mold-safe sanitizer can remove surface growth. Porous materials with deep growth (drywall, carpet, ceiling tiles) often require removal and disposal to prevent hidden spores from regrowing. After cleaning, dry the area thoroughly and ventilate well to avoid residual moisture. Never mix cleaners unless the label explicitly allows it, and avoid bleach on porous surfaces as it can degrade materials and spread spores. Implement a routine cleaning plan for damp areas to minimize recurrent spores.
Structural repairs and remediation basics
If dampness recurs, structural fixes may be required. Address leaks in roofs or plumbing, improve insulation to reduce condensation, and seal gaps where moisture enters. In areas with repeated moisture, replacing affected drywall, insulation, or carpeting may be necessary to remove harboring materials. After removal, re-seal cleaned surfaces with mold-resistant paint or caulk and ensure areas are fully dry before reoccupation. These steps create a durable barrier against regrowth and protect your home from future water events.
Ongoing maintenance checklist
- Inspect for leaks or condensation monthly and after heavy rain.
- Run a dehumidifier or air conditioner in damp spaces and monitor RH levels.
- Ensure bathroom exhaust fans vent outdoors and operate during and after showers.
- Keep clutter off floors and store moisture-prone items in dry areas.
- Schedule annual inspections of roofs, plumbing, and crawl spaces.
- Log moisture events and remedial actions to detect patterns early and stay proactive.
Specific problem areas and how to handle them
Bathrooms: focus on fan ventilation, grout cleaning, and drying surfaces after use. Kitchens: fix leaks under sinks, address dishwashers, and vent range hoods. Basements and crawl spaces: monitor humidity, inspect for water intrusion, and use vapor barriers if needed. For any space with persistent dampness, reinforce sealing, improve drainage, and ensure complete dryness before reoccupation. These targeted approaches prevent conditions that mold loves, such as warmth, moisture, and poor airflow.
When to call a professional
If you notice ongoing dampness, new growth after cleaning, or mold in hidden spaces behind walls or under flooring, professional remediation is warranted. A pro can safely contain the area, test for hidden colonies, and recommend a durable moisture-control plan. Health symptoms such as persistent coughing, itchy eyes, or nasal congestion in your home may indicate that mold needs expert assessment. The Mold Removal Lab Team recommends getting a professional opinion when moisture problems persist beyond basic fixes.
Tools & Materials
- Dehumidifier(Choose a model capable of handling the space’s square footage.)
- Digital hygrometer(Place in central areas to monitor relative humidity.)
- Protective PPE(Gloves, goggles, and a respirator or N95 mask.)
- Mold-safe cleaner and sanitizer(Non-ammonia and non-chlorine products preferred for safe use.)
- Scrub brush and disposable rags(For hard surfaces and cleanup.)
- Plastic sheeting and tape(Containment if removing materials.)
- Caulk or mold-resistant paint(For resealing and finishing touches.)
- Replacement materials(Drywall, insulation, or carpet if removal is needed.)
- Two-bucket method supplies(One for cleaning solution, one for rinsing.)
Steps
Estimated time: 2-4 hours
- 1
Inspect for moisture sources
Conduct a thorough walk-through of the space to identify leaks, condensation points, and damp areas. Document findings with notes and photos to guide repairs.
Tip: Focus on hidden spots behind appliances and under sinks where moisture often hides. - 2
Stop water infiltration and leaks
Repair roof leaks, plumbing drips, and seal windows or doors where water can seep in. After repairs, dry the area quickly to prevent mold from starting.
Tip: Tighten seals and test with a moisture meter to confirm dryness. - 3
Dry out the space thoroughly
Run dehumidifiers and fans to reduce humidity below 50%. Aim for complete dryness, which may take several hours depending on the space.
Tip: Keep doors and windows closed during dehumidification for efficiency. - 4
Clean and sanitize surfaces
Use a detergent solution on non-porous surfaces, then apply a mold-safe sanitizer. Wear PPE and avoid cross-contamination by cleaning from top to bottom.
Tip: Rinse and dry surfaces completely before re-entry to prevent rewetting. - 5
Repair and reseal affected areas
Replace severely damaged porous materials and reseal with mold-resistant products. Ensure proper ventilation during curing.
Tip: Use mold-resistant paint on new drywall or patches to deter future growth. - 6
Set up ongoing monitoring and maintenance
Install monitors, log humidity, and perform seasonal checks. Reassess after heavy rains or rapid temperature changes.
Tip: Schedule reminders for quarterly checks to stay ahead of issues.
FAQ
Can mold come back after it's removed?
Yes, mold can regrow if moisture returns or if spores remain. Addressing moisture sources and maintaining dry conditions are essential to preventing regrowth.
Yes, mold can come back if moisture returns, so staying on top of humidity and leaks is key.
How long does it take to prevent mold regrowth?
Prevention depends on maintaining dry conditions and consistent maintenance. Some spaces dry within days after addressing moisture, while others may take weeks to stabilize.
Prevention time varies, but consistent moisture control is the most important factor.
Are household remedies enough to keep mold away long-term?
Home remedies can help with surface cleanup, but long-term prevention requires controlling moisture, repairing leaks, and following a regular maintenance plan.
Home remedies help, but lasting prevention needs moisture control and repairs.
What humidity level is safe for homes?
A safe range is typically 30-50% relative humidity, depending on climate and space use. Monitoring helps keep levels steady.
Aim for 30 to 50 percent humidity and monitor with a hygrometer.
When should I call a professional?
If mold keeps returning after cleaning, you have hidden growth, persistent leaks, or health symptoms, professional remediation is advised.
Call a professional if mold keeps coming back or you suspect hidden growth.
Will mold return after remodeling?
Remodeling can trap moisture if not managed properly. Ensure moisture sources are addressed and air becomes dry before closing walls.
Remodels can reintroduce moisture, so plan moisture control during and after.
Watch Video
The Essentials
- Identify moisture issues before cleaning.
- Maintain humidity under 50% in most spaces.
- Ventilate and dry areas promptly after damp events.
- Replace or seal sources of moisture when needed.
- Call a pro for persistent or hidden mold problems.