How to Keep a Mold Free Home: A Practical Guide for 2026
Learn practical, science-backed steps to prevent and remove mold at home. This Mold Removal Lab guide covers moisture control, cleaning routines, and long-term prevention.

You will learn proven strategies to prevent and remove mold in your home, with a focus on moisture control, regular cleaning, and prompt remediation of leaks. This guide covers practical steps, safe products, and a maintenance plan you can start today. Gather basic cleaning supplies, a moisture meter (optional), and a simple monitoring routine.
Understanding mold growth and why it happens
Mold spores are everywhere—indoors and outdoors. They need three things to grow: moisture, a food source (like wood, drywall, or fabric), and time. In most homes, the primary limiting factor is moisture: leaks, high humidity, condensation, and poor air circulation create damp areas where spores can settle and colonize. When you reduce moisture and improve airflow, you dramatically cut the places mold can take hold. According to Mold Removal Lab, mold growth accelerates in spaces where water intrusion remains unaddressed for days or weeks, so prompt action is essential.
Within minutes of a leak or a humid condition, surface moisture can begin to accumulate. Patches may appear on walls, ceilings, or under sinks. If you see visible mold, treat it promptly and safely, because early intervention helps prevent hidden colonies behind walls or under flooring. The environment you create—the temperature, humidity, and cleanliness—determines whether mold becomes a recurring problem or a rare event. In practice, the most effective prevention blends moisture control, regular cleaning, and proactive inspections.
The non-negotiables of mold prevention
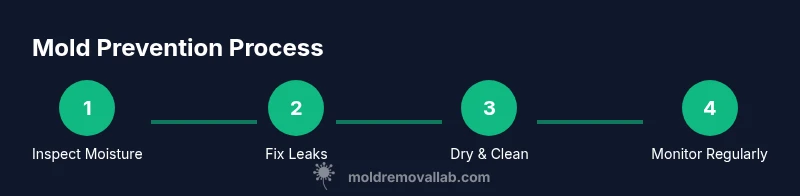
There are a few non-negotiables you should implement in every room. First, stop moisture from lingering: fix leaks quickly, dry wet areas within 24-48 hours, and maintain proper drainage around the foundation. Second, monitor humidity levels and improve ventilation, especially in kitchens, baths, laundry areas, and basements. Third, clean regularly with non-abrasive cleaners and address moldy spots as soon as they appear. Fourth, educate household members about spotting early signs of moisture problems and reporting leaks. Lastly, document all moisture events and remediation steps so you can trace patterns over time.
Mold Removal Lab analysis shows that practical moisture management and timely cleaning are the strongest predictors of mold absence in homes. By prioritizing these measures, you reduce the chances of hidden colonies taking hold behind walls, under cabinets, or in crawl spaces. The goal is to create environments that resist mold colonization, not just react after an issue appears. A proactive routine turns a potentially costly problem into a manageable maintenance task.
Practical moisture control strategies
The core strategy to keep a mold free home is to control moisture wherever it appears. Start by addressing structural sources: fix leaks in roofs, pipes, and windows; ensure proper drainage away from the foundation; and reseal areas prone to condensation. Inside, use dehumidifiers in damp spaces and run exhaust fans during showers and cooking. When possible, open windows or use cross-ventilation to bring in fresh air. Keep surfaces dry by drying with towels after use and wiping down high-moisture zones like windowsills. Regularly inspect hidden areas—behind appliances and under sinks—where moisture can accumulate without obvious signs.
In practice, combine these tactics with routine cleaning: vacuum with a HEPA filter, wipe down damp surfaces, and promptly address any musty odors that could signal hidden mold. The aim is to sustain a balance where moisture is kept at bay and surfaces stay dry long enough to prevent colonization. A clear rule of thumb is to treat any persistent dampness as a potential mold source and act quickly.
Ventilation and humidity management
Ventilation plays a critical role in preventing mold growth by moving moist indoor air outside and replacing it with drier outdoor air. Use exhaust fans in bathrooms and kitchens, and consider installing ceiling or wall vents in rooms that often feel humid. In smaller spaces, a portable dehumidifier can maintain comfortable humidity levels. If you use air conditioning, ensure coils are clean and drainage lines are clear so condensation does not accumulate.
Humidity management is about consistency, not perfection. A widely accepted approach is to aim for humidity levels that minimize condensation on cold surfaces. Monitor with a hygrometer in living areas, basements, and bathrooms. If readings drift upward, increase airflow, run the dehumidifier longer, or reduce moisture sources. Regular maintenance of ventilation equipment prevents gradual performance loss that can undermine your mold-prevention efforts.
Leaks, drainage, and building maintenance
Water intrusion is the most common driver of indoor mold. Start with a thorough inspection for leaks in roofs, walls, pipes, and appliances. Fixing leaks quickly reduces the amount of standing moisture available for mold to feed on. Check gutters and downspouts to ensure water is directed away from the home’s foundation and correct any drainage issues around patios or driveways. Inspect the basement and crawl space for dampness, and keep these areas clean, dry, and well ventilated. Seal gaps around windows, doors, and plumbing with appropriate materials to minimize moisture ingress.
If you live in a climate with seasonal humidity, adjust maintenance routines accordingly: sweep away standing water, clear basements of damp belongings, and address condensation on windows promptly. Keep a log of moisture events so patterns are easy to track and address. A proactive approach reduces the need for more extensive remediation later.
Cleaning and remediation basics
When mold is visible, start with containment to prevent spores from spreading. Wear PPE: an N95 respirator, gloves, and eye protection. Isolate the area if feasible using plastic sheeting. Clean hard surfaces with a mild detergent and warm water, then dry completely. For porous materials that have mold deeply embedded (like drywall or insulation), you may need to remove and dispose of the affected portion. Non-porous surfaces can often be cleaned and dried, but ensure you do not leave moisture behind.
After cleaning, recheck the area for moisture and dry thoroughly. If mold returns quickly, explore whether hidden moisture is persistent or if there is a hidden source like a leak. In many cases, you can prevent recurrence with a combination of improved ventilation, surface cleaning, and timely moisture mitigation. If you smell a persistent musty odor, treat it as a sign to re-evaluate your moisture strategy and cleaning routine.
Safe products and application tips
Choose cleaners that are appropriate for the surface and safe for occupants. A simple approach uses mild dish soap and warm water for routine cleaning, followed by a disinfectant only when necessary and used according to product directions. Vinegar can help with light mold on non-porous surfaces, but avoid mixing cleaners, and do not rely on vinegar alone for mold remediation. Hydrogen peroxide is another option for small, contained areas. For stubborn growth, consider EPA-registered cleaners that specify mold remediation use.
Always test cleaners on a hidden area first to avoid discoloration. Apply cleaners with a spray bottle and wipe with a microfiber cloth. Dry the surface completely to prevent regrowth. If mold has invaded porous materials, replacement is often more effective than cleaning; this reduces the risk of regrowth and avoids hazardous cleanup exposure.
Tools, devices, and monitoring
Basic tools make prevention easier. A digital hygrometer helps you keep tabs on humidity in critical spaces. A dehumidifier, portable or built into HVAC, reduces moisture levels over time. Use a moisture meter to check for dampness in walls or floors after a leak or flood. A scrub brush, spray bottle, microfiber cloths, and a bucket support cleaning tasks. For containment, plastic sheeting, tape, and sealants help isolate areas during remediation. Finally, maintain a simple log to track moisture, cleanup dates, and any repairs.
Investing in a few reliable tools saves time and reduces confusion when mold questions arise. Prioritize tools that are easy to sanitize, compatible with your surfaces, and appropriate for the space you’re treating.
Weekly and monthly checklists
Consistency is the best defense against mold. Create a simple weekly routine that includes a quick moisture scan of bathrooms, kitchens, basements, and laundry areas, plus a quick wipe-down of surfaces prone to condensation. Monthly, inspect under sinks, around appliances, and behind furniture near water sources for signs of dampness or musty odors. Document any changes and adjust your plans as needed.
A good maintenance plan should also incorporate seasonal checks—before winter heating starts, after heavy rains, and at the start of spring when humidity rises. The goal is to identify issues early before they become costly repairs. By following a steady schedule, you maintain a mold-free home with less stress and more peace of mind.
Real-world scenarios and long-term plan
In homes with recurring moisture issues, a 60-90 day review of your prevention plan can help you spot patterns. For example, a small leak under a kitchen sink that’s ignored for weeks can create a microclimate for mold; addressing it promptly reduces risk and cost. In spaces prone to humidity, such as basements or crawl spaces, a long-term plan may include installing a dedicated dehumidification system and monitoring those zones with a hygrometer.
The long-term plan you implement should be practical and scalable: tackle leaks quickly, maintain ventilation, and evaluate the need for professional remediation if mold returns despite your best efforts. The Mold Removal Lab team recommends making moisture management a daily habit, not a yearly chore, and keeping a log of improvements to track progress.
Tools & Materials
- N95 respirator or equivalent(Fit-tested if possible)
- Protective gloves(Latex or nitrile)
- Goggles or safety glasses(Eye protection during cleaning)
- Dish soap(Mild detergent for routine cleaning)
- Spray bottle(For cleaners and water)
- Scrub brush(Stiff-bristled for durable surfaces)
- Microfiber cloths(Lint-free and washable)
- Bucket(For rinsing and transport)
- Dehumidifier(Reduce ambient moisture)
- Humidity monitor / hygrometer(Track RH in key spaces)
- Plastic sheeting(Containment during remedial work)
- Tape (painter's or duct)(Seal containment and edges)
- Sealant (silicone)(Seal joints in bathrooms)
- Non-porous cleaners or EPA-registered mold cleaners(Follow label directions)
- Moisture meter (optional)(Check hidden dampness)
Steps
Estimated time: 2-6 hours
- 1
Inspect for moisture
Walk through each room to identify damp spots, condensation, and obvious leaks. Note the source and scope of moisture so you can plan targeted actions.
Tip: Mark each moisture source with tape and photograph for records. - 2
Stop the water source
Fix leaks promptly—roofs, pipes, appliances, and HVAC connections. If a leak can’t be repaired immediately, isolate the area and contain it to prevent spread.
Tip: Turn off affected water supply if safe to do so. - 3
Dry the area thoroughly
Use towels, fans, and a dehumidifier to dry surfaces. Target completion within 24-48 hours to minimize mold oportunity.
Tip: Open windows where feasible to improve airflow. - 4
Clean visible mold safely
Wipe with mild detergent and rinse, then dry completely. For porous materials, consider removal if contamination is deep.
Tip: Do not mop or scrub aggressively on fragile surfaces to avoid spreading spores. - 5
Contain and protect
Contain the area with plastic sheeting if contamination is widespread. Seal edges to prevent spores from drifting.
Tip: Avoid disturbing moldy materials unnecessarily. - 6
Repair and restore
Replace or repair damaged materials as needed. Ensure any new materials are moisture resistant in high-humidity zones.
Tip: Consider mildew-resistant paint for added protection. - 7
Improve ventilation
Install or upgrade exhaust fans and ensure good cross-ventilation in kitchens, bathrooms, and laundry rooms.
Tip: Regularly clean exhaust filters for optimal performance. - 8
Reassess moisture after cleanup
Re-measure humidity and inspect for dampness after remediation. Look for signs of lingering moisture under sinks and behind appliances.
Tip: Keep a moisture log to detect patterns. - 9
Document and monitor
Record all remediation steps, sources, and outcomes. Schedule follow-up checks monthly for the first quarter.
Tip: Use photos to compare before/after progress. - 10
Set preventive routines
Create a weekly and monthly checklist and assign responsibilities to household members to ensure consistency.
Tip: Treat prevention as an ongoing maintenance task.
FAQ
How quickly does mold grow after moisture exposure?
Mold can begin to take hold within 24-48 hours of moisture exposure if conditions are favorable. Prompt action to dry and clean damp areas dramatically reduces this risk.
Mold can start growing within a couple of days after moisture appears, so act quickly—dry the area and clean thoroughly.
Can I remove mold myself?
Small, non-porous mold growth can often be cleaned safely with proper PPE and cleaners. For larger areas or porous materials, it's safer to consult a professional remediation service.
Yes for small spots with the right gear, but for bigger areas or porous material, call a pro.
Is black mold more dangerous than other molds?
Any visible mold should be treated seriously. Some black molds can produce potent mycotoxins, but the key risk comes from moisture, spores, and exposure duration rather than color alone.
All mold should be treated with caution. If you’re unsure, it’s best to have a professional assess the area.
What humidity level should I keep indoors to prevent mold?
Aim to keep indoor humidity in the low to mid range and avoid prolonged high humidity in damp spaces. Use a hygrometer to monitor and adjust ventilation and dehumidification as needed.
Keep humidity low and steady, using a hygrometer to stay on track.
How long does it take to dry a damp area after a spill?
Drying time depends on the surface and airflow. In most homes, targeted fans and a dehumidifier can reduce lingering moisture within 24-48 hours.
Most damp areas dry within one to two days with good airflow and dehumidification.
When should I call a professional for mold concerns?
Call a professional if mold covers a large area (typically more than a few square feet), if it recurs after cleaning, or if it involves porous materials like drywall or insulation.
If the mold is extensive or keeps coming back, it’s time to call in a pro.
Watch Video
The Essentials
- Identify moisture sources and fix leaks promptly.
- Maintain low humidity and good ventilation.
- Clean and dry surfaces quickly to prevent regrowth.
- Document checks and remediation to sustain a mold-free home.