Mold Control Guide: Practical Steps for a Safer Home
Learn practical, science-backed mold control techniques for homeowners. Identify moisture sources, safely remove mold, and maintain a healthy indoor environment with Mold Removal Lab's guidance.

To achieve mold control at home, start by locating and fixing moisture sources, then safely remove visible mold, dry all surfaces within 24-48 hours, and maintain humidity below 50% to prevent regrowth. Use proper protective gear, seal affected areas, and monitor for new growth with regular inspections. This approach reduces health risks and protects building materials.
What mold control means and why it matters
According to Mold Removal Lab, mold control is fundamentally about preventing growth by managing moisture, temperatures, and airflow. When humidity remains high, or a leak drips behind walls, mold spores can settle and colonize within days. This makes moisture management the single most important strategy for a healthy home. In practice, mold control combines rapid leak repair, prompt cleanup of existing growth, and ongoing surveillance of moisture-prone zones such as bathrooms, basements, and crawl spaces. Failure to address moisture often leads to recurring problems even after cleaning, increasing health risks for occupants, particularly those with allergies or asthma. This section outlines a practical framework you can apply in any home: identify sources of moisture, fix them, clean visible mold safely, and establish a routine of monitoring humidity and ventilation. By following these steps, homeowners and renters can reduce mold exposure and protect structural materials from water damage.
Moisture management: the cornerstone of mold control
Moisture creates the environment mold needs to thrive. The first action is a moisture inventory: inspect for roof leaks, plumbing problems, damp basements, and condensation on windows. Fix leaks promptly and dry affected areas within 24-48 hours; this rapid response prevents spores from taking root. Humidity control is essential: aim to keep indoor relative humidity below 50% in most climates, and adjust for seasonal variations. Ventilation matters too: run exhaust fans in bathrooms and kitchens, and consider upgrading HVAC filtration to reduce circulating spores. Regular checks of crawl spaces and wall cavities can catch hidden moisture before it becomes a mold problem. The result is a robust moisture-control plan that reduces mold risk and buys you time to address underlying building weaknesses.
Safe cleanup: practical steps for small mold problems
Small patches of mold on non-porous surfaces can be cleaned safely with basic PPE and household cleaners. Before you begin, put on an N95 respirator, goggles, and gloves, and isolate the area with plastic sheeting to prevent spores from spreading. Clean surfaces with warm water and mild detergent; avoid dry brushing which can aerosolize spores. For non-porous surfaces, a diluted bleach solution can be used per label directions; never mix cleaners. Dry the area thoroughly after cleaning and dispose of contaminated materials in sealed bags. If mold covers a porous material like drywall or insulation, or if you have health concerns, it is safer to call a licensed remediation professional. Always verify that moisture sources have been addressed to prevent quick re-growth.
Humidity, ventilation, and indoor air quality
Humidity control and ventilation work hand in hand with filtration to protect indoor air quality. To reduce condensation, improve insulation where possible and ensure windows are properly sealed. Use exhaust fans in moisture-generating rooms, and consider a dehumidifier in damp spaces such as basements or laundry rooms. Regular filter changes and HVAC maintenance minimize circulating mold spores. For homes with persistent moisture issues, an air purifier with a true HEPA filter can complement the moisture-control plan by capturing fine particles. Remember, no single product is a cure-all; mold control is an integrated approach that addresses moisture, airflow, and cleanliness.
Long-term prevention: routines that last
Prevention relies on daily habits and periodic maintenance. Start with a monthly check of plumbing lines, roofs, gutters, and foundation for signs of moisture intrusion. Maintain landscaping to direct water away from the foundation, repair cracked seals around doors and windows, and replace damp building materials as needed. Keep indoor surfaces dry by wiping spills promptly and drying laundry promptly in a well-ventilated area. Track humidity with a simple hygrometer, and adjust dehumidification as seasons change. A consistent routine reduces the chance of mold returning and protects the home’s value and occupant health.
Inspection and testing: when a pro is helpful
Not every mold issue requires lab testing, but professional input is valuable in many scenarios. Visual inspection and humidity measurements can indicate risk and guide remediation. If you notice recurring mold after cleaning, if moisture sources are difficult to fix, or if you suspect hidden mold behind walls, schedule a professional inspection. A licensed mold assessor or remediation contractor can locate moisture sources, recommend a remediation scope, and perform post-remediation testing to confirm success. In complex environments such as HVAC systems or large basements, professional involvement improves outcomes and reduces exposure risk.
Safer products and smart substitutions
Some cleaners are more effective than others, and product selection matters for safety. Bleach can kill mold on non-porous surfaces but may not reach porous materials or hidden growth; always follow label directions and ensure good ventilation. Vinegar, hydrogen peroxide, and commercial mold cleaners offer alternatives, but results vary by surface and mold type. Avoid products that promise permanent mold elimination without addressing moisture control. Pair cleaners with moisture-reduction measures and ongoing maintenance for best results. When in doubt, choose proven products and follow label directions to minimize health risks.
Tools & Materials
- N95 respirator mask(Ensure proper fit; replace if damaged)
- Protective goggles(Eye protection against splashes and spores)
- Gloves (nitrile or latex)(Chemical resistant; use in all cleaning tasks)
- Plastic sheeting or tarps(Seal off work area to prevent spread of spores)
- Bucket and scrub brushes(Non-porous cleaning tools for surfaces)
- Detergent or mild soap(First step for cleaning; non-toxic option preferred)
- Bleach (optional, for non-porous surfaces)(Follow label directions; ensure ventilation)
- Dehumidifier or humidity monitor(Maintain RH below 50% in affected areas)
- HVAC filter upgrade (optional)(Improve filtration during remediation)
- HEPA air purifier (optional)(Use in damp spaces if available)
- Moisture meter or hygrometer(Track humidity and detect hidden moisture)
- Sealant or mold-inhibiting paint (optional)(After remediation, limit future growth)
Steps
Estimated time: 2-6 hours
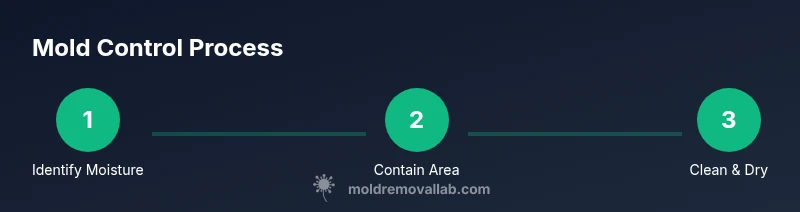
- 1
Identify moisture sources
Survey the home for roof leaks, plumbing faults, and condensation hotspots. Document locations with notes or photos and prioritize fixes based on severity. This step sets the foundation for effective mold control by targeting the root cause.
Tip: Begin at the highest risk area (bathrooms, kitchens) and work outward to trace all moisture paths. - 2
Contain the work area
Before cleaning or remediation, seal the affected zone with plastic sheeting and tape. Turn off or isolate the HVAC system to prevent spores from circulating. Containment minimizes cross-contamination during cleanup.
Tip: Label containment boundaries and avoid touching other rooms while working. - 3
Clean visible mold safely
Put on PPE, scrub non-porous surfaces with detergent and water, then rinse and dry thoroughly. Do not use abrasive methods that release spores. For porous materials, consider professional remediation instead of DIY cleaning.
Tip: Never mix ammonia with bleach and ensure good ventilation. - 4
Address moisture sources
Repair leaks, improve drainage, and fix insulation or ventilation gaps to prevent recurrence. After repairs, dry the area completely before resuming normal use.
Tip: Document repairs with photos for future reference. - 5
Lower humidity and improve airflow
Use dehumidifiers and increase ventilation in moisture-prone rooms. Maintain indoor RH under 50% and ensure continuous air exchange where possible.
Tip: Set a reminder to re-check humidity weekly during peak damp seasons. - 6
Monitor and re-test
Reassess the area after 24–72 hours of drying. If mold returns or moisture persists, escalate remediation or re-evaluate HVAC and structural integrity.
Tip: Keep a remediation log to track improvements and repeat issues.
FAQ
What is mold control?
Mold control means preventing moisture-related growth by reducing humidity, fixing leaks, and cleaning mold promptly.
Mold control is about stopping moisture so mold can't grow; fix leaks and clean up mold quickly.
How do I know if I have a moisture problem?
Look for condensation, damp spots, musty odors, or visible water damage. Use a hygrometer to measure humidity and check for leaks.
Look for damp spots, musty odors, and leaks; monitor humidity levels.
When should I hire a mold remediation professional?
If mold covers more than a small area, involves porous materials, or if you have health concerns, call a licensed mold remediation professional.
If the mold is large, persistent, or you or someone in the home has health issues, get a professional.
Can I use bleach to kill mold?
Bleach can kill surface mold on non-porous surfaces but may not reach porous materials or hidden mold; follow label instructions and ensure ventilation.
Bleach can kill surface mold on non-porous surfaces, but it may not reach hidden mold.
How often should I test for mold after remediation?
Follow your remediation professional's plan; routine visual checks and humidity monitoring are usually sufficient unless advised otherwise.
Follow the plan from the remediator; regular checks and humidity monitoring help ensure it's gone.
Watch Video
The Essentials
- Prioritize moisture control to achieve mold prevention
- Dry and clean promptly to reduce mold regrowth risk
- Ventilation and humidity management are central to long-term health
- Call a pro for large, porous, or recurring mold problems
- Regular checks prevent long-term damage and protect indoor air quality