Black Mold Mitigation: A Practical Home Guide
Learn practical black mold mitigation methods to protect health and home. This step-by-step guide covers containment, PPE, moisture control, and when to call professionals.

Goal: achieve safe, effective black mold mitigation in your home. You’ll identify mold-prone areas, confirm presence with simple tests, isolate the affected zone, use appropriate PPE, and follow step-by-step cleaning and containment practices. This guide covers DIY-safe methods for minor cases and when to call a licensed pro for larger infestations or hazardous exposure.
What is black mold and why mitigation matters
Black mold in homes is a common name for a group of moulds that thrive in damp spaces. It can appear as dark patches on walls, ceilings, or fabrics that have absorbed moisture. While not all black mold is toxic, many varieties can irritate the skin, eyes, and lungs, especially for sensitive people. Effective black mold mitigation starts with understanding moisture sources, proper containment, and safe cleaning practices. The Mold Removal Lab team emphasizes that rapid action reduces exposure risk and limits structural damage. By addressing moisture and contamination early, homeowners can minimize health symptoms, odors, and the spread of spores. For families with allergies, children, elderly residents, or individuals with respiratory conditions, mitigation is especially important. This guide will help you identify problem areas, contain the spread, clean safely, and maintain environments to prevent regrowth, while recognizing when professional help is necessary. According to Mold Removal Lab, moisture control is the cornerstone of any mitigation plan.
How mold grows in indoor spaces
Mold needs three things to thrive indoors: moisture, an organic surface, and time. In damp environments—basements, bathrooms, kitchens, or spaces with roof leaks—mold can become established quickly. Porous materials like drywall, fabric, and wood can provide a food source for spores, enabling colonies to grow behind cabinets or inside wall cavities. The Mold Removal Lab analysis shows moisture as the leading driver of indoor mold growth, making moisture control the most effective mitigation strategy. Temperature also plays a role: typical indoor ranges support growth when humidity remains high for extended periods. Understanding these drivers helps homeowners target the right remediation actions rather than chasing symptoms alone.
Health risks and who is at risk
Exposure to black mold can cause a range of symptoms, from nasal irritation and coughing to wheezing and headaches. People with asthma, allergies, or compromised immune systems, as well as young children and the elderly, are most vulnerable. Prolonged exposure in poorly ventilated spaces can worsen respiratory conditions and trigger new sensitivities. While many people recover quickly after remediation, others may experience prolonged symptoms if moisture returns or if infested materials remain in place. The Mold Removal Lab team notes that addressing moisture and improving air quality are central to reducing health risks.
Assessing severity: DIY vs professional help
Small, isolated patches on non-porous surfaces may be manageable with proper PPE and cleaning products. However, larger infestations, growth on porous materials, or mold found within HVAC systems usually require professional remediation. If you suspect mold covers wide areas, penetrates the structure, or involves common wet areas such as basements or crawlspaces, contact a licensed mold remediation specialist. Never rely on household cleaners alone to treat widespread growth, as incomplete removal can cause regrowth and further exposure. The Mold Removal Lab team advises erring on the side of caution and insisting on professional help when in doubt.
Containment and safety planning
Containment is essential to prevent spores from spreading to unaffected rooms. Use plastic sheeting and tape to seal off the work zone, close doors and vents, and create a negative-pressure environment if possible. Remove as much moisture as you safely can before cleaning to reduce airborne spores. Plan for disposal of contaminated materials in sealed bags and coordinate with household occupants to minimize exposure during the work. Remember that containment work should be done before cleaning so you don't spread spores to other areas of the home. The Mold Removal Lab guidance emphasizes proper planning as the foundation of safe remediation.
PPE and working area preparation
Before you start, put on an appropriately fitted N95 respirator, chemical-resistant gloves, eye protection, and disposable coveralls. Ensure your gloves are intact and replace any damaged PPE. Work in short, controlled bursts to limit exposure and fatigue. If cleaning in a humid space, run a dehumidifier to maintain a safe humidity level for your PPE comfort and to improve dry-time after cleaning. Pro tip: keep spare PPE and cleaning rags on hand to maintain cleanliness and reduce cross-contamination. The Mold Removal Lab team highlights PPE as your first line of defense against spores and irritants.
Cleaning strategies for different surfaces
Non-porous surfaces (tile, metal, glass) can often be cleaned with detergent and water or a mild disinfectant following manufacturer directions. Porous materials (drywall, insulation, fabric) may trap mold behind surfaces and require removal and replacement to fully remediate. Avoid over-wetting porous materials to prevent further moisture retention. For cleaning options, start with a gentle detergent and progress to hydrogen peroxide or vinegar where appropriate, avoiding mixing cleaning chemicals. Rinse, dry thoroughly, and keep the area ventilated to discourage regrowth. The right approach depends on surface type and the extent of growth.
Disposal and decontamination of materials
Contaminated materials should be sealed in heavy-duty bags for disposal and not left in living spaces. Double-bag if necessary and promptly remove waste from the home to a proper waste receptacle. After removal, clean tools and surfaces used in remediation with soap and water, then disinfect as needed. Avoid cross-contamination by changing clothes and washing hands immediately after handling infested materials. The Mold Removal Lab recommendations emphasize proper disposal to prevent spores from circulating and to minimize recontamination risk.
Moisture control: fixing leaks, ventilation, and drying
Addressing the moisture source is the only way to prevent mold return. Repair leaks in roofs, pipes, windows, and walls promptly and maintain dry, well-ventilated spaces. Use fans and dehumidifiers in damp rooms to accelerate drying after cleaning. Improve ventilation by running exhaust fans, opening windows when feasible, and ensuring HVAC systems are clean and functioning properly. Regular moisture monitoring with a hygrometer helps you see trends and notice rising humidity before mold returns. The Mold Removal Lab approach centers moisture management as the cornerstone of sustained mitigation.
Preventing recurrence: long-term maintenance
After remediation, adopt ongoing habits to keep moisture in check. Fix persistent leaks, seal gaps around plumbing, maintain a low humidity level in susceptible rooms, and routinely inspect areas with prior growth. Use washable, mold-resistant paints and ensure furnishings don't trap moisture. Keep air purifiers and dehumidifiers in place in high-risk areas as needed. Regular cleaning and prompt action when you notice new damp spots reduce the chance of regrowth. The Mold Removal Lab team underscores that prevention is easier than repeated remediation.
Common myths about black mold
Myth: All dark spots are deadly mold and require immediate professional removal. Reality: Some dark stains are non-toxic mildew or dirt; proper inspection matters. Myth: Bleach cleans everything and prevents mold growth. Reality: Bleach is not a silver bullet for porous materials and can create hazardous fumes in enclosed spaces. Myth: If you don’t see a musty odor, there isn’t mold. Reality: Odor can be faint or absent even when mold is present behind walls or under floors. The Mold Removal Lab stresses that accuracy comes from moisture testing and targeted remediation rather than assumptions.
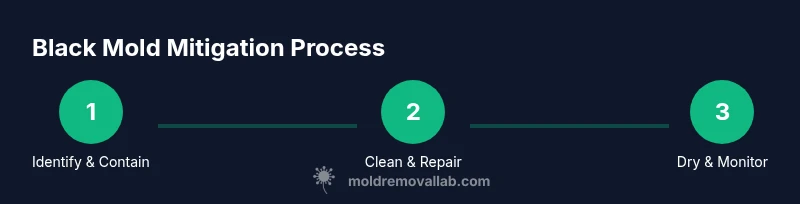
DIY remediation checklist and quick reference
- Identify moisture source and affected areas
- Contain the space and don PPE
- Select appropriate cleaning agents and surfaces to clean
- Clean, rinse, and dry thoroughly
- Remove irreparably damaged materials
- Dry and monitor for regrowth for several days after remediation
- Reassess moisture sources and ventilation regularly
This quick reference is designed to help homeowners safely start remediation, with the caveat to involve professionals for larger or uncertain cases. The Mold Removal Lab team recommends using this checklist as a starting point and tracking progress over time.
Tools & Materials
- N95 respirator(Fit-tested, preferably NIOSH-approved)
- Disposable coveralls(Ideally with hood and elastic cuffs)
- Protective goggles(Protect eyes from splashes)
- Chemical-resistant gloves(Nitrile preferred)
- Plastic sheeting and tape(For containment barriers)
- HEPA vacuum with proper filters(Useful for cleanup after containment)
- Detergent or mold cleaning solution(Follow manufacturer directions)
- Hydrogen peroxide 3% or white vinegar(For porous surfaces, test first)
- Buckets and brushes(For cleaning and rinsing)
- Dehumidifier or portable fans(To dry area and reduce moisture)
- Moisture meter or hygrometer(Track humidity levels)
- Heavy-duty trash bags(For contaminated materials)
Steps
Estimated time: 4-8 hours
- 1
Identify affected area
Locate visible mold and check for hidden growth behind walls, under sinks, and in damp zones. Document the scope with photos to guide decisions and communicate with any other occupants.
Tip: Mark boundaries with tape to keep others out of the work zone. - 2
Set up containment
Seal off the work area using plastic sheeting and tape. Close doors, vents, and HVAC registers to prevent spores from spreading to clean spaces.
Tip: Create a negative-pressure environment if possible to curb airborne spores. - 3
Put on PPE and prepare area
Don a properly fitted N95, gloves, goggles, and disposable coveralls before touching any moldy materials.
Tip: Check PPE for wear and have replacements handy for a clean swap. - 4
Address moisture source
Repair leaks, improve drainage, and reduce humidity before cleaning to prevent rapid regrowth.
Tip: Fix moisture first; cleaning without moisture control is often wasted effort. - 5
Select cleaning approach
Choose appropriate cleaners for the surface type. Avoid mixing cleaners and follow label directions for safety and effectiveness.
Tip: Test a small, inconspicuous spot first. - 6
Clean and dislodge mold
Gently scrub moldy areas from top to bottom with detergent, rinse, and dry thoroughly. Replace removed materials if necessary.
Tip: Work methodically to prevent dispersal of spores. - 7
Dispose of contaminated materials
Place moldy debris in sealed bags and remove from living areas promptly. Clean tools and surfaces after disposal.
Tip: Dispose of bags as soon as possible to minimize exposure. - 8
Dry area and monitor
Continue drying with dehumidifiers and fans. Recheck periodically for signs of moisture or new growth over the next days.
Tip: Keep humidity low and monitor damp spots regularly.
FAQ
What is black mold and should I worry?
Black mold refers to several mold species that appear dark and thrive in damp environments. It can irritate airways and skin; addressing moisture and contamination is key. If you have health concerns, seek professional guidance.
Black mold refers to several dark molds that grow in damp spaces. It can irritate airways; consider professional help if you have health concerns.
Is black mold dangerous to health?
Exposure can cause irritation and respiratory symptoms, especially for sensitive groups. Removing mold safely and controlling moisture reduces risks.
Exposure can irritate the airways, especially for sensitive people. Safe removal and moisture control reduce risks.
Can I remove black mold myself?
Small, clearly defined areas on non-porous surfaces may be tackled safely with proper PPE and cleaning agents. Large areas, porous materials, or hidden growth should be handled by professionals.
You can handle small, clearly defined areas with proper PPE, but larger or hidden growth should be done by pros.
When should I call a professional?
Call a professional if growth is extensive, involves porous materials, or affects HVAC systems or structural elements. They have specialized containment and remediation methods.
Call a pro if growth is widespread or affects structures or HVAC systems.
What moisture issues contribute to black mold?
Leaks, condensation, high humidity, and poor ventilation feed mold growth. Fixing moisture sources is essential for lasting results.
Leaks and high humidity feed mold. Fix moisture sources to prevent return.
Does bleach work for black mold?
Bleach is not effective for porous materials and can create fumes in enclosed spaces. Use surface-appropriate cleaners and consider professional help for larger jobs.
Bleach isn't a universal fix, especially on porous materials; for big jobs, get help.
Watch Video
The Essentials
- Identify moisture sources and affected zones first
- Contain the area to prevent spread of spores
- Wear proper PPE and follow safe cleaning practices
- Address moisture sources to prevent recurrence
- Consult a professional for large or uncertain jobs