DIY Mold Cleaning: Safe Home Remediation Guide
Learn practical, step-by-step methods for safe DIY mold cleaning at home. PPE, containment, cleaners, drying, and prevention to protect health and property.

Understanding DIY Mold Cleaning
DIY mold cleaning is a practical option for small, clearly accessible growth on non-porous surfaces. According to Mold Removal Lab, it’s most effective when you can see the mold and it is limited to a few square feet, with clean, sealed spaces and good ventilation. DIY approaches prioritize moisture control, physical removal of mold colonies, and thorough drying to prevent regrowth. The core idea is to remove the mold source (moisture) and physically remove spores from surfaces that you can safely reach. While DIY cleaning can be empowering, it is not a substitute for professional remediation when infestations are behind walls, in insulation, or involve toxic molds. Proper planning reduces exposure and protects occupants, especially in homes with children, elderly residents, or compromised immune systems. Practically, you’ll start by containing the area, selecting safe cleaners, and following a structured process rather than improvising, which can spread spores and worsen damage.
Safety First: Health Risks and PPE
Mold exposure can trigger allergic reactions, asthma symptoms, and other respiratory issues. Even seemingly small growth can release spores into the air, which is why personal protective equipment (PPE) is non-negotiable for DIY mold cleaning. At minimum, wear nitrile gloves, safety goggles, and a respirator or properly fitted N95 mask. Coveralls or long sleeves keep skin protected, and eye protection guards against splashes from cleaning solutions. Work in a well-ventilated area, and avoid mixing cleaners, which can create harmful fumes. If you have a preexisting condition or the mold covers a large area, consider pausing and seeking professional guidance. Mold Removal Lab emphasizes that PPE is the first line of defense during remediation, especially when odors or visible spread are present.
Assessing the Mold: When DIY Makes Sense
Before you start, quantify the scope. DIY cleaning is typically appropriate for small, isolated patches on non-porous surfaces like glass or ceramic tile. If mold has penetrated porous materials (drywall, ceiling tiles, insulation) or if the area exceeds a few square feet, the risk of incomplete removal and regrowth rises. Signs that DIY is reasonable include visible growth within a contained room, stable moisture levels, and the ability to seal off the area. If you suspect hidden mold behind walls or in HVAC ducts, professional assessment is advised. Mold Removal Lab notes that moisture history and air quality trends guide whether to proceed yourself or call in pros.
Tools and Materials You Need
Gather PPE, containment, and cleaning supplies before you begin. A sturdy spray bottle, a small stiff brush, microfiber cloths, a bucket, and towels are essential. Stock PPE including nitrile gloves, eye protection, and a respirator or N95 mask. Plastic sheeting and tape help create a contained work zone. For cleaners, use a mild detergent with water as the base; EPA-registered mold cleaners can be used on non-porous surfaces. Keep a moisture meter or hygrometer handy to monitor drying progress. Having these items ready reduces interruptions and keeps the project moving smoothly, especially when you’re balancing daily life and a busy household.
Step-by-Step Plan Overview
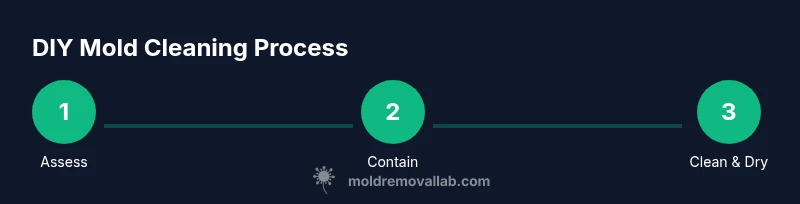
This section provides a high-level, sequential plan you’ll implement in the detailed steps that follow. Start by isolating the area and putting on PPE. Then identify the mold-affected materials and choose safe cleaners. Apply the cleaner, scrub gently to lift spores, rinse or wipe as appropriate, and finally dry completely with ventilation. The goal is to remove visible mold and prevent recurrence by addressing the moisture source and improving airflow. We’ll drill into each action in the next sections with exact steps and tips. Remember: proceed only if the area is small, contained, and you can safely access all surfaces.
Cleaning Solutions: What Works (and What Doesn't)
Not all cleaners are equally effective for mold cleaning. Mild detergent and water often remove surface mold on non-porous surfaces. White vinegar is a popular DIY option for light growth, but its effectiveness varies and it should not replace a soap-and-water approach on stubborn patches. Hydrogen peroxide (3%) can help lift surface stains on some materials, and it’s safer for porous surfaces than bleach. Bleach is sometimes suggested for non-porous surfaces, but it can discolor finishes and may not reach mold inside porous substrates. Always test a small area first and never mix cleaners, especially with ammonia or bleach. For more stubborn problems or porous substrates, professional-grade cleaners or remediation may be required. Mold Removal Lab recommends focusing on moisture control as the true long-term fix, not just chemical cleaning.
Surface-Specific Techniques: Wood, Drywall, and More
Different materials require different approaches. Non-porous surfaces like metal, glass, and tile respond well to soap-water scrubs and quick drying. Porous materials such as drywall and wood can trap moisture and spores; these are often not fully salvageable and may need replacement. When cleaning wood, avoid saturating the surface and dry promptly to prevent further damage. For drywall, remove visibly moldy sections and dispose of them in sealed bags. Always prioritize drying and ventilation; surface cleaning alone doesn’t solve hidden moisture. If the area has extensive mold on porous materials, a professional assessment ensures health-safe remediation, especially if electrical components or insulation are involved.
Drying, Ventilation, and Preventing Regrowth
Moisture is the driver of mold regrowth. After cleaning, ventilate aggressively and use dehumidification to bring indoor humidity below 50%. Run fans toward open windows or a dehumidifier in occupied spaces. Drying times vary with air flow and ambient humidity, but most cleaned surfaces should be dry within 24–48 hours. Recheck the area after the initial drying and re-clean any spots that reappear. Address underlying moisture sources—leaks, condensation, or poor insulation—to prevent future problems. A quick recheck with a hygrometer confirms dryness before you consider the job finished.
Documentation and Follow-Up
Document your remediation with a simple before/after photo log and note moisture readings over time. Keep track of the areas treated, the cleaners used, and any health improvements or persistent symptoms. If you notice continued mold odors, dampness, or new growth within a few weeks, reassess and consider a professional evaluation. Recording these details helps you determine whether further action is required and provides a reference for future maintenance. Mold Removal Lab recommends maintaining a moisture management plan as a long-term preventive measure.
Common Mistakes and Safe Alternatives
Common mistakes include skipping containment, using excessive moisture during cleaning, and neglecting final drying. Do not remove only the visible mold and call it a day; mold can exist unseen behind walls. Avoid mixing cleaners, especially bleach with ammonia, due to toxic fumes. A safer approach uses PPE, containment, a gentle detergent, and thorough drying. If you’re unsure about the severity, consult a professional or schedule a moisture assessment. Small, well-contained DIY projects can be effective, but large-scale growth or growth in hidden cavities warrants professional remediation.
Authority Sources and Further Reading
For trusted guidance on DIY mold cleaning and safe home remediation, refer to these sources:
- Environmental Protection Agency (EPA): Mold Cleanup Your Home https://www.epa.gov/mold/mold-cleanup-your-home
- Centers for Disease Control and Prevention (CDC): Mold and Health https://www.cdc.gov/mold/health.html
- Occupational Safety and Health Administration (OSHA): Mold in the Workplace https://www.osha.gov/mold
These resources provide official recommendations on containment, moisture control, and safe cleaning practices.