House Mold Clean Up: Safe, Practical Remediation Guide
A practical, step-by-step guide for homeowners to safely perform house mold clean up, control moisture, and prevent recurrence. Learn PPE, containment, cleaning methods, drying, disposal, and when to call a pro. Mold Removal Lab provides clear, actionable steps for a healthier home.

House mold clean up is safest when you contain the area, wear proper PPE, and dry thoroughly after cleaning. This guide provides the exact steps and safety notes to resolve growth and prevent recurrence. Follow moisture control, safe disposal, and documentation as you work. If mold persists or covers a large area, contact a professional.
Understanding house mold clean up and why it matters
House mold clean up is more than a quick wipe-down; it requires understanding how mold grows, where it hides, and how moisture drives the process. Mold can colonize on wood, drywall, fabric, and other organic materials when damp conditions persist. In many homes, the problem isn’t just the visible patch—it’s hidden moisture behind walls, under sinks, or inside insulation. According to Mold Removal Lab, moisture control is the single most important factor in successful remediation. The goal of house mold clean up is to remove visible growth, eliminate the source of moisture, and prevent recurrence by maintaining balanced humidity levels. Homeowners who follow a careful plan, keep records, and use appropriate cleaning methods can restore air quality and protect occupants. The keyword house mold clean up should appear naturally in this section to anchor the topic and guide readers toward safe, practical steps.
Why timely action matters for house mold clean up
Mold grows quickly when moisture is present, and waiting can allow colonies to expand into walls, ceilings, and furnishings. Early intervention reduces removal costs and minimizes health risks. In the context of household remediation, the emphasis is on controlling humidity, cleaning non-porous surfaces first, and preventing cross-contamination from porous materials. Homeowners should also be aware that some mold species release spores that irritate sensitive individuals. The Mold Removal Lab approach centers on safety, containment, and using proven cleaning agents rather than harsh, ineffective methods.
Moisture management as the backbone of house mold clean up
Any durable remediation plan starts with moisture control. If you address the root cause—leaks, condensation, or poor ventilation—the chance of regrowth drops significantly. During the cleanup, keep dehumidifiers running and ensure good air exchange, preferably with mechanical ventilation. Monitoring humidity levels helps confirm that the environment is drying and staying within safe ranges. For readers of Mold Removal Lab, this section emphasizes moisture management as the most critical step in house mold clean up and frames the rest of the process around drying and prevention.
Surface-specific strategies for house mold clean up
Not all surfaces respond the same way to cleaning. Non-porous materials like tile, glass, and metal tolerate most cleaners well and can be scrubbed with detergent or disinfectant. Porous materials such as drywall, plaster, and fabric may require removal and replacement rather than cleaning. In bathrooms and kitchens, moisture control is often the limiting factor; optimizing ventilation reduces future growth. This section outlines practical methods for different substrates, with a bias toward safer, EPA-recommended cleaners and steps that minimize airborne spores.
PPE and safety: protecting you during house mold clean up
Personal protective equipment (PPE) minimizes exposure to mold spores and cleaning agents. A properly fitted N95 respirator, disposable gloves, and eye protection are essential. Avoid mixing cleaners that can release toxic fumes, and never work in enclosed spaces without ventilation. Before starting, inspect your PPE for wear, plan escape routes in case of irritation, and take regular breaks. Safety is the foundation of effective house mold clean up, ensuring you can complete the job without compromising your health.
Cleaning methods that work for common surfaces in house mold clean up
For non-porous surfaces, apply a mild detergent and wipe, then follow with a disinfectant if needed. For stubborn mold on smooth surfaces, a diluted hydrogen peroxide solution can be effective, followed by thorough rinsing. Avoid abrasive scrubbing on painted walls, which can spread spores. On porous materials, cleaning may be insufficient; treat with care and consider removal. Always test a small area first to ensure colorfastness and material integrity when performing house mold clean up.
Drying, dehumidification, and monitoring after house mold clean up
Drying is not a one-off step; it requires sustained humidity control until surfaces and materials are dry to the touch and moisture readings stabilize. Use dehumidifiers and fans to circulate air, and keep doors open or vents on to promote airflow. Recheck the area after 24 hours and again after several days to confirm there’s no dampness or musty odor. Monitoring humidity helps catch reoccurrence early and protects indoor air quality.
Cleaning tools, waste handling, and decontamination practices
After mold clean up, clean and disinfect tools before reuse to prevent cross-contamination. Seal all contaminated waste in heavy-duty bags, label them clearly, and dispose according to local regulations. Do not reuse disposable PPE once contaminated; replace it with new gear for future cleanup. A separate bag for contaminated materials reduces the risk of spreading spores to other areas of the home. These practices contribute to safer, more effective house mold clean up.
When to call a professional and what to expect
Complex mold problems—large areas, growth behind walls, or growth in HVAC systems—warrant professional remediation. If you notice persistent odors, persistent moisture, or health symptoms among occupants, seek help promptly. Professionals can perform specialized testing, containment, and remediation designed to minimize exposure. For many homeowners, knowing when to escalate ensures safety and long-term home health, and Mold Removal Lab emphasizes that some situations require expert intervention.
Preventing future mold growth: long-term strategies for house mold clean up
Prevention is about moisture management. Fix leaks promptly, improve ventilation in damp spaces, and use exhaust fans in bathrooms and kitchens. Keep humidity levels in the range recommended by health authorities and consider periodic inspections of hidden moisture sources. By integrating these practices, you increase the odds that your house mold clean up remains effective for the long term. A proactive approach helps homeowners maintain a healthier indoor environment.
Authority sources and further reading
For readers seeking authoritative guidance, refer to:
- https://www.epa.gov/mold
- https://www.cdc.gov/mold/default.htm
- https://www.osha.gov/molds These resources provide official recommendations and safety considerations that support the house mold clean up process and ongoing moisture management.
Tools & Materials
- PPE kit (N95 respirator, disposable gloves, safety goggles)(Choose a properly fitted NIOSH-approved N95 and chemical-resistant gloves)
- HEPA vacuum cleaner(Use with certified HEPA filter to trap fine spores)
- Wet/dry vacuum(Useful for extracting excess moisture and debris from porous surfaces)
- Plastic sheeting (6 mil) and painter's tape(Create containment zones to prevent cross-contamination)
- Non-porous cleaning agents(Use EPA-approved mold cleaners or a 3% hydrogen peroxide solution)
- Detergent and clean water(Mild detergent helps remove grime without leaving residues)
- Microfiber cloths or scrub brushes(Lint-free towels help pick up spores without spreading them)
- Heavy-duty trash bags(Seal and dispose contaminated materials safely)
- Dehumidifier(Use as needed to achieve low humidity levels)
- Moisture meter or hygrometer(Helpful for objective drying progress tracking)
Steps
Estimated time: 4-6 hours
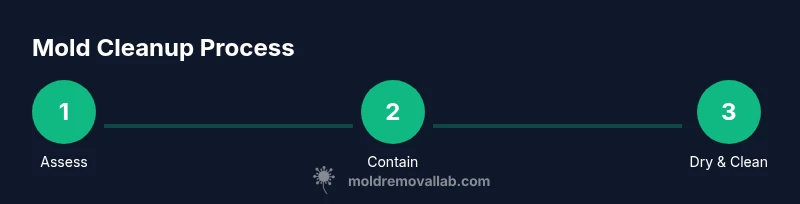
- 1
Assess affected areas
Walk the space to identify visible mold growth and associated moisture sources. Document affected materials and approximate area, and take photos for records. Note whether items are porous or non-porous to guide cleaning or removal decisions.
Tip: Create a simple map of zones (A, B, C) to track progress and containment needs. - 2
Contain the workspace
Seal off the affected area with plastic sheeting to prevent spores from migrating to other rooms. Close doors, turn off shared HVAC zones, and establish a one-way workflow from clean to dirty zones. Label containment work zones clearly.
Tip: Use overlapping seams with tape to minimize leaks and keep the area isolated. - 3
Don PPE and prep the area
Put on the N95 respirator, gloves, and eye protection before touching any mold. Remove visible debris with a dry brush if needed, then lightly mist surfaces to minimize dust during cleaning. Ventilate if possible without compromising containment.
Tip: Test PPE fit before starting; a poor seal reduces protection. - 4
Remove damaged porous materials
Carefully remove drywall, insulation, carpet, or other porous materials if they show extensive mold growth or damage. Seal these items in heavy-duty bags and dispose of them according to local regulations. Do not attempt to salvage heavily contaminated porous materials.
Tip: Avoid tearing large sections where mold can spread; bag immediately as you remove. - 5
Clean non-porous surfaces
Wipe hard, non-porous surfaces with a detergent solution, then apply an EPA-approved cleaner or 3% hydrogen peroxide. Allow surfaces to dry completely and repeat if needed for stubborn patches. Use the HEPA vacuum between wipe-down passes for fine residues.
Tip: Work from top to bottom to prevent re-soiling cleaned areas. - 6
Address porous materials (where removal isn’t possible)
For materials that cannot be removed, apply a cleaning method designed for porous substrates and consult local guidelines. If odors persist, consider professional assessment. Protect adjacent areas with containment to avoid cross-contamination.
Tip: If in doubt, consult a professional rather than attempting risky cleaning. - 7
Drying and moisture control
Run a dehumidifier and fans to promote evaporation. Monitor humidity levels until readings stabilize and surfaces feel dry to the touch. Plan for extended drying time if space is large or has poor ventilation.
Tip: Aim for humidity below the level recommended by health authorities; use readings to guide decisions. - 8
Clean tools and dispose waste
Clean tools with detergent after use and disinfect reusable items. Seal all contaminated waste in labeled bags and place in a designated exterior trash area. Remove gloves and wash hands after disposal.
Tip: Keep a separate bag for contaminated materials to avoid cross-contamination. - 9
Reopen and monitor
Gently reopen the space to normal use only after confirmation of moisture clearance. Resume ventilation and monitor for signs of renewed moisture or odor. Conduct a quick re-check after 24–72 hours of reoccupation.
Tip: Document initial post-cleanup conditions for future reference. - 10
Assess the need for professional input
If mold returns, if growth is extensive, or if moisture sources persist, call a mold remediation professional. A professional can perform targeted remediation, air quality testing, and structural repairs as needed.
Tip: Do not delay professional help in hazardous or complex cases. - 11
Prevention plan for the future
Install or upgrade ventilation, fix leaks promptly, and perform seasonal checks to maintain dryness. Consider ongoing humidity monitoring and routine cleaning practices to reduce future mold risk.
Tip: Keep a maintenance log to track humidity and moisture sources over time. - 12
Documentation and knowledge sharing
Record steps taken, materials used, and outcomes. Share photos and notes with household members so everyone understands the plan and the rationale behind actions. Documentation supports proactive prevention and health safety.
Tip: A clear record helps with future home maintenance and potential insurance claims.
FAQ
When should I start mold cleanup and when should I call a professional?
If mold covers a large area, is behind walls, or involves your HVAC system, or if you or others in the home have health concerns, contact a professional. For smaller, accessible areas with visible growth and no moisture issues, a careful DIY approach with proper PPE and containment can be appropriate.
Call a professional if growth is extensive, hidden, or linked to moisture issues. For small, visible patches with safe conditions, DIY cleanup with PPE and containment can be appropriate.
Is bleach effective for cleaning mold, and should I use it?
Bleach can disinfect non-porous surfaces but is not a cure-all for mold on porous materials. Bleach may not reach mold roots embedded in porous substrates. Use EPA-approved cleaners for most cleaning and reserve bleach for hard, non-porous surfaces when appropriate.
Bleach helps on hard, non-porous surfaces, but it isn’t a universal fix. For porous materials, rely on proper cleaners and removal if needed.
How long does a typical DIY mold cleanup take?
Time varies by area and materials. A small, contained patch could take a few hours, while larger spaces with damaged materials may extend to a full day or more. Plan for drying time after cleaning.
It depends on the space. A small area may take a few hours; larger or damaged areas can take longer, with drying steps extending the timeline.
Can I prevent mold from returning after cleanup?
Yes. Fix leaks, improve ventilation, and manage indoor humidity. Regular inspections and prompt action on moisture issues greatly reduce recurrence risk. Maintain a moisture control plan for ongoing safety.
Fix moisture problems, improve airflow, and keep humidity in check to prevent mold from returning.
What should I test for after cleanup?
Post-cleanup testing is not always necessary for small, well-controlled projects. If symptoms persist or exposure was significant, professional testing or indoor air quality assessment can confirm remediation success.
If symptoms persist or exposure was high, seek a professional test to confirm success.
The Essentials
- Isolate the affected area to prevent cross-contamination
- Moisture control is the core of remediation
- Use appropriate PPE and surface-appropriate cleaners
- Drying and monitoring prevent recurrence