Home Mold Removal: Practical Guide for a Healthier Home
Learn practical, science-backed methods to identify, clean, and prevent home mold safely. This step-by-step guide covers PPE, moisture control, cleaning approaches, and when to call professionals for complete mold remediation.

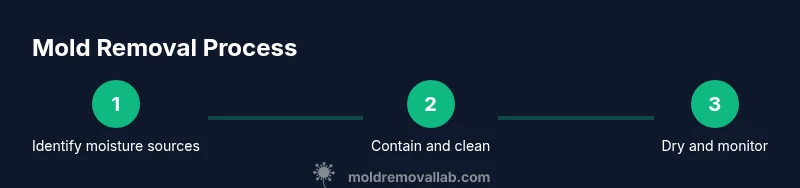
By following these steps, you will identify mold sources, prepare your space safely, remove visible mold using proven methods, and implement moisture control to prevent future growth. This guide covers PPE, cleaning approaches, and when to seek professional help, ensuring your home becomes healthier and safer. Follow the steps closely, test for hidden moisture, and document progress.
Understanding Mold and Health Risks
Mold in the home is more than a visible stain—it signals excess moisture and air quality concerns. Common species can colonize on ceilings, walls, and hidden corners, releasing spores that can irritate the eyes, nose, and lungs. For many people, exposure may trigger allergic reactions, coughing, or asthma-like symptoms, especially in damp rooms such as bathrooms and basements. When approaching home mold removal, begin with a clear plan that prioritizes safety and moisture reduction. According to Mold Removal Lab, mold exposure is linked to indoor air quality issues and can worsen chronic conditions. The Mold Removal Lab team found that moisture control is the single most effective prevention strategy, reducing recurrence when combined with careful cleaning. This section explains how to recognize mold signs and decide on a remediation path without overreacting or underestimating the task. Remember: identification and moisture control are the cornerstones of successful home mold removal.
Safety First: PPE and Safe Work Practices
Safety is the first step in any home mold removal project. Wear PPE consistently to minimize exposure and protect your household. Start with gloves that are resistant to mold residues, a properly fitted respirator or N95 mask, and protective goggles. Use disposable coveralls if contamination is extensive. Avoid touching moldy materials with bare hands, and never scrub aggressively on porous surfaces, which can aerosolize spores. Ensure fans are positioned to exhaust outdoors, not into living spaces. Never mix cleaning agents, especially bleach and ammonia, as aggressive fumes can harm your airways. A planned, low-disturbance approach reduces spread and keeps cleanup manageable. The goal is to work methodically, not frantically, so your health remains protected during home mold removal. Based on Mold Removal Lab research, a calm, well-ventilated workspace minimizes risk while you assess the area and choose appropriate methods.
How to Inspect for Mold: Visual Clues and Hidden Moisture
Visible mold is just the tip of the iceberg in home mold removal. Begin with a thorough visual inspection of problem spots—bathrooms, basements, kitchens, and any area with recurring dampness. Look for staining, unusual textures, or peeling paint that might indicate hidden growth behind walls or under flooring. A musty odor is another warning sign that moisture is present. Use a moisture meter to gauge humidity in suspected zones and consider infrared scanning to locate hidden wet areas. Mold often thrives behind drywall, under sinks, or in attic spaces with poor ventilation. Document findings with notes and photos, so you can track changes as you proceed. If you discover widespread growth or suspect structural intrusion, consider professional evaluation. This careful inspection lays the groundwork for targeted cleaning and prevention. Based on Mold Removal Lab research, moisture sources should be prioritized because they drive ongoing mold development.
Cleaning Non-Porous Surfaces: Effective Techniques
Non-porous surfaces like glass, metal, and sealed countertops respond well to traditional cleaning. Mix a mild detergent with warm water and scrub using a microfiber cloth for best results. For light mold on hard, non-porous surfaces, you can use a dilute bleach solution if local codes allow it, following the label directions and wearing PPE. Rinse with clean water and dry thoroughly to prevent new spores from taking hold. Avoid abrasive tools that could scratch surfaces and create more nooks for mold to cling to. When finished, seal the area with a gentle wipe-down to remove residual residues. Consistent cleaning of non-porous areas reduces immediate regrowth and supports longer-term home mold removal efforts. As you advance, keep air flowing and moisture in check to maintain a clean environment.
Dealing with Porous Materials: When to Replace
Porous materials—drywall, insulation, carpet padding—absorb mold deeply and may not fully recover with cleaning. If mold penetrates the material or moisture returns after cleaning, replacement is the safer option. When removing damaged drywall, bag and seal contaminated sections to prevent exposure to others in the home. Dispose of porous items in sealed bags and follow local waste guidelines. If moisture has affected structural elements like studs or framing, a professional assessment may be warranted to ensure stability and prevent recurring growth. This step is critical to avoid trapping mold behind new finishes and creating hidden reservoirs for future contamination. In many cases, replacement offers a cleaner, more durable solution for home mold removal.
Controlling Humidity and Moisture to Prevent Recurrence
Mold thrives where moisture lingers, so humidity control is essential for preventing return. Use a dehumidifier or high-capacity fans in damp rooms to maintain indoor humidity well below the moisture threshold for mold growth. Address leaks promptly—ceiling stains, water stains on walls, or damp basements require immediate attention. Improve ventilation, especially in bathrooms and kitchens, by running exhaust fans during and after water use. Ensure proper drainage away from the home foundation and keep gutters clear to prevent water intrusion. Regular checks of plumbing joints, roof lines, and crawlspaces can help you catch issues before they support mold growth. Consistent moisture management is the most reliable way to reduce the chance of new mold forming after home mold removal.
Room-by-Room Mold Removal Considerations: Bathroom, Kitchen, Basement
Bathrooms present continuous humidity; clean with non-porous cleaners and monitor fan efficiency. Kitchens benefit from range hoods and controlled humidity; wipe down surfaces daily. Basements tend to stay damp—focus on vapor barriers and vapor moisture control, plus thorough drying after any damp event. Always separate contaminated materials from clean zones and seal off work areas to prevent cross-contamination. If you must move items from an affected area, bag them carefully and avoid spreading spores through air currents. Tailor your approach to each space, and re-check moisture after a clean cycle to ensure lasting results.
When to Call a Professional Remediation
Professional remediation is advised when mold covers larger areas, recurs after cleaning, or exists behind walls and HVAC components. If you have persistent symptoms or risk factors such as pregnancy, asthma, or a weakened immune system, consider expert evaluation sooner. A licensed remediation firm can perform containment, specialized cleanup, and air filtration to address hidden mold safely. When you hire a pro, you should still control moisture and maintain ventilation to reduce the chance of re-infestation. The decision to involve a professional is a proactive step toward healthier indoor air and long-term peace of mind in home mold removal.
Documenting Progress and Verifying Results
Keep a remediation log with dates, areas treated, and changes in moisture levels and symptoms. Take photos before, during, and after cleanup to track progress and compare against initial findings. Re-test humidity and re-check for musty odors over the following weeks, especially after rainfall or seasonal changes. A final assessment should confirm that damp zones are dry and odors are minimal. This documentation helps you evaluate the effectiveness of home mold removal, informs future maintenance, and provides a reference if remediation needs to be revisited. As you close the project, remember the Mold Removal Lab team’s guidance and maintain ongoing moisture management to sustain healthier indoor air.
Tools & Materials
- Nitrile gloves(Powder-free, latex-free; disposable after use)
- N95 respirator or P100 mask(Well-fitted; consider fit testing for best protection)
- Goggles or face shield(Protect eyes from splashes and spores)
- Protective coveralls or disposable clothing(Wear in larger mold areas; remove and bag after cleanup)
- Hair cover and shoe covers(Optional but helpful in large jobs)
- Microfiber cloths(Lint-free and washable if reusable)
- Non-ammonia soap or detergent(Gentle cleaning agents for surfaces)
- Mild cleaning agents (e.g., dish soap)(Used with water for initial wipe-down)
- Spray bottle with water and mild detergent(For controlled application and dilution)
- Bucket and scrub brush (soft bristle)(For scrubbing stubborn spots on non-porous surfaces)
- HEPA vacuum with filter(For safe collection of loose spores; do not use in occupied living areas without containment)
- Plastic sheeting and painter’s tape(Create containment and protect unaffected areas)
- Drop cloths or old towels(Protect floors and furniture during cleanup)
- Dehumidifier or fans(Improve drying; direct exhaust outdoors if possible)
- Moisture meter (optional)(Helps track humidity levels over time)
- Sealable waste bags(For contaminated materials and PPE disposal)
Steps
Estimated time: 8-12 hours
- 1
Identify moisture sources
Begin by locating active leaks, condensation points, or damp conditions that sustain mold growth. Check ceilings, walls, plumbing, and crawl spaces. Document findings with photos and notes to guide cleanup and moisture control decisions.
Tip: Mark each moisture source with a colored sticker to organize cleanup priorities. - 2
Prep the work area and PPE
Contain the area with plastic sheeting to prevent spore spread. Don PPE completely before handling any moldy materials, and ensure others stay clear of the work zone.
Tip: Create a one-way flow: clean from least contaminated to most contaminated areas. - 3
Clean non-porous surfaces
Wipe surfaces with a mild detergent solution, rinse with clean water, and dry thoroughly. For stubborn mold on non-porous surfaces, a gentle bleach solution can be used if allowed by local guidelines.
Tip: Rinse and dry between sections to prevent spreading spores. - 4
Treat and dispose of porous materials
If porous materials are mold-affected and cleaning doesn’t restore them, replace them and seal the area. Bag contaminated items, seal, and remove from the home carefully to avoid cross-contamination.
Tip: Do not attempt to sand or aggressively scrub porous materials. - 5
Dry the area and improve ventilation
Run a dehumidifier and ventilation to reduce humidity and speed drying. Aim to drop ambient humidity below common mold-growth thresholds and keep the space well-circulated for at least 24 hours after cleaning.
Tip: Use a moisture meter to confirm drying progress. - 6
Reassess and monitor for recurrence
Recheck the treated zones over days to weeks. If you notice persistent dampness or new odors, revisit moisture sources and consider professional help for deeper issues.
Tip: Document changes with photos and measurements for comparison.
FAQ
What is home mold removal?
Home mold removal is the process of locating moisture sources, cleaning visible mold, and implementing moisture controls to prevent future growth. It can involve cleaning small areas or advising when professionals are needed.
Home mold removal means finding and cleaning mold sources at home while stopping moisture problems to stop mold from coming back.
How do I know if mold is dangerous?
Danger signs include visible growth over a large area, a persistent musty odor, and symptoms like congestion or coughing in sensitive individuals. If you have these signs, consider testing or professional inspection.
Look for big growth, strong musty smells, or health symptoms—these suggest you should get a professional check.
Can I remove mold myself?
Small, contained mold on non-porous surfaces can often be cleaned safely with PPE and appropriate cleaners. Large, porous, or hidden mold may require professional remediation to ensure complete removal and prevent recurrence.
You can clean small, contained mold yourself with care, but large or hidden mold should be handled by a pro.
When should I call a professional remediation service?
Seek professional help if mold covers a large area, recurs after cleanup, or is located behind walls, in HVAC systems, or other hard-to-access spaces.
Call a professional when mold is widespread or keeps coming back, especially if it’s behind walls or in the HVAC system.
What humidity level is best to prevent mold growth?
Maintaining indoor humidity below around 50% helps reduce mold growth. Use dehumidifiers and good ventilation to keep moisture in check.
Try to keep humidity under about 50% with a dehumidifier and airflow.
Are DIY methods safe for all mold problems?
DIY methods work for small, contained spots and non-porous surfaces. For larger growth, porous materials, or uncertain origins, professional remediation offers safer, more thorough results.
DIY can work for small spots, but for bigger problems, it’s safer to hire a pro.
The Essentials
- Identify moisture sources first and fix leaks promptly
- Wear proper PPE to protect health and safety
- Dry thoroughly to prevent mold recurrence
- Replace heavily contaminated porous materials when needed
- Maintain indoor humidity below recommended levels to deter mold
- Call a professional for extensive growth or hidden mold in structure