Toilet Mold Removal: A Practical Guide for Homeowners
A practical, safe approach to toilet mold removal with moisture control, DIY methods, and guidance on when to hire a pro. Learn techniques from Mold Removal Lab to keep bathrooms healthy.

Understanding toilet mold removal: why it appears and how it spreads
Toilet mold is a common bathroom challenge that thrives where moisture and warmth meet inadequate ventilation. In many homes, the toilet area experiences frequent humidity from showers, splash zones, and even toilet flushes. This combination creates a welcome environment for mold spores to settle and grow on caulk, grout, and painted surfaces. According to Mold Removal Lab, toilet mold thrives where moisture and warmth meet poorly ventilated spaces. The most common mold species found in residential bathrooms include Aspergillus, Penicillium, and Cladosporium. Identifying the exact species is usually unnecessary for DIY remediation; what matters is locating the growth, understanding the moisture source, and selecting the right cleaning approach. If you see black, green, or white patches around the base, around the seal, or on the grout, you’re likely looking at mold that has found a moisture path. In many cases, the mold is surface-level on nonporous materials, but it can seep into porous substrates if moisture persists.
Mold Removal Lab analysis shows that small patches under two square feet are generally manageable with standard cleaning methods, while larger infestations or porous materials—like drywall, wood, or untreated fabric—may require more extensive remediation or professional help. This article focuses on practical steps you can take safely, including moisture control, appropriate cleaners, and what to replace when surfaces have deteriorated. By following these steps, you can reduce health risks and keep the bathroom drier over time.
Common sources of moisture in toilet areas and how to manage them
Moisture in the toilet area comes from several sources, and tackling the root cause is essential for long-term control. Leaks from supply lines or the toilet flange can create persistent dampness behind walls or under tile. Condensation forms on cool surfaces, especially during cold mornings, and poor ventilation traps humidity in the room. If the exhaust fan is underperforming, or if the bathroom door stays closed while showering, the air exchange will be limited and mold growth accelerates. The practical fix starts with a bathroom moisture audit: look for damp spots on caulk, grout discoloration, warped paint, or musty odors. Based on Mold Removal Lab research, addressing moisture sources is the single most important step to prevent reoccurrence. Simple fixes—like tightening loose connections, sealing cracks around the toilet base, and improving airflow—can dramatically reduce mold growth. In addition to structural fixes, implement a moisture management routine: run an exhaust fan for at least 20 minutes after showering, open a window if possible, and use a dehumidifier in particularly humid bathrooms. Even small changes, such as drying the toilet and surrounding surfaces after use and wiping down the rim, can make a meaningful difference in keeping a toilet mold-free.
Safety first: PPE, ventilation, and safe handling of cleaners
Always approach toilet mold removal with safety in mind. Start by turning on adequate ventilation. Put on a properly fitted N95 respirator, protective gloves, and safety goggles to guard against mold spores and chemical splashes. Long sleeves and pants can protect skin from cleaning solutions. Work slowly and avoid stirring dust by aggressive scrubbing. If you or household members have mold sensitivities or asthma, consider postponing the cleanup or seeking professional help. According to Mold Removal Lab, consistent protection reduces exposure risk during routine bathroom mold removal. Use a dedicated set of tools for mold cleaning to prevent cross-contamination, and seal off the area with a temporary barrier if you have porous materials nearby. When choosing cleaners, use products labeled for mold remediation and avoid mixing cleaners, particularly ammonia with bleach, which can release toxic gases. Ventilation is essential: keep a window open or run an exhaust fan during and after cleaning for several hours until surfaces are completely dry. If you observe hidden mold behind drywall or under vanity, do not attempt to remove it yourself; call a qualified contractor rather than disturbing the area.
Cleaning options: soap, vinegar, hydrogen peroxide, and cleaners
There are several approaches to cleaning toilet mold, depending on the surface, size of the growth, and whether the material is porous. For nonporous surfaces like glazed tiles and acrylic fixtures, regular dish soap or mild bathroom cleaners can remove surface stains. White vinegar and hydrogen peroxide are popular home remedies because they are less harsh than bleach and tend to be effective on many common bathroom molds. Always test cleaners on a small, inconspicuous area first and avoid mixing agents, especially bleach with ammonia or vinegar, which can release dangerous gases. For tougher growth, consider products labeled for mold remediation, following the manufacturer’s directions. If mold recurs near the base of the toilet or behind the grout, the issue is often moisture-related and may require moisture control improvements or professional assessment. Mold Removal Lab recommends documenting the process with notes or photos to track progress and inform future maintenance.
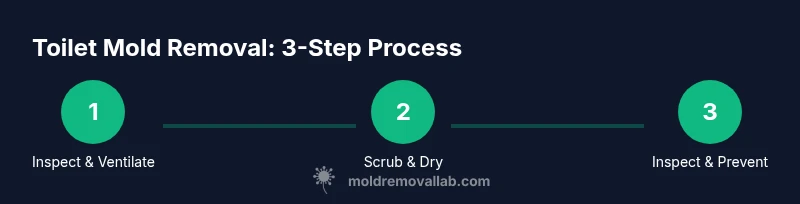
Step-by-step overview for bathroom mold removal
This section provides a high-level overview that aligns with the detailed steps, focusing on hygiene, structure, and moisture management. Start with a quick moisture check around the toilet and under any adjacent fixtures. Ventilate the space well before you begin, and don your PPE to minimize exposure. Apply your chosen cleaner to the affected surfaces, then scrub firmly with a stiff brush or sponge. Rinse with clean water and dry thoroughly with towels or a fan. Inspect the area for remaining colonies; repeat treatment if necessary, and address any cracks or gaps in caulk or grout. Finally, implement a moisture-reduction plan—improve ventilation, fix leaks, and consider sealing vulnerable seams to prevent recurrence. These practices lay a foundation for a cleaner, healthier bathroom and reduce the likelihood of future mold growth. The Mold Removal Lab team emphasizes maintaining dryness and regular checks to prevent a return.
Porous materials: when to replace rather than scrub
Porous materials such as drywall, wooden vanity sides, or certain fabrics absorb moisture and harbor mold more deeply than nonporous surfaces. If you notice persistent staining, softening, or crumbling around moldy areas, replacement is usually the safer option. Caulk around the toilet base that shows cracking or detachment should be removed and re-sealed after mold removal; failing to replace compromised caulk can invite rapid re-growth. For porous surfaces, a thorough cleaning may remove surface mold but fail to eliminate mold spores embedded in the substrate. In such cases, it is prudent to replace the affected material or consult a professional for remediation that includes containment and disposal of contaminated materials. Mold Removal Lab highlights that visible growth on porous materials is a red flag that warrants professional evaluation, especially if the mold has penetrated behind walls or into insulation.
Prevention: moisture control and routine maintenance
Prevention centers on controlling humidity and eliminating ongoing moisture sources. Ensure the bathroom has adequate ventilation—use an exhaust fan during and after showers and keep doors or windows open to promote air exchange. Regularly inspect seals around the toilet base, grout lines, and any caulk for signs of wear or moisture intrusion. Wipe down surfaces after use and consider a dehumidifier in high-humidity bathrooms. Schedule periodic checks for moisture and mold growth, especially in homes with humid climates or poor ventilation. Small, proactive actions—such as promptly repairing leaks and cleaning seals—can prevent a recurrence and maintain a healthier bathroom environment. The Mold Removal Lab team encourages a proactive mindset to preserve bathroom integrity over time.
Putting it all together: next steps and when to contact experts
Toilet mold removal is a practical task for most homeowners when the area is small, surfaces are nonporous, and moisture sources can be controlled. If you notice mold spreading beyond two square feet, if you encounter mold behind walls, or if you have persistent moisture despite your best efforts, seek professional remediation. A licensed mold professional can assess hidden moisture reservoirs, perform containment, and ensure that affected structures are properly treated and dried. The Mold Removal Lab team believes that informed homeowners know their limits; when in doubt, err on the side of safety and contact a qualified remediation specialist. For many households, a well-executed DIY approach paired with ongoing moisture control offers a balanced, cost-effective path to a mold-free bathroom.