Removing Bathroom Mold and Mildew: A Practical Guide
Learn how to safely remove bathroom mold and mildew with a proven, step-by-step plan. This guide covers moisture control, safe cleaners, protective gear, and prevention strategies to reduce recurrence.

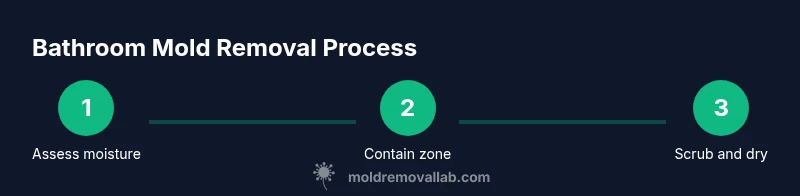
You can remove bathroom mold and mildew safely by identifying moisture sources, choosing proven cleaners, and following a step-by-step remediation plan. Start with protective gear, ventilation, and containment to prevent spread. After cleaning, dry the area completely and implement ongoing mold prevention like improved ventilation and regular cleaning. This guide also covers when to call a pro and how to safely dispose of contaminated materials.
Understanding bathroom mold and mildew
Bathroom mold and mildew thrive in damp, poorly ventilated spaces. Mold refers to fungi colonies that can grow on walls, grout, and wood; mildew is a surface-level fungus that appears as powdery patches. Both require moisture and organic material to persist. According to Mold Removal Lab, effective removal starts with stopping the moisture source and choosing cleaning methods that are safe for your surfaces. Before you begin, inspect for leaks, condensation, and hidden damp zones behind shower enclosures, under sinks, or in ceilings. Document visible growth with photos for reference and to guide any professional assessment. Replace aging grout and damaged caulk where needed, since these gaps harbor spores. By understanding the nature of the growth, you can tailor your approach: mildew on non-porous surfaces is usually easier to remove; mold inside porous materials may require replacement. The goal is dry, clean surfaces and minimized disruption to occupants.
Safety and protective gear
Safety comes first when removing mold and mildew. Wear an N95 respirator, goggles, and tight-fitting gloves to protect skin and lungs from spores and cleaning fumes. Use disposable coveralls or long sleeves to prevent contamination of clothes. Work with good ventilation, opening windows or using a exhaust fan; keep doors closed to contain the work area. Do not mix cleaning products; combining bleach with ammonia or acids can create hazardous vapors. Have a sealed trash bag ready for disposable materials and a damp cloth to minimize dust while cleaning.
Pre-clean assessment and moisture control
Begin with a quick assessment: locate the moisture source (leaky pipe, poor ventilation, or high humidity). Fix the underlying issue if possible before cleaning; otherwise the mold will return. Use a hygrometer or a simple indoor humidity check: aim for humidity below 50% to deter fungal growth. Remove standing water and improve airflow by running the exhaust fan during and after showers. Photograph the area to track progress.
Cleaning agents: options and cautions
Choose cleaners suited to the surface. For non-porous surfaces like tile and glass, a commercially available bathroom cleaner or a diluted bleach solution can be effective when used correctly. For porous materials, avoid bleach on porous wood or drywall and consider replacement instead. Hydrogen peroxide and vinegar are popular natural options, but avoid mixing them with bleach. Always test a small hidden area first. Use a spray bottle to apply the cleaner and let it sit briefly to kill spores before scrubbing.
Surface-specific cleaning methods: tile, grout, and grout sealing
For glazed ceramic tile, scrub with a stiff nylon brush and cleaner, then rinse and dry. Grout is more porous and tends to retain mold; apply cleaner and scrub, then consider sealing or regrouting to prevent future growth. After cleaning grout, seal it with a color-matched grout sealer to reduce moisture penetration. For shower tiles near caulked edges, inspect caulk for mold and replace if needed.
Dealing with porous materials: caulk, wood, and fabric
Porous materials like caulk, wood, and fabric soak up moisture and mold more deeply. If cleaning does not remove the mold from these materials, replacement is often necessary. When removing caulk, cut away the old material and clean the joint before resealing. For wood, sand and treat with appropriate products or replace if the mold is persistent. Wash bathroom textiles in hot water with detergent or discard infested items.
Handling persistent mold and hidden growth
Persistent growth or mold hidden behind walls or under fixtures requires more careful planning. If you notice recurring dampness, consider a moisture barrier and professional assessment. Do not excavate or drill into walls yourself without protective containment, as spores can spread. Document areas with photos and notes for any professional remediation plan.
Drying and ventilation: the aftercare
After cleaning, dry all surfaces completely using towels, a dehumidifier, or fans. Maintain indoor humidity below 50% and run the bathroom fan for 20-30 minutes after showers, even when not actively cleaning. Keep windows open where possible and clean the fan vents regularly to maintain airflow. This reduces the chance of regrowth and preserves the work you just completed. According to Mold Removal Lab, consistent moisture control is essential for long-term results.
When to call a professional and remediation plan
Some cases require professional remediation: large outbreaks, growth after DIY attempts, or mold that has penetrated drywall or structural materials. A licensed mold remediation contractor can assess, contain, and safely remove mold with proper containment and waste handling. They can help with moisture management strategies and remediation documentation for home insurance claims. The Mold Removal Lab Team recommends seeking professional help when mold is expanding behind walls or near electrical components, or when you observe persistent odors or health symptoms.
Tools & Materials
- Nitrile gloves(Disposable, powder-free, fits snugly)
- N95 respirator(Proper fit; replace if soiled)
- Safety goggles(Wraparound style preferred)
- Protective coveralls(Long sleeves; avoid cotton that holds moisture)
- Plastic sheeting/drop cloths(2-4 mil thickness; seal doorways)
- Masking tape(For sealing plastic sheeting)
- Plastic trash bags(HEAVY-DUTY, sealable)
- Scrub brushes (stiff nylon)(One for grout, one for smooth surfaces)
- Microfiber cloths(For wiping and drying)
- Spray bottles(Label cleaners clearly)
- Bucket(For rinse water)
- Mild bathroom cleaner(pH-neutral if possible)
- Bleach (unscented household bleach)(Use only on non-porous surfaces; follow label directions)
- Hydrogen peroxide (3%)(Alternative cleaner on certain surfaces)
- HEPA vacuum (optional)(Capture spores during cleanup)
- Replacement grout/caulk(For resealing after cleaning)
- Dehumidifier or hygrometer(Monitor and reduce humidity)
Steps
Estimated time: 4-8 hours
- 1
Gather safety gear and prep space
Put on PPE, assemble cleaning supplies, and lay down plastic to protect nearby areas. Confirm proper ventilation by opening windows or running a fan. This minimizes exposure to spores and fumes while you work.
Tip: Double-check fit of the respirator before starting; a loose seal reduces protection. - 2
Ventilate the bathroom
Increase airflow to reduce humidity during cleaning. Run the exhaust fan continuously for the duration of the project and for several hours after completion to dry surfaces.
Tip: Keep doors closed to prevent cross-contamination to other rooms. - 3
Contain the work area
Seal off the cleaning zone with plastic sheeting, taping edges to create a containment barrier. This helps prevent spores from drifting to other rooms.
Tip: Cover vent openings with filters or leave slightly ajar to avoid pressure buildup. - 4
Identify moisture sources
Check for leaks and condensation; address the root cause if possible. If leaks are present, delay extensive cleaning until repairs are made to prevent re-wetting.
Tip: Take photos of the area to document conditions before repairs. - 5
Apply cleaner to moldy areas
Spray the affected surfaces with your chosen cleaner and let it sit for the recommended contact time. This helps kill spores before scrubbing.
Tip: Never mix cleaners with bleach or ammonia; this creates hazardous gases. - 6
Scrub and rinse surfaces
Scrub with a nylon brush on tiles and grout; focus on discolored zones. Rinse with clean water and wipe dry to reduce moisture retention.
Tip: Use circular motions to dislodge mold from grout while avoiding aggressive abrasion. - 7
Address porous materials
If mold penetrates porous materials (caulk, wood, fabric), assess replacement rather than deep cleaning. Dry these areas thoroughly after treatment.
Tip: For textiles, launder on hot cycle or discard infested items. - 8
Dry thoroughly and inspect
Use towels, dehumidifier, or fans to finish drying. Recheck humidity levels to ensure the environment stays unfavorable to mold regrowth.
Tip: Keep humidity under 50% for at least several days after cleaning. - 9
Prevent recurrence
Implement ongoing ventilation and cleaning routines; reseal grout or caulk where needed. Schedule monthly checks for damp areas in the bathroom.
Tip: Install or upgrade a humidity sensor to alert you before mold can return.
FAQ
What is the difference between mold and mildew?
Mold is a fuzzy growth that penetrates porous materials, while mildew is a surface bloom on surfaces. Both require moisture to thrive and should be addressed with moisture control and appropriate cleaners.
Mold grows into porous materials, while mildew sits on the surface. Both need moisture control and proper cleaners to remove.
Is bathroom mold dangerous?
Exposure to mold can irritate airways and trigger allergies in some people. In bathrooms, rapid cleaning and drying of affected areas reduces health risks. Seek medical advice if respiratory symptoms persist.
Mold can irritate the airways and trigger allergies for some people; clean and dry promptly, and seek medical advice if symptoms persist.
Can bleach remove mold on all surfaces?
Bleach can be effective on non-porous surfaces, but it is not recommended for porous materials like wood or drywall. Always test first and never mix bleach with ammonia or acids.
Bleach works on non-porous surfaces but not on porous ones; never mix with other cleaners.
How long does it take to dry after cleaning?
Drying time varies by surfaces and airflow, but expect several hours to a full day in humid bathrooms. Use fans and a dehumidifier to accelerate drying.
Drying can take several hours to a day; improve airflow with fans and a dehumidifier.
Should I replace porous materials after mold exposure?
If mold penetrates porous materials or cleaning doesn’t remove it completely, replacement is usually the safest option to prevent regrowth.
If mold penetrates porous materials, replacement is often the safest option.
When should I call a professional?
Call a professional for large outbreaks, recurring growth after DIY efforts, or mold that appears to be structural. They can contain, remove, and document remediation for insurance.
Call a pro for large or persistent outbreaks and for structural concerns.
The Essentials
- Identify and fix moisture sources to stop mold growth.
- Use surface-appropriate cleaners and never mix chemicals.
- Contain, scrub, rinse, and dry thoroughly to prevent spread.
- Porous materials may need replacement rather than deep cleaning.
- Ongoing ventilation and humidity control reduce recurrence.