Mold in Bathroom: A Practical Guide for Homeowners
A practical, step-by-step guide for homeowners and renters to identify mold in bathroom, safely remove it, and prevent future growth with moisture control and maintenance strategies.

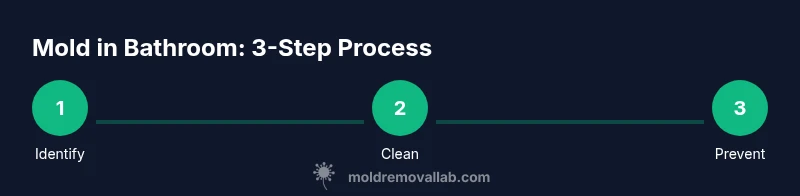
By the end of this guide, you will identify, clean, and prevent mold in bathroom safely and effectively. You’ll learn to spot common signs, differentiate mildew from harmful mold, choose the right cleaners, and fix underlying moisture issues. You’ll need basic PPE, good ventilation, and accessible cleaning supplies to start immediately.
What mold in bathroom looks like and common culprits
Mold in bathroom is typically the result of persistent moisture and insufficient ventilation. In many homes, you’ll notice dark spots on grout, ceiling corners, behind the toilet, or under sink cabinets. The most common culprits are hidden leaks, high humidity, and condensation from steamy showers. According to Mold Removal Lab, these conditions create a welcoming environment for fungal growth, especially in poorly ventilated spaces. Early visual cues include black, green, or gray patches, musty odors, and damp surfaces that never seem to dry. Understanding where mold likes to hide helps you target cleaning efforts and fix the moisture source for lasting results. Look for areas with frequent splash exposure—shower corners, tub edges, and vanity backs are frequent hot spots. If you see staining, peeling paint, or warped materials, you may be dealing with more than surface mildew and should proceed with caution. A quick moisture check around windows and grout lines can reveal hidden humidity pockets that feed mold.
Health risks and when to seek medical or professional help
Mold in bathroom can affect indoor air quality, especially for allergies, asthma, and immune-compromised individuals. Short-term exposure can trigger eye irritation, coughing, and nasal congestion, while long-term exposure may exacerbate breathing issues. If you notice persistent symptoms after cleaning, or if you involve mold growth behind walls or under floorboards, it’s wise to consult a professional. Mold Removal Lab emphasizes that addressing air quality and moisture control is central to reducing health risks. People with chronic respiratory conditions should be especially cautious and consider professional remediation for larger infestations. If you see mold growth larger than a few square feet, or if you encounter water intrusion from leaks, hire a licensed contractor or mold remediation expert promptly.
Health considerations also apply to pets and young children, who may be more sensitive to mold spores.
Safety gear and preparing the space
Before you begin any cleaning, equip yourself with proper safety gear to protect against spores and skin contact. A disposable PPE kit or at minimum an N95 respirator, nitrile gloves, and protective goggles are essential. The area should be well-ventilated; open a window and run a fan if possible, but avoid directing air into living areas. Cover nearby surfaces with plastic sheeting to contain dust and mold particles. If the mold is extensive or access is difficult, plan for temporary relocation of residents and consider hiring a professional. The goal is to minimize exposure while you work. Label and isolate the space so others don’t inadvertently spread spores to clean areas.
Containment and moisture control: setting the stage for cleanup
Containment begins with closing doors, turning off HVAC in the affected zone, and sealing vents if feasible. Use plastic sheeting to block the doorway and create a makeshift containment zone. Address the moisture source first—repair leaks, fix dripping faucets, or replace a faulty seal around a shower pan. After reducing humidity, use dehumidifiers and fans to dry the area thoroughly. Moisture control is not a one-time fix; you’ll need to maintain lower humidity levels (ideally below 50%) to prevent regrowth. Keeping surfaces dry, removing standing water promptly, and improving ventilation are key long-term strategies. Mold Removal Lab’s guidance emphasizes moisture management as the foundation of any remediation plan.
Cleaning methods by surface type: tiles, grout, and porous materials
Non-porous surfaces like ceramic tiles respond well to disinfectants. Apply a cleaner such as diluted white vinegar or hydrogen peroxide to the affected area, scrub with a brush, and rinse with water. For grout lines, a paste of baking soda and water can lift mold and brighten color after scrubbing. Porous materials, including drywall or fabric-backed panels, often require removal and replacement if the infestation is deep or persistent. Do not rely on bleach alone for porous substrates, as it may not penetrate deeply and can damage materials. Always dry thoroughly after cleaning to prevent a recurrence. The right combination of cleaning agents, physical scrubbing, and thorough drying yields the best results in bathrooms with persistent moisture exposure.
Drying and disinfection: finishing touches to prevent regrowth
After cleaning, dry the area completely using fans and a dehumidifier. Open windows if weather permits to accelerate air exchange, and monitor humidity levels over the next 24-48 hours. Apply a disinfectant like hydrogen peroxide or white vinegar to kill remaining spores, and consider a light coating of borax or baking soda to deter future growth on grout. Repaint or recaulk if you notice gaps or damaged surfaces that harbor moisture. Mold Removal Lab notes that consistent post-cleaning drying is as important as the cleaning itself; moisture control prevents a quick return of mold. Regular maintenance—such as wiping down showers after use and fixing leaks promptly—protects your investment and improves indoor air quality.
When to call a professional and what to expect
If you encounter mold growth behind walls, under flooring, or if the area remains damp after cleaning, professional remediation is warranted. Licensed mold inspectors can assess structural integrity and identify hidden moisture sources. For large infestations, or if mold covers more than 10 square feet, a professional remediation contractor is recommended. They will typically seal off the area, use HEPA-filtered equipment, and remove or treat affected materials as needed. The Mold Removal Lab team emphasizes that professional help is the safest route for substantial mold problems or uncertain sources. Early intervention, even for smaller areas, helps protect your home’s structure and indoor air quality.
Remember: DIY remediation is feasible for small, clearly bounded areas with readily accessible surfaces; larger or hidden problems should be managed by professionals.
Long-term prevention: ventilation, humidity control, and maintenance
Prevention starts with ongoing ventilation improvements and humidity management. Install or upgrade exhaust fans, run them during and after showers, and consider a dehumidifier in damp bathrooms. Clean the bathroom regularly to prevent soap scum and mineral buildup that can harbor mold, and repair leaks promptly. Check caulk and grout annually and re-seal if you see gaps or cracks. Keeping bathroom doors and windows open when weather allows also helps reduce moisture buildup. Finally, address any recurring condensation issues by adjusting room temperature or insulation around outside walls. Mold Removal Lab’s guidance highlights persistent moisture as the root cause; consistent vigilance is essential for long-term control.
Practical maintenance plan and scheduling
Create a simple monthly maintenance routine to stay ahead of mold growth. Start with a quick inspection of grout lines, corners, and behind fixtures. Wipe down surfaces after use, run the exhaust fan for at least 15-20 minutes post-shower, and monitor humidity levels with a hygrometer. Schedule a professional inspection annually if your bathroom experiences frequent humidity spikes or if you recently remodeled. A written cleaning and maintenance calendar helps you stay accountable and reduces the chance of hidden moisture turning into a mold problem. Mold Removal Lab’s approach emphasizes proactive care to keep bathrooms healthy and mold-free.
Tools & Materials
- N95 or P100 respirator(protects from inhaling spores)
- nitrile gloves(chemical resistance; avoid latex if sensitive)
- protective goggles(eye protection during scrubbing)
- disposable coveralls or old clothing(helps keep clothing mold-free)
- microfiber cloths(lint-free and reusable)
- scrub brush with stiff bristles(effective for grout and textured surfaces)
- sponge or non-scratch scrub pad(for gentle scrubbing)
- bucket(for soaking and mixing cleaners)
- spray bottles(for cleaners and disinfectants)
- white distilled vinegar(eco-friendly cleaning option)
- hydrogen peroxide 3%(antimicrobial disinfectant)
- baking soda(light abrasive and deodorizer)
- clear dish soap(mild degreaser)
- bleach (sodium hypochlorite)(use with caution; avoid on porous surfaces)
- dehumidifier or high-CCFan(dries area and reduces moisture)
- moisture meter (optional)(monitors humidity levels)
Steps
Estimated time: 2-3 hours
- 1
Identify moisture sources and PPE
Before touching mold, identify moisture sources and put on PPE. Look for leaks, condensation, or ventilation problems that keep surfaces damp. Document locations with notes or photos to guide repairs and subsequent cleaning.
Tip: Take photos of affected areas to track changes after cleaning and repairs. - 2
Contain the workspace and limit spread
Seal the area to prevent spores from spreading to clean parts of the bathroom or other rooms. Close doors, cover vents if feasible, and keep nonessential people and pets out of the zone. This containment makes cleaning safer and more effective.
Tip: Use plastic sheeting to create a simple containment barrier under the door. - 3
Stop the moisture source and start drying
Repair leaks or seal gaps around fixtures and ensure the area can dry. Run a dehumidifier and use fans to accelerate evaporation. Do not begin aggressive cleaning until moisture levels start to drop and surfaces feel dry to the touch.
Tip: If you can’t stop the moisture quickly, postpone extensive cleaning to prevent re-growth. - 4
Clean non-porous surfaces
Apply a cleaner to tiles, glass, and metal, then scrub with a stiff brush and rinse thoroughly. For grout, use a baking soda paste for stubborn spots and follow with a vinegar or peroxide rinse. Dry immediately after cleaning to limit lingering moisture.
Tip: Never mix cleaners; use one disinfectant at a time and rinse well between applications. - 5
Address porous materials
Porous materials like drywall or fabric-backed panels with mold growth often need removal or replacement. If you can remove affected items, bag and dispose of them safely. If removal isn’t possible, treat with appropriate products and ensure complete drying before re-installation.
Tip: When in doubt, replace damaged porous materials to prevent hidden mold pockets. - 6
Disinfect and deodorize
Disinfect cleaned surfaces with hydrogen peroxide or white vinegar. This step helps kill remaining spores and freshens the space. Lightly sprinkle baking soda on grout after drying as a deodorizer and to deter future growth.
Tip: Do not mix vinegar and hydrogen peroxide in the same bottle; use separate applications. - 7
Dry completely and verify
Ensure every surface is completely dry before replacing fixtures or repainting. Recheck corners and behind fixtures for any residual moisture. Use a moisture meter if available to confirm levels are under control.
Tip: Keep the space ventilated for 24-48 hours after cleaning to maintain a dry environment. - 8
Prevent future mold growth
Implement a prevention plan: improve ventilation, fix leaks promptly, and maintain indoor humidity below 50%. Schedule regular inspections and cleanings to catch problems early. Document changes and review the plan annually.
Tip: Create a simple monthly check list to stay on top of moisture and mold risk.
FAQ
What causes bathroom mold?
Bathroom mold is usually caused by persistent moisture from leaks, condensation, or poor ventilation. The combination of damp surfaces and organic materials provides a food source for mold growth, especially in corners and grout lines.
Bathroom mold is typically caused by ongoing moisture from leaks, condensation, or inadequate ventilation. The damp surfaces and grout create a food source for mold, especially in corners.
Is bathroom mold dangerous to people in the home?
Most bathroom mold is not immediately hazardous, but some species can irritate the eyes, nose, and throat, and may worsen allergies or asthma. If you have chronic symptoms or the mold is extensive, seek professional assistance and ensure proper containment and ventilation during cleanup.
Most bathroom mold isn't immediately dangerous, but some types can irritate airways. If symptoms persist or you have a large infestation, consider professional help and ventilate well during cleanup.
Can I remove mold in the bathroom myself?
DIY removal is feasible for small, clearly bounded areas with nonporous surfaces. Always use PPE, contain the area, and avoid disturbing mold behind walls. For larger infestations, porous materials, or hidden mold, a professional remediation is recommended.
You can remove small, clearly bounded mold on nonporous surfaces yourself with proper PPE, containment, and drying. For larger or hidden mold, hire a professional.
What cleaners work best for bathroom mold on tiles and grout?
Vinegar and hydrogen peroxide are effective for many bathroom mold scenarios on nonporous surfaces. For grout and stubborn spots, a baking soda paste with light scrubbing works well. Avoid bleach on porous materials and never mix cleaners.
Vinegar and hydrogen peroxide work well on nonporous surfaces. For grout, use a baking soda paste and scrub. Avoid bleach on porous materials and never mix cleaners.
How long does bathroom mold remediation take?
Simple, bounded mold cleanup can take a few hours, plus drying time. Larger jobs or complex moisture issues may require more time and professional assessment. Always plan for moisture repair and follow-up checks.
A small, bounded cleanup may take a few hours, plus drying time; larger jobs require more time and possibly professional help.
Watch Video
The Essentials
- Identify and fix moisture sources before cleaning.
- Contain the area to prevent cross-contamination.
- Use surface-appropriate cleaners and dry surfaces completely.
- Consider professional help for large or hidden mold growth.
- Implement a long-term prevention plan with ventilation and humidity control.