How to Stop Mold from Growing in Your Toilet
Learn how to stop mold from growing in toilet with a practical, step-by-step plan. Control moisture, clean safely, seal gaps, and prevent recurrence—trusted guidance from Mold Removal Lab.

How to stop mold from growing in toilet involves identifying moisture sources, drying affected areas, and applying safe cleaning steps, followed by moisture control and routine maintenance. This guide provides a clear, step-by-step plan and practical prevention tips. According to Mold Removal Lab, effective moisture management is the keystone of lasting results.
Why toilet mold forms and why it matters
Mold growth in bathrooms, and specifically around the toilet, thrives where moisture and warmth meet porous surfaces. The toilet area often experiences condensation, leaks, and high humidity, creating a perfect environment for mold to establish. While many bathroom molds are not immediately dangerous, they can trigger allergies, irritate the lungs, and lead to structural damage if left unchecked. The goal of this guide is to help you stop mold from growing in toilet by removing moisture sources, cleaning effectively, and preventing recurrence. Remember: persistent moisture is the root cause, and fixing it is the most reliable way to keep mold at bay.
Understanding what you’re dealing with: mold vs mildew
Mold and mildew look different and require different approaches. Mildew tends to be flat and powdery on surfaces, while mold can penetrate porous materials like grout and caulk. In toilets, mold often hides behind caulk, under seals, or inside grout lines. If you notice a musty smell or see black, green, or brown patches, it’s wise to treat it promptly. Quick identification helps you choose safe cleaning methods and avoid spreading spores to other areas.
Quick assessment and safety precautions
Before you start, ensure good ventilation and wear protective gear. Put on gloves, a mask, and eye protection. If you have respiratory issues or mold covers large areas, consider pausing and planning a staged remediation. Remove personal items from the bathroom and keep pets away while you work to minimize exposure. A quick moisture check with a hygrometer can help you understand the humidity levels you’re aiming for after treatment.
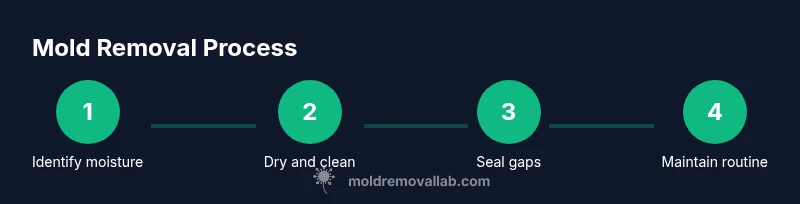
Step-by-step action plan overview
This section provides a concise overview of the major actions you’ll perform. You’ll locate moisture sources, dry and clean affected surfaces, apply a safe disinfectant, and then address structural issues like leaks or gaps in caulk. Finally, you’ll implement a prevention routine to maintain low humidity and quick drying after use. The steps below map neatly to the detailed step-by-step in the dedicated block.
Cleaning methods: safe agents and workflows
Safe cleaning agents for toilet mold include white vinegar, hydrogen peroxide, and baking soda. Vinegar is a natural antiseptic and can halt mold growth on nonporous surfaces. Hydrogen peroxide penetrates porous materials and helps kill mold spores. Never mix cleaners like vinegar and bleach, as dangerous chlorine gas can form. For grout and caulk, use a stiff brush and, if needed, a mold-resistant sealant to block future growth.
Moisture control and ventilation strategies
Addressing moisture is essential for long-term prevention. Fix any leaks immediately and consider upgrading the bathroom’s ventilation with an exhaust fan. If a fan isn’t feasible, use a portable fan after showers and wipe surfaces dry. Keep a humidity target around 40-50% and use a dehumidifier if your bathroom stays humid. Regular airflow reduces lingering moisture that fuels mold.
Long-term prevention and maintenance routines
Adopt simple daily and weekly habits to keep toilet mold at bay: dry surfaces after use, wipe down caulk lines, and clean the toilet and its surroundings weekly with a mild cleaner. Periodically inspect caulk and grout; reseal any cracks to prevent moisture from seeping behind tiles. With consistent habits and moisture control, you’ll reduce mold recurrence.
When to call a professional and what to expect
If you observe extensive growth, growth behind walls, or mold returns after your own remediation, consult a licensed mold remediation professional. A pro can perform a detailed assessment, moisture mapping, and safe containment if needed. They’ll provide a remediation plan that targets underlying moisture problems and ensures proper sealing of surfaces.
Tools & Materials
- Latex or nitrile gloves(Protect skin from cleaners and mold spores)
- N95 respirator or P100 mask(Prevents inhalation of spores)
- Safety goggles(Eye protection during scrubbing and chemical use)
- Spray bottle (multi-use)(For applying cleaners evenly)
- White vinegar (5-6%)(Natural mold inhibitor for non-porous surfaces)
- Hydrogen peroxide (3%)(Disinfects and penetrates porous areas)
- Baking soda(Mild abrasive and deodorizer)
- Mild dish soap or bathroom cleaner(General cleaning and degreasing)
- Scrub brush (stiff-bristle)(Goes into grout and seams)
- Microfiber cloths(Wipe surfaces dry and remove spores)
- Grout brush or old toothbrush(For tough grout lines)
- Caulk or mold-resistant sealant(Seal gaps after cleaning to prevent moisture ingress)
- Caulk gun(Applies sealant cleanly)
- Dehumidifier or portable fan(Helps reduce humidity in the bathroom)
Steps
Estimated time: 60-90 minutes
- 1
Shut off water and inspect for leaks
Turn off the toilet shut-off valve to prevent water flow while you work. Look for drips around the base, supply line, and wax ring. If you identify leaks, prioritize repairing them before deep cleaning to remove the moisture source.
Tip: Document any leaks with photos for a maintenance log. - 2
Dry the area and remove visible mold
Use towels or a dry cloth to absorb standing water. Wipe surfaces with vinegar solution or a mild cleaner to remove visible mold and reduce spores. Dry thoroughly to prevent re-growth.
Tip: Keep windows open or run a fan to accelerate drying. - 3
Apply safe disinfectant and scrub
Spray vinegar on non-porous surfaces and let it sit for a few minutes. For porous areas like grout, apply hydrogen peroxide and scrub with a stiff brush. Rinse with clean water and dry completely.
Tip: Avoid mixing cleaners—vinegar with bleach releases toxic gases. - 4
Address grout and caulk gaps
Inspect grout lines and caulk around the toilet for cracks. If needed, re-caulk with a mold-resistant sealant once the area is fully dry. This step prevents moisture from seeping behind tiles and supporting mold growth.
Tip: Choose silicone-based sealant for bathrooms due to moisture resistance. - 5
Improve bathroom moisture control
Upgrade ventilation or add a portable fan. Run the fan during and after showers for at least 20-30 minutes. Consider a dehumidifier if humidity remains high after cleaning.
Tip: Aim for consistent humidity below 50% in the bathroom. - 6
Establish a weekly maintenance routine
Clean the toilet rim and surrounding surfaces with a mild cleaner weekly. Dry surfaces after flushing and keep an eye on caulk lines for early signs of moisture. Keep a simple log to track improvements.
Tip: Set a calendar reminder to maintain consistency. - 7
Know when to escalate
If mold returns despite your cleaning and moisture control, or if you notice hidden growth behind walls, seek professional remediation. Professionals can perform moisture mapping and provide advanced containment.
Tip: Document recurring growth with photos to show a pro.
FAQ
Is toilet mold dangerous to health?
Most bathroom mold is not immediately dangerous for healthy individuals, but it can trigger allergies, asthma symptoms, and irritation. Prolonged exposure should be minimized, and mold should be removed promptly.
Bathroom mold can irritate allergies and asthma for some people, so it’s best to remove it promptly and keep the area dry.
Can I remove mold myself, or do I need a pro?
Small, visible mold growth on nonporous surfaces can often be addressed with household cleaners and proper protection. If mold covers large areas, is embedded in grout, or recurs after cleaning, consider hiring a licensed professional.
You can handle small, surface mold yourself, but for large areas or recurring mold, a professional is safer.
Should I use bleach on toilet mold?
Bleach can kill surface mold on nonporous surfaces but may not reach mold in porous grout. It can also damage some bathroom finishes if used improperly. Prefer hydrogen peroxide or vinegar for most toilet areas.
Bleach kills surface mold, but for grout use peroxide or vinegar to avoid damage.
How often should I inspect for mold in the bathroom?
Check the bathroom weekly for signs of moisture, condensation, or mold and address any damp spots quickly to prevent growth.
Inspect weekly and fix damp spots right away to keep mold away.
What if mold returns after cleaning?
Reassess moisture sources (leaks, humidity), re-clean using safe methods, and reseal any gaps. If it returns repeatedly, a professional assessment is advised.
If mold comes back, check moisture and gaps, then consider a pro if needed.
Watch Video
The Essentials
- Identify and fix moisture sources first
- Use safe cleaners and avoid mixing chemicals
- Seal gaps to prevent recurrence
- Ventilate bathroom to maintain low humidity
- Monitor and maintain on a weekly cycle