How to Remove Mold from Shower: Safe Step-by-Step Guide
Learn practical, non-toxic methods to remove mold from your shower, prevent regrowth, and keep your bathroom safe. Clear, actionable steps for homeowners.

Learn how to remove mold from your shower safely using proven cleaning methods, protective gear, and moisture control. This quick guide outlines essential steps, recommended cleaners, and best practices to clean mold from grout and tiles, prevent regrowth, and maintain a healthier bathroom for every household member in your home.
What mold is in showers and why it grows
Mold in showers is typically a fungus that thrives in moist environments. In bathrooms, steam, humidity, and soap scum create the perfect conditions for growth on grout, tile seams, and caulk. The Mold Removal Lab team notes that showers are high-traffic moisture zones, so routine maintenance is essential to prevent recurrence. Mold often starts as a small, invisible patch and enlarges quickly if moisture sources aren’t controlled. By understanding that moisture is the primary driver, homeowners can target the right spots: door tracks, grout lines, caulk, and shower shelves. Regular inspection after baths or showers helps catch early growth before it becomes a bigger mess. According to Mold Removal Lab, addressing moisture sources and cleaning promptly dramatically reduces recurring mold in showers. Early action keeps both surfaces and indoor air healthier for occupants.
Safety first: PPE, ventilation, and when to call a pro
Mold exposure can affect sensitive individuals, so safety comes first. Always wear a NIOSH-approved respirator or at least a high-quality disposable mask, protective goggles, and gloves. Ensure good ventilation by opening a window or running a fan to move air away from your face while you work. If you encounter extensive growth (large patches, porous materials like grout or caulk that crumble, or mold around drywall), consider professional remediation. The Mold Removal Lab Team emphasizes that significant infestations or uncertain mold types warrant expert assessment to avoid health risks and structural damage. Never disturb mold if you have asthma, allergies, or a compromised immune system until you’ve consulted a professional.
Prep and workspace setup
Before you start cleaning, prepare the space to stay organized and minimize spread. Remove personal items from the shower area, line the floor with protective towels or a drop cloth, and cover nearby surfaces with plastic sheeting if needed. Use a dedicated spray bottle for your cleaner to prevent cross-contamination with kitchen or bathroom surfaces. Keep a damp cloth handy for quick wiping, and set up a small trash bag for disposable materials. Proper prep reduces cleanup time and helps you apply cleaners more effectively. The goal is a contained, ventilated workspace where you can focus on mold removal without exposing the rest of the bathroom.
Cleaning strategies: cleaners and methods
Effective mold removal hinges on choosing cleaners that are appropriate for the surface and mold type. Common options include hydrogen peroxide or a diluted bleach solution for nonporous surfaces, white vinegar as a milder disinfectant, and baking soda for scrubbing and deodorizing grout. Steam cleaning can also help loosen mold on sealed surfaces, but it should be used with caution on delicate materials like natural stone or wallpaper. Always test cleaners in a small, inconspicuous area first to ensure colorfastness and material safety. Avoid mixing cleaners, especially bleach with ammonia or vinegar, to prevent toxic gases. The Mold Removal Lab analysis reinforces using low-toxicity agents where possible while maintaining effectiveness. For very stubborn mold or porous materials that have absorbed mold odors, replacement may be the most reliable long-term solution.
Step-by-step remediation overview
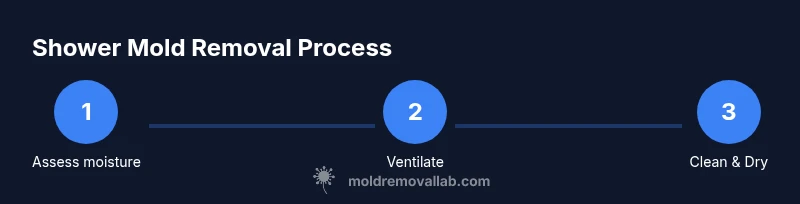
Below is a concise overview of the remediation approach. It highlights the sequence without duplicating the detailed steps found later. Start by preparing safety gear, choosing a suitable cleaner, applying it to affected areas, letting it dwell, scrubbing, rinsing, and thoroughly drying. Finish with moisture control to reduce regrowth potential. With consistent moisture management and regular inspections, you can keep your shower mold-free and protect indoor air quality over time. The Mold Removal Lab Team recommends documenting mold locations to monitor for future growth and to guide preventive actions.
Rinse, dry, and prevent mold return
After cleaning, rinse all treated surfaces with clean water to remove residual cleaner and loosened mold. Dry the area completely using towels or a squeegee, and run a fan or dehumidifier to speed up drying, especially in humid climates. Re-caulk or seal gaps if caulk shows mold damage, and consider replacing porous materials such as shower grout if it is degraded. To prevent recurrence, maintain low humidity (ideally below 50%) and improve ventilation: leave a vent fan running longer after showers, fix leaks promptly, and clean surfaces regularly with a quick disinfectant. Consistent moisture control is the most reliable defense against mold returning.
When to call a professional
If you find mold growing behind tiles, behind caulk, or if the shower area has extensive water damage, professional remediation is advised. Black mold or mold covering large areas can indicate hidden moisture problems that require structural assessment and specialized cleaning methods. If you are unsure about mold type or if anyone in the home has respiratory issues, consult a licensed mold remediation specialist. The Mold Removal Lab Team notes that professional assessment leads to safer cleanup, appropriate containment, and fewer repeated outbreaks.
Authoritative sources and further reading
For more guidance, consult reputable sources:
- https://www.epa.gov/mold
- https://www.cdc.gov/mold/dampness_severe_mold.html
- https://www.osha.gov/mold
These resources provide official guidance on mold health risks, remediation strategies, and safety practices to prevent mold growth in moisture-prone areas like showers.
Tools & Materials
- N95 respirator or higher-grade mask(Essential for breathing protection during cleaning)
- Protective gloves(Nitrile gloves recommended)
- Safety goggles or face shield(Protect eyes from splashes)
- Spray bottles (at least two)(One for cleaner, one for water/rinse)
- Stiff-bristled brush(For grout and tile surfaces)
- Scrub sponge or microfiber cloths(For wiping and finishing)
- Bucket(Optional for rinsing workflow)
- Old towels or rags(Dry surfaces thoroughly)
- Plastic sheeting or painter's tape(Containment around area)
- Fan or dehumidifier(Promotes air movement and drying)
- Moisture meter or hygrometer(Helpful to monitor humidity levels)
- Mild all-purpose cleaner or 3% hydrogen peroxide(Choose a non-ammonia option)
- White vinegar (optional)(Mild disinfectant for nonporous surfaces)
- Baking soda (optional)(Deodorizes and scrub aid)
Steps
Estimated time: 45-90 minutes total, plus additional drying time as needed
- 1
Put on PPE and ventilate
Don your N95 mask, goggles, and gloves before touching any moldy areas. Open a window or run an exhaust fan to create airflow and reduce inhalation risk. This initial protection minimizes exposure to spores.
Tip: Ventilation also helps dry surfaces faster after cleaning. - 2
Protect surrounding surfaces
Cover nearby fixtures with plastic and remove loose items from the shower to prevent contamination. Keep cleaning contained to the affected area to avoid spreading mold spores.
Tip: If you cannot seal the area, perform work in stages and seal off as you go. - 3
Choose a cleaning agent and apply to affected areas
Select a safe cleaner: either 3% hydrogen peroxide, a diluted bleach solution for nonporous surfaces, or white vinegar for milder cleaning. Apply generously to moldy grout and tiles, ensuring full coverage.
Tip: Test cleaners on a small patch first to verify colorfastness. - 4
Let cleaner dwell
Allow the chosen cleaner to sit on the moldy areas for several minutes as recommended by the product label. This dwell time helps break down mold bonds before scrubbing.
Tip: Do not rush this step; dwell time is critical for effectiveness. - 5
Scrub mold away
Scrub the treated surfaces with a stiff brush to lift mold from grout lines and tiles. Focus on seams and caulk where mold often hides and regrows.
Tip: Use circular motions and apply steady pressure without damaging the surface. - 6
Rinse and dry thoroughly
Rinse all cleaned areas with clean water to remove residue. Thoroughly dry with towels and run a fan or dehumidifier to reduce moisture quickly.
Tip: Keep surfaces dry for at least 24-48 hours to discourage regrowth. - 7
Inspect and maintain moisture control
Recheck the area after a day or two for any remaining mold and address moisture sources. Regular cleaning and ventilation are key to long-term prevention.
Tip: Consider resealing grout or caulk if it shows signs of wear. - 8
Seal or repaint if needed
If mold recurs on grout or caulk, you may need to replace those materials or apply a mold-resistant sealant. Do not delay resealing if there are visible gaps.
Tip: Choose mold-resistant products designed for bathrooms.
FAQ
What causes mold in showers?
Mold in showers grows where moisture lingers, especially on grout, caulk, and behind tiles. Regular steam and humidity create an ideal habitat, so controlling moisture is the key preventive step.
Mold grows where moisture hangs around, so controlling humidity is the best preventive step.
Is bleach safe for mold in a shower?
Bleach can be effective on nonporous surfaces, but it should be used with proper ventilation and never mixed with ammonia or vinegar. It may not reach mold that has penetrated porous materials.
Bleach can help on nonporous surfaces if you ventilate well and don't mix cleaners.
DIY vs professional remediation?
Small, surface-level mold on nonporous surfaces can often be addressed by homeowners. Larger infestations, porous materials, or hidden mold behind walls should be handled by professionals.
If it's just a small area on nonporous surfaces, you can do it yourself; big or hidden mold should get a pro.
How long does removal take?
Removal time depends on extent and surfaces. Minor mold may take under a couple of hours, while larger areas or porous materials could extend into several hours over multiple days with drying time.
Time varies with how large the area is and what surfaces are affected.
What if mold returns after cleaning?
If mold returns, reassess moisture sources, check for leaks, improve ventilation, and re-clean using a more thorough approach. In persistent cases, consult a professional to address underlying issues.
If it comes back, re-evaluate moisture and ventilation and consider a pro if it keeps returning.
Do I need to remove tiles or re-grout?
Removal of tiles or re-grouting is usually unnecessary for small patches, but mold in grout and caulk that crumbles should be replaced. For porous materials that have absorbed mold, replacement is often the best option.
Sometimes you just replace the grout or caulk; if the material is damaged, replacement is best.
Watch Video
The Essentials
- Inspect moisture sources and fix leaks promptly.
- Wear proper PPE and maintain ventilation during cleaning.
- Choose non-toxic cleaners when possible and avoid mixing chemicals.
- Dry thoroughly and improve bathroom airflow to prevent regrowth.
- Know when to call a professional for large or persistent mold problems.