What Kills Mold in Shower: A Practical Guide
Learn proven methods to remove and prevent mold in your shower. This guide covers safe cleaners, step-by-step instructions, maintenance tips, and when to call a pro, based on Mold Removal Lab analysis, 2026.

Identify the mold source in your shower, improve ventilation, and apply an effective cleaner to kill the mold. Use proven options like hydrogen peroxide or diluted bleach, scrub thoroughly, and dry all surfaces completely. Then implement ongoing maintenance to prevent regrowth. This quick approach minimizes spread, protects indoor air quality, and buys time to fix underlying moisture issues.
Understanding Shower Mold and Why Bathrooms Are Prone
Shower mold grows where moisture lingers. In bathrooms, warm humidity combined with limited sunlight and porous grout creates a perfect environment for mold spores to take hold. Grout lines, caulk, and tile seams are especially vulnerable because water often hides in tiny crevices. Over time, routine showers can deposit soap scum and organic residue that feed mold growth, turning a routine cleaning into a maintenance challenge. According to Mold Removal Lab, bathrooms experience higher humidity levels than other living spaces, and inadequate ventilation is a leading driver of persistent mold in showers. The good news: with a clear plan, you can break the cycle by reducing moisture, cleaning thoroughly, and sealing vulnerable joints. Recognizing early signs — dark spots, musty odors, or damp walls — helps you act before mold penetrates deep into grout or behind tiles. In many cases, quick surface cleaning coupled with moisture control is enough to restore a shower to a safe, hygienic condition. Remember, consistency matters more than intensity.
The Most Effective Treatments: What Kills Mold in Shower
There are several cleaners commonly recommended for shower mold. Hydrogen peroxide at 3% is a color-safe option that disinfects without harsh fumes and is effective on non-porous surfaces like ceramic tile and enamel. Spray the area, let it sit for 10-15 minutes, then scrub and rinse. Bleach is another powerful option for non-porous surfaces; always dilute and never mix with ammonia. Bleach can degrade grout over time, so use sparingly and rinse thoroughly. White vinegar is milder and can slow mold growth when used regularly, but it is not a cure-all for established colonies, particularly on porous stone or cement grout. Baking soda acts as a gentle abrasive and deodorizer; combine with a little water to form a paste for grout lines. For persistent or porous surfaces, enzyme-based cleaners or professional-grade mold removers may be more effective. After cleaning, dry thoroughly and address the moisture source to prevent regrowth. This section aligns with Mold Removal Lab’s guidance on safe, effective mold remediation.
Safety and Cleaning Protocols: How to Apply Cleaners Safely
Safety comes first when cleaning mold. Wear PPE: nitrile gloves, goggles, and a mask (N95 or respirator) to protect from spores and chemical fumes. Ventilate the space by turning on exhaust fans or opening a window. Never mix cleaners. If you’re using bleach, vent the area and avoid combining with ammonia or acids. Start with a small test area to ensure the cleaner won’t discolor surfaces. Apply cleaners to the moldy area using a spray bottle and let dwell for the recommended time before scrubbing. Use a dedicated scrub brush for grout lines; keep towels or microfiber cloths handy to capture debris. Rinse surfaces with clean water and dry immediately with a fan or dehumidifier. Monitor for regrowth over the next few days, repeating cleaning if necessary. If mold returns quickly, it may indicate hidden moisture behind walls or under flooring.
Prevention and Maintenance: Keeping Mold Away
Prevention is easier than remediation. Improve bathroom ventilation with a rated exhaust fan that runs during and after showers for at least 15-30 minutes. Use a dehumidifier in humid climates or during damp seasons. Wipe down shower walls after use to remove moisture and soap scum. Repair leaks promptly, fix cracked tiles, and re-caulk where needed. Sealants and grout should be mold-resistant if possible, but routine cleaning remains essential. Regular cleaning schedules—at least weekly for high-humidity bathrooms—help catch signs early. Consider applying a mold-resistant sealant to grout lines after cleaning to slow moisture penetration. Replace any soaked or deteriorated caulk, as mold can root behind it. By combining moisture control, routine cleaning, and timely repairs, you can keep mold from returning and protect indoor air quality.
When to Seek Professional Help
Some situations are beyond DIY remediation. If mold covers a large area, recurs after cleaning, or you suspect hidden growth behind walls, call a licensed mold remediation professional. A pro can perform a thorough inspection, identify moisture sources, and use containment methods to prevent spread. If you have health concerns or allergies, limit exposure until mold is addressed. Professionals can also advise on whether structural repairs, such as re-grouting or replacing damaged caulk, are necessary. While DIY methods can fix surface mold, pro remediation ensures comprehensive treatment and reduces the risk of recontamination.
Tools & Materials
- Heavy-duty rubber gloves(Protect skin from cleaners)
- Goggles or safety glasses(Shield eyes from splashes)
- N95 mask or respirator(Protect lungs from spores)
- Spray bottle(For applying cleaners)
- Scrub brush (firm bristles)(Grout lines and tile seams)
- Microfiber cloths(Wipe and dry surfaces)
- Hydrogen peroxide (3%)(Disinfectant on non-porous surfaces)
- Bleach (sodium hypochlorite)(Use only if appropriate; follow label)
- White vinegar(Mild disinfectant for mild cases)
- Baking soda(Mild abrasive deodorizer)
- Enzyme cleaner(Good for organic residue)
- Fan or dehumidifier(Help drying and moisture control)
- Mold-resistant caulk/sealant(Seal joints after cleaning)
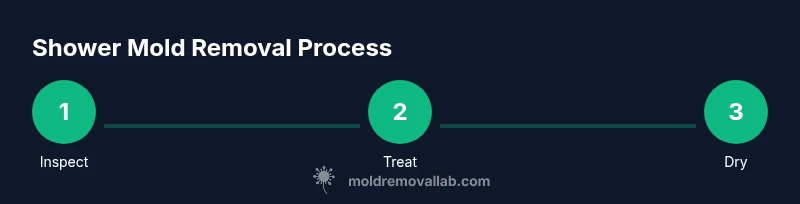
Steps
Estimated time: 30-60 minutes
- 1
Inspect and identify mold sources
Begin by examining all shower surfaces—tiles, grout, caulk, and behind doors or shelves. Look for visible mold, musty odors, and damp patches. Take photos to document extent and plan repairs. This helps you distinguish active growth from surface staining.
Tip: Document areas with mold and moisture; map out sources that need repair. - 2
Ventilate and prepare the area
Open windows or switch on exhaust fans; remove towels and personal items from the shower area; ensure good airflow. Put on PPE before touching moldy surfaces. If possible, isolate the bathroom from other living spaces during cleaning.
Tip: Ventilation reduces inhalation risk and speeds up the cleaning process. - 3
Apply cleaner to affected areas
Choose a cleaner based on surface type. Spray hydrogen peroxide on non-porous surfaces or use a diluted bleach solution as appropriate. Let the cleaner sit for several minutes per product instructions, then begin scrubbing the moldy areas. Avoid applying cleaners to porous stone or damaged surfaces where mold may be hiding.
Tip: Test a small area first to verify there is no surface damage. - 4
Scrub, rinse and dry surfaces
Scrub mold-prone areas with a firm-bristle brush, focusing on grout lines and seams. Rinse with clean water and dry completely using a fan or dehumidifier. Wipe remaining moisture with microfiber cloths to prevent residual dampness.
Tip: Thorough drying is critical to stop regrowth. - 5
Seal, monitor and maintain moisture control
Re-caulk if needed and seal grout with mold-resistant material after surfaces are completely dry. Keep the bathroom dry by running the exhaust fan after showers and addressing leaks promptly. Check the area again within 24–48 hours to ensure no new dampness appears.
Tip: Regular maintenance reduces recurrence and protects indoor air quality.
FAQ
What kills mold in shower?
Mold in showers is effectively killed by proper disinfection and moisture control. Hydrogen peroxide and diluted bleach are common options; bleach is strong but can damage surfaces. Vinegar alone may not remove entrenched mold on grout.
Hydrogen peroxide or diluted bleach work, but you must ventilate and dry the area to prevent regrowth.
Is vinegar effective for shower mold?
White vinegar has antimicrobial properties but is generally not enough for established mold on porous grout. It can help slow growth on non-porous surfaces.
Vinegar can slow mold growth, but it may not remove established mold on grout.
Should I replace caulk after cleaning mold?
If caulk shows mold after cleaning or has deteriorated, replace with mold-resistant caulk to prevent future growth.
If the caulk is moldy or damaged, replace it to prevent future growth.
How long does it take for cleaned areas to dry?
Drying times vary with airflow. In a well-ventilated bathroom, visible surfaces can dry within a few hours; hidden moisture behind walls may take longer.
Most showers dry in a few hours with good airflow.
Can mold return after cleaning, and why?
Yes, if moisture sources aren’t addressed. Persistent dampness behind walls or leaks can cause rapid regrowth after cleaning.
Mold can come back if moisture isn’t controlled.
When should I call a professional?
Call a professional if mold covers a large area, reappears after DIY cleaning, or you suspect hidden growth behind walls.
Call a pro if it keeps coming back or seems extensive.
Watch Video
The Essentials
- Ventilate during cleaning to reduce spores.
- Use proven cleaners like hydrogen peroxide or bleach with caution.
- Dry surfaces completely after treatment to prevent regrowth.
- Address moisture sources and seal joints.
- Seek professional help for persistent or large-area mold.