How to Clean Mold from Shower Safely and Effectively
Learn how to clean mold from your shower safely with practical steps, proven cleaners, and moisture-control tips. This Mold Removal Lab guide covers vinegar, hydrogen peroxide, baking soda, and when to use bleach, plus prevention to keep your shower mold-free in 2026.

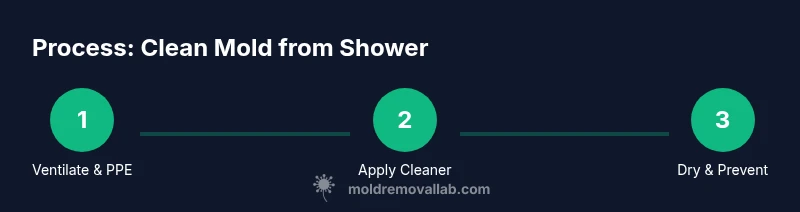
To clean mold from a shower, you’ll remove surface growth, treat it with a non-toxic cleaner, and dry the area to prevent re-growth. Start with ventilation, wear protective gear, and choose a method based on surface porosity: vinegar for non-porous tile, hydrogen peroxide for grout, and baking soda for tough stains. Mold Removal Lab guides this safe, practical approach.
What causes shower mold and why moisture matters
Mold growth in showers is driven by repeated exposure to moisture, warm temperatures, and limited airflow. Even small residual dampness after a shower can sustain mold colonies on tile, grout, caulk, and shower curtains. The Mold Removal Lab Team notes that proper moisture control is the most effective long-term strategy. By understanding how humidity, condensation, and poor ventilation interact with cleaning, homeowners can break the mold life cycle rather than simply masking the problem. Regular inspection of grout lines, silicone seams, and door caulk helps catch problems early before they spread. A quick humidity test—aim for 40-60% relative humidity—can guide your remediation schedule.
Safety first: protect yourself and your home
Mold remediation involves airborne spores that can irritate the nose, eyes, and lungs. Always wear nitrile or latex gloves, a fitted respirator or N95 mask, and eye protection. Ventilate the area with open windows or a fan directed outward. If you have asthma, allergies, or are pregnant, consider delaying work or hiring a professional. Keep pets and children away from the work zone, and cover nearby surfaces with plastic sheeting to protect them from splashes.
Surface testing and choosing cleaners
Surfaces in showers vary in porosity. Non-porous tile and enamel are easier to disinfect, while grout and caulk are more porous and prone to residual mold. Start with a small test area to ensure cleaners don’t damage finishes. For most showers, a non-toxic cleaner like white vinegar or hydrogen peroxide is effective. Bleach is a strong option for non-porous surfaces but can discolor materials and release fumes, so it should be used with caution and proper ventilation. Always label and store cleaners separately to avoid accidental mixing.
Vinegar method for non-porous surfaces
Vinegar is a mild, effective option for many bathroom surfaces. Pour undiluted white vinegar into a spray bottle and apply to the affected area. Let sit for 15-20 minutes to allow the acetic acid to penetrate mold films, then scrub with a stiff-bristle brush. Rinse thoroughly with warm water and repeat if stains persist. Vinegar is a practical first step for ceramic tiles and metal fixtures, especially when discoloration is minimal. After cleaning, dry the surface completely to slow regrowth.
Hydrogen peroxide method for grout and porous areas
Hydrogen peroxide (3%) is a powerful oxidizer that can penetrate grout and porous seams. Spray or apply with a sponge to the moldy grout, wait 5-10 minutes, and scrub with a nylon brush. Rinse with warm water and repeat as needed. For stubborn discoloration, reapply and let it sit a bit longer. Hydrogen peroxide is generally safe for most bathroom materials and leaves less odor than stronger cleaners. Always test a hidden area first.
Baking soda paste for stubborn grout stains
A baking soda paste (baking soda + water) can lift stubborn mold and deodorize the shower. Mix a thick paste, apply to grout, and scrub with a brush in circular motions. After several minutes, rinse and dry. Baking soda is gentle and non-toxic, making it a good finishing touch after vinegars or hydrogen peroxide. For extra whitening, you can add a small amount of hydrogen peroxide to the paste before applying.
Bleach: when, where, and how to use safely
Bleach can kill mold on non-porous surfaces but is not ideal for porous grout since it may not reach underlying growth. If you choose bleach, use a small amount, work in a well-ventilated area, and wear eye protection and gloves. Never mix bleach with ammonia or vinegar, as dangerous fumes can form. Rinse thoroughly after treatment and dry completely. If mold returns quickly on grout, consider replacing compromised silicone or resealing the area.
Drying, sealing, and moisture control to prevent recurrence
Drying is the final, critical step. After cleaning, use a towel or a dry mop to remove all moisture, then run a dehumidifier or fan for several hours. Re-caulk or seal any caulk lines that show wear, and consider regrouting severely stained areas. Improve bathroom ventilation by keeping a vent fan running during and after showers for at least 15-30 minutes. Regular checks on grout and caulk prevent reoccurrence and extend the life of your shower.
Preventive habits to keep showers mold-free
Adopt a routine: squeegee or wipe walls after showers, fix any leaks promptly, and maintain house humidity around 40-60%. Use mold-resistant silicone in joints and replace porous materials (like shower curtains) when signs of mold appear. Schedule a quarterly inspection of the shower caulk and grout, and consider a year-round mold prevention plan if you live in a humid climate. Consistency is the key to long-term success.
Common mistakes to avoid and how to fix them
Avoid using abrasive tools that scratch grout or tile; micro-scratches can harbor spores. Don’t mix cleaners or leave solutions on surfaces for too long, which can damage finishes. Don’t rely on a single cleaning session; mold often hides in unseen crevices. If you’re unsure about the material or if mold returns after multiple cleanings, consult a professional to assess structural moisture and seal integrity.
AUTHORITY SOURCES
EPA, CDC, and OSHA provide guidelines on mold, moisture, and safer cleaning practices. For additional detailed guidance, see:
- https://www.epa.gov/mold
- https://www.cdc.gov/mold/default.htm
- https://www.osha.gov/molds
Mold Removal Lab’s analysis in 2026 reinforces the importance of moisture control and proper cleaning sequences to prevent recurrence.
Tools & Materials
- Latex or nitrile gloves(Protect hands from cleaners and mold exposure)
- Goggles or safety glasses(Shield eyes from splashes)
- N95 mask or equivalent respirator(Limit inhalation of spores)
- Spray bottle(Apply cleaners evenly)
- White vinegar (5% acidity)(Non-toxic mold cleaner for many surfaces)
- Hydrogen peroxide 3%(Disinfects grout and porous areas)
- Baking soda(Make paste for grout deodorizing)
- Soft-bristled or nylon scrub brush(Gentle on grout, effective scrubbing)
- Sponge or microfiber cloths(Wipe and rinse without lint)
- Optional: lemon juice or essential oils(Natural fragrance additive)
- Bleach (sodium hypochlorite)(Only for non-porous surfaces with ventilation)
- Box fan or portable exhaust fan(Improve air circulation during cleaning)
Steps
Estimated time: 60-120 minutes
- 1
Ventilate and protect yourself
Open the bathroom window and turn on the exhaust fan to create air flow. Put on gloves, eye protection, and an N95 mask. This reduces exposure to mold spores during cleanup.
Tip: Keep doors open to maximize ventilation; if possible, run a fan outside the bathroom to pull air away from living spaces. - 2
Test cleaners on a small area
Before applying cleaners broadly, test on a hidden area to confirm no surface damage or discoloration. This helps prevent unintended damage to grout or tiles.
Tip: Choose a discreet corner of the shower wall for testing a cleaner like vinegar or hydrogen peroxide. - 3
Apply vinegar for non-porous surfaces
Spray undiluted white vinegar on the affected tile and grout. Let it sit for 15-20 minutes to penetrate the mold, then scrub with a stiff brush. Rinse with warm water.
Tip: Vinegar works best on non-porous surfaces like ceramic tile; avoid using vinegar on natural stone. - 4
Scrub mold from tiles and grout
Use a nylon brush to scrub the tile grout and any moldy caulk. Focus on seams where moisture collects. Rinse thoroughly and dry.
Tip: Work in small sections to prevent the cleaner from drying before you scrub. - 5
Treat porous areas with hydrogen peroxide
Spray 3% hydrogen peroxide on grout and porous seams. Let it bubble for a few minutes, then scrub and rinse. This helps lift embedded mold from porous materials.
Tip: Avoid mixing hydrogen peroxide with vinegar in the same container. - 6
Use baking soda paste for stubborn grout
Mix baking soda with water to a thick paste. Apply to stubborn grout stains, scrub, and rinse. The paste deodorizes while aiding mold removal.
Tip: If stains persist, reapply after a 10-minute pause. - 7
Consider bleach for non-porous spots
If needed, dilute bleach (1 part bleach to 10 parts water) and apply to non-porous areas only. Let sit briefly, then rinse and ventilate well.
Tip: Never mix bleach with ammonia or vinegar; fumes can be dangerous. - 8
Rinse and dry thoroughly
Rinse all surfaces to remove cleaner residues. Wipe dry with a microfiber cloth to reduce remaining moisture.
Tip: Completely dry is essential to prevent regrowth within 24-48 hours. - 9
Improve ongoing moisture control
Run the exhaust fan for 15-30 minutes after showers. Wipe down walls and door to remove residual moisture.
Tip: Consider a dehumidifier in consistently humid bathrooms. - 10
Seal or replace compromised caulk or grout
If caulk shows damage or mold recurs, remove damaged material and re-seal with fresh silicone or grout.
Tip: Choose mold-resistant silicone for long-term resistance. - 11
Schedule follow-up checks
Inspect shower corners every few weeks for signs of regrowth and address moisture issues promptly.
Tip: Maintaining a cleaning log helps catch trends early. - 12
Document and monitor results
Note improvements after each cleaning, and adjust methods if mold returns within a few months.
Tip: If mold returns despite best efforts, consult a mold remediation professional.
FAQ
What is the best cleaner for shower mold on ceramic tiles?
For ceramic tiles, undiluted white vinegar is a practical first step, followed by thorough rinsing and drying. If mold remains, hydrogen peroxide can disinfect grout without harsh fumes. Always test first on a small area.
For tiles, start with vinegar, then scrub and dry. Hydrogen peroxide can help grout if mold persists.
Is it safe to use bleach to remove shower mold?
Bleach can kill mold on non-porous surfaces but may not reach embedded mold in porous grout. Use it cautiously, in a well-ventilated area, and never mix with ammonia. Rinse thoroughly after use.
Bleach is an option for non-porous areas if used carefully and ventilated, but not ideal for porous grout.
How can I prevent mold from coming back after cleaning?
Improve ventilation, reduce humidity, and dry surfaces after each shower. Replace damaged grout or caulk and consider a mold-resistant sealant. Regular inspections help catch problems early.
Keep the bathroom dry, fix leaks, and seal grout to prevent mold from returning.
Can I clean mold myself, or should I hire a pro?
Many cases can be managed with household cleaners and proper safety. If mold covers a large area, or if you have health concerns, it’s wise to consult a professional mold remediation service.
Small outbreaks can be DIY, but large or persistent mold should be professionally addressed.
What signs indicate I should replace silicone or grout?
If caulk or grout remains consistently discolored, cracked, or mold keeps returning despite cleaning, replacement is usually necessary to restore a clean seal.
If it's cracky or keeps growing mold, replace it.
Is mold dangerous to health, and who is most at risk?
Some mold species can irritate the respiratory system, especially in people with allergies, asthma, or compromised immune systems. Reducing exposure and timely remediation minimizes risk.
Mold can irritate sensitive individuals; ventilate and remediate promptly.
Watch Video
The Essentials
- Ventilate before cleaning and wear PPE.
- Choose cleaners based on surface porosity: vinegar on non-porous; peroxide on grout.
- Dry thoroughly and improve bathroom moisture control to prevent recurrence.
- Seal and replace damaged caulk/grout to stop regrowth hotspots.
- If mold recurs, seek professional remediation.