Black Mold in the Shower: A Safe Removal Guide
Practical, safety-first steps to remove black mold in the shower, identify moisture sources, and prevent recurrence. Learn from Mold Removal Lab with a step-by-step remediation plan, safe products, and moisture-control strategies for a healthier bathroom.

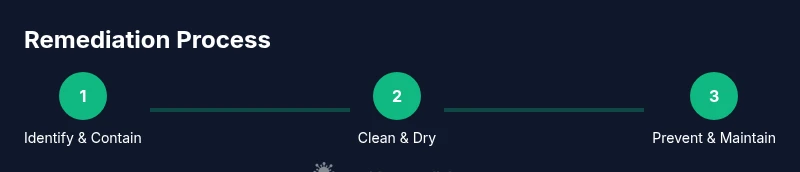
You can safely remove black mold in the shower and prevent recurrence by following a structured cleaning, drying, and moisture-control plan. Begin with protective gear, confirm moisture sources, and use approved cleaners. This guide walks you through a practical, step-by-step remediation approach with safety tips and materials. You will learn how to assess surfaces, isolate the area, and prevent spread to other rooms.
What is black mold in the shower?
Black mold in the shower is a common term for several dark molds that thrive in damp, poorly ventilated bathroom environments. In many homes, the culprits include species such as Stachybotrys chartarum or Cladosporium, but the key point is moisture-driven growth. The Mold Removal Lab team notes that visible black streaks or spots often indicate a larger, hidden problem behind grout, tiles, or shower walls. Early signs include musty odors, condensation on surfaces after showers, and peeling paint or tiles. Because bathrooms are routinely exposed to humidity, even small leaks or a blocked exhaust fan can create the conditions that let mold take hold. For homeowners, the goal isn't to label the species with certainty but to interrupt moisture, clean surfaces thoroughly, and prevent spores from becoming established colonies. This section explains how to recognize the problem, differentiate surface staining from embedded mold, and plan a safe remediation approach that minimizes exposure risk.
According to Mold Removal Lab, moisture control is the foundation of safe mold remediation, and proper containment reduces the risk of cross-contamination during cleanup.
Health risks and when to seek help
Exposure to black mold can affect respiratory health, trigger allergic reactions, and worsen asthma for sensitive individuals. In the shower, the combination of humidity, skin contact, and aerosolized spores increases exposure potential, especially for children, older adults, and people with compromised immune systems. If you notice persistent cough, wheezing, eye irritation, headaches, or skin rashes after bathing, consider consulting a healthcare provider and addressing the mold problem at its source. Mold Removal Lab analysis shows that proactive cleanup and moisture control can reduce symptoms and improve indoor air quality over time. If symptoms persist or imaging reveals extensive growth behind walls, professional assessment is advised.
Causes and moisture management in bathrooms
The shower environment is inherently humid, and moisture control is key to stopping mold growth. Moisture sources include leaky plumbing, insufficient ventilation, high nighttime humidity, and rapid temperature changes after long showers. Ventilation fans should run during and after showers, and doors or windows should allow air exchange when feasible. Regularly inspect grout lines, caulk, and shower pan for signs of water intrusion. Practically, focus on reducing residual moisture, improving airflow, and maintaining a dry surface after each use to minimize mold re-growth.
Tools, safety gear, and products you’ll need
Before you start, assemble PPE and cleaning supplies to minimize exposure. You’ll want: NIOSH-approved N95 respirator, disposable coveralls or long sleeves, chemical-resistant gloves, and eye protection. Have plastic sheeting or painter’s tape for containment, a scrub brush, a non-ammonia cleaner or soap, a labeled spray bottle, a sponge, HEPA-filter vacuum (optional but helpful), a drying fan, and a moisture-absorbent dehumidifier if available. Use cleaners approved for mold remediation; avoid mixing cleaners, especially bleach with ammonia, which can release dangerous gases. This section aligns with best practices from Mold Removal Lab and standard home-maintenance guidelines for safe cleanup.
Prevention and long-term moisture management
Preventing recurrence requires ongoing moisture management. After cleaning, seal vulnerable grout lines and caulk gaps where water can seep in. Maintain bathroom humidity at comfortable levels by using exhaust fans, dehumidifiers, or air purifiers, and ensure proper drainage and regular inspection for leaks. Keep shower surfaces dry when not in use and consider routine mold inspections every 6–12 months in damp bathrooms. The goal is consistent dryness, proper airflow, and prompt repair of any moisture intrusion to minimize future mold growth.
When to call a professional
If mold covers a large area, penetrates behind walls, or keeps returning despite cleaning, professional remediation is advised. Structural behind-wall mold, complex plumbing leaks, or suspected HVAC-related spread require trained teams with containment and negative pressure to prevent cross-contamination. The Mold Removal Lab team recommends seeking a professional if you are unsure about the extent of growth or your safety when attempting cleanup.
Tools & Materials
- N95 or higher respirator(NIOSH-rated; replace if damp or damaged)
- Disposable coveralls(Long sleeves; avoid cotton that can trap moisture)
- Nitrile gloves(Water-resistant, chemical-safe; double-glove if using strong cleaners)
- Eye protection(Goggles or face shield)
- Plastic sheeting or painter’s tape(Create a containment zone around shower area)
- Scrub brushes(Soft and stiff brushes for grout and tile)
- Non-ammonia cleaner or soap(Mold-safe cleaner; avoid ammonia-based cleaners with bleach)
- Spray bottle(Label with cleaner and water solution)
- Sponge and microfiber cloths(For wiping surfaces and rinsing)
- Bucket(For rinsing or mixing cleaners)
- Disposable trash bags(Seal tightly before disposal)
- HEPA vacuum (optional)(For cleanup of fine spores after cleaning)
Steps
Estimated time: 2-4 hours active work; up to 48 hours drying
- 1
Identify affected area
Locate visible mold growth and inspect for hidden mold behind grout, tiles, and shower walls. Note any leaks or water intrusion and decide if containment is needed to prevent spreading spores to adjacent rooms.
Tip: Document the area with a photo, so you can monitor progress and communicate with others. - 2
Wear PPE and set up containment
Put on your respirator, gloves, and protective clothing. Create a containment zone using plastic sheeting to limit dust and spores from migrating to the rest of the bathroom.
Tip: Keep kids and pets away from the work area for safety. - 3
Ventilate the space
Ventilate by turning on the bathroom exhaust fan or opening a window if safe to do so. Keep airflow directed away from other rooms to avoid spread.
Tip: If possible, run the vent for the entire cleaning and drying process. - 4
Clean the moldy surfaces
Apply a mold-safe cleaner or soap to moldy grout and tiles. Scrub with appropriate brushes, focusing on grout lines and any porous materials.
Tip: Avoid aggressive scrubbing on delicate surfaces to prevent damage. - 5
Rinse and dry surfaces
Rinse surfaces with clean water and wipe thoroughly. Use a dry cloth or towel to remove residual moisture, then allow the area to air-dry.
Tip: If possible, increase air movement with a fan or dehumidifier to speed drying. - 6
Seal and protect vulnerable areas
Seal cracked grout or re-caulk where water is likely to seep in. Applying a breathable sealant can help limits future moisture penetration.
Tip: Choose mold-resistant products designed for bathrooms. - 7
Improve ongoing moisture control
Keep humidity low using exhaust fans, dehumidifiers, and proper ventilation. Address any leaks promptly and monitor signs of recurring moisture.
Tip: Establish a recurring reminder to check evolving moisture levels. - 8
Inspect and monitor
Reassess the area after cleaning to ensure no visible mold remains. If symptoms persist or new growth appears, re-evaluate or consult a professional.
Tip: Note any unseen growth in hidden areas that may require service.
FAQ
Can bleach remove black mold from a shower surface?
Bleach can kill some surface mold, but it often doesn’t reach into porous materials like grout or drywall. Thorough cleaning, drying, and moisture control are essential for longer-term results.
Bleach can help on non-porous surfaces, but for porous materials you need a mold-safe cleaner and drying to prevent return.
Is black mold dangerous to my health?
Yes, mold exposure can affect sensitive individuals, causing allergy-like symptoms and respiratory issues. If you notice persistent symptoms after exposure, seek medical advice.
Mold can affect health, especially if you have allergies or asthma. If symptoms linger, talk to a professional.
When should I call a professional?
Call a professional if the mold covers a large area, is growing behind walls, or keeps returning despite cleaning. Large or hidden growth requires specialized containment and equipment.
If you suspect behind-wall growth or extensive spread, it’s safer to get a pro involved.
How long does it take to dry after cleaning?
Drying times vary with humidity and ventilation, but expect at least 24–48 hours for surfaces to fully dry. Use a dehumidifier or fan to speed this up.
Most bathrooms take a day or two to dry completely if you control humidity.
Will mold return if I don’t fix the moisture source?
Yes. Without fixing the moisture source, mold is likely to return. Address leaks, improve ventilation, and monitor humidity to reduce the chance of recurrence.
If you don’t fix the moisture, the mold will likely come back.
What cleaners are best for shower mold?
Look for cleaners labeled for mold remediation that are non-ammonia and non-chlorine. Follow product instructions, use proper PPE, and ensure surfaces dry completely.
Use mold-safe cleaners and dry surfaces thoroughly after cleaning.
Watch Video
The Essentials
- Control moisture first to prevent mold growth
- Use proper PPE and avoid mixing cleaners
- Seal and dry surfaces thoroughly after cleaning
- Ventilate consistently to reduce humidity
- Consider professional help for large or hidden mold