Get Rid of Bathroom Mold: Practical Step-by-Step Guide
Learn how to get rid of bathroom mold safely with a proven, practical plan. This guide covers causes, DIY methods, when to call a pro, and prevention to keep your bathroom healthy.

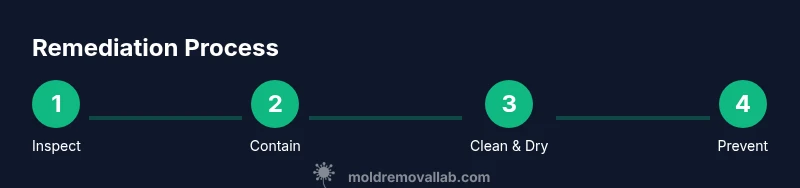
Get rid of bathroom mold by locating all moldy areas, drying moisture, and using proven cleaners on nonporous surfaces. Start with ventilation, wear PPE, and isolate the area to prevent spread. For porous materials, remove and replace if damaged. Follow an approved step-by-step remediation plan and monitor humidity to prevent recurrence.
What causes bathroom mold and why it matters
Bathroom mold thrives in damp environments where humidity remains high for extended periods. Most molds require moisture to grow, and bathrooms — with showers, baths, sinks, and humid air — are prime locations. The Mold Removal Lab team notes that mold can develop in hidden corners behind cabinets, under sinks, and within grout if regular airflow is limited. Left unchecked, mold can affect indoor air quality, trigger allergies, and damage surfaces over time. Understanding the root causes— persistent dampness, poor ventilation, leaks, and inadequate humidity control—helps homeowners target the right fixes rather than relying on quick surface cleaning alone. Addressing moisture sources is the single most important step toward lasting mold control. Throughout this process, prioritize safety and follow local regulations for mold cleanup.
How to assess your bathroom mold situation
Start with a simple assessment to determine scope and urgency. Look for visible colonies, musty odors, or staining on walls, ceilings, tile grout, and caulking. Check for leaks around the shower pan, under the sink, and behind cabinets. Note areas with condensation buildup on cold surfaces and track humidity using a simple hygrometer. If you notice water damage or mold growth that spans larger areas (e.g., wall cavities or behind drywall), this signals a higher-risk situation and may require professional assessment. The Mold Removal Lab team recommends documenting moisture sources and mold locations before starting any cleanup so you can verify improvements later.
Step-by-step: Get rid of bathroom mold safely (overview)
A careful, methodical approach reduces spread and protects occupants. Begin with containment, PPE, and ventilation, then dry out the space. Clean nonporous surfaces with mild cleaners, and decide whether porous materials must be removed. Finally, prevent future growth by controlling humidity and fixing leaks. This overview aligns with guidance from Mold Removal Lab and general public health sources, which emphasize moisture control as the foundational strategy for mold remediation. For renters and homeowners alike, safety and prevention are the most reliable long-term solutions.
Tools & Materials
- Nitrile gloves(Size M or L; disposable)
- Safety goggles(Anti-fog, splash protection)
- N95 respirator(Fit-tested if possible)
- Protective coveralls(Long sleeves and pants; breathable)
- Spray bottle(For cleaners and rinses)
- Detergent or mild cleaner(Non-ammonia, non-acidic)
- Bleach (optional)(Use only per label if cleaning non-porous surfaces)
- Hydrogen peroxide (optional)(Alternative to bleach on some surfaces)
- Plastic sheeting(To contain the workspace)
- Masking tape(Seal edges of plastic containment)
- Scrub brush (stiff-bristled)(For grout and hard surfaces)
- Microfiber cloths(For wiping and drying)
- Drop cloths or towels(Protect flooring)
- Dehumidifier or fan(Reduce ambient humidity during and after cleanup)
- Trash bags(Seal and dispose of contaminated materials)
Steps
Estimated time: 3-5 hours
- 1
Inspect and map mold areas
Walk through the bathroom to identify all mold patches and moisture sources. Photograph or note each location to guide containment and cleaning scope. Mapping helps you avoid missing hidden growth.
Tip: Take measurements and mark areas with painter’s tape for precise cleanup. - 2
Protect yourself and prep the space
Put on PPE before touching any mold. Close doors to limit spread, open windows, and set up containment with plastic sheeting to protect adjacent rooms.
Tip: Keep children and pets out of the work area. - 3
Contain and isolate the work area
Drape plastic sheeting to seal the work zone and create a clear path for clean airflow. Use tape to secure plastic at floor level to prevent seepage into other spaces.
Tip: Containment reduces cross-contamination during cleaning. - 4
Dry out the space
Use a dehumidifier or fans to lower ambient humidity and evaporate moisture from surfaces. Target a steady low humidity level for several hours; recheck the next day if necessary.
Tip: Drying first makes cleaning more effective and safer. - 5
Clean nonporous surfaces
Apply a mild cleaner to hard, nonporous surfaces like tile, enamel, glass, and metal. Scrub with a stiff brush, rinse with clean water, and dry thoroughly.
Tip: Rinse and dry promptly to prevent residual moisture. - 6
Address porous materials
If mold has penetrated drywall, wood, or insulation, removal may be necessary. In some cases, sealed or patched surfaces can be treated, but damaged materials should be discarded according to local guidelines.
Tip: When in doubt, treat damaged porous material as discardable. - 7
Rinse, dry, and recheck
Wipe surfaces again to remove any remaining residue. Ensure all cleaned areas are completely dry before removing containment.
Tip: Check corners, behind fixtures, and inside grout lines. - 8
Prevent recurrence
Fix leaks, improve ventilation, and maintain humidity below typical thresholds to make future mold growth unlikely. Document improvements and set up ongoing monitoring.
Tip: Use a hygrometer to track humidity and run ventilation after showers.
FAQ
What is the safest first step when you notice bathroom mold?
Start by assessing the extent of the mold and ensuring you have proper PPE. Ventilate the area and isolate the space to prevent spores from spreading to other rooms. For substantial growth or unknown extent, consult a professional.
Begin with assessment and ventilation, ensure PPE, and call a pro if the growth is large.
Can I use bleach to remove bathroom mold?
Bleach can be effective on hard, nonporous surfaces. It should be used cautiously and in well-ventilated areas, following the label directions. Porous materials like drywall or wood often require removal rather than cleaning.
Bleach works on hard, nonporous surfaces when used as directed, but porous materials may need removal.
Should I remove drywall if mold is behind tiles or drywall?
If mold penetrates drywall or insulation, removal is often necessary to prevent regrowth. Patch or replace with moisture-resistant materials after cleaning and drying the area.
If moisture-damaged drywall is moldy, it usually needs removal and replacement.
How long does it take to complete bathroom mold remediation?
A typical DIY remediation with proper containment and drying can take several hours. If moisture sources are significant or materials must be removed, the process may extend to a couple of days.
Most DIY jobs take several hours, but more extensive cases can take a couple of days.
Is DIY mold remediation safe for renters?
DIY remediation can be safe for small, isolated mold growth with proper PPE and containment. For large areas, structural damage, or uncertain sources, consult a landlord or a licensed professional.
DIY is possible for small spots with safety gear, but big jobs require a pro.
What humidity levels prevent mold growth in bathrooms?
Maintaining indoor humidity below about 50-60% generally helps prevent mold growth. Use ventilation, dehumidifiers, and fix leaks to keep moisture in check.
Keep bathroom humidity under 60% and fix leaks to slow mold growth.
Watch Video
The Essentials
- Identify moisture sources to prevent recurrence
- Ventilate and dry promptly after moisture events
- Use appropriate cleaners for different surfaces
- Discard porous materials with mold growth when damaged
- Maintain humidity and fix leaks to block regrowth