Fix mold in bathroom: a practical how-to guide
A practical, step-by-step guide to fix mold in bathroom safely. Learn when to DIY, the right cleaning methods, moisture control, and maintenance strategies to prevent recurrence.

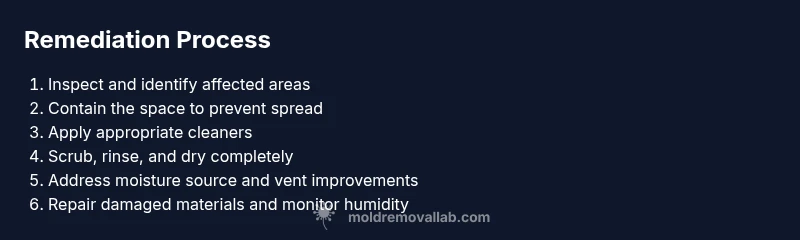
You’ll be able to fix mold in bathroom by following a clear, safety-first remediation plan. Start with assessment and PPE, then isolate the area, clean non-porous surfaces, dry thoroughly, repair moisture sources, and implement ongoing moisture control. This approach minimizes health risks and prevents mold recurrence in the bathroom.
Why fixing mold in bathroom matters
Mold in bathrooms is a common homeowner challenge, driven by humidity, poor ventilation, and hidden leaks. Fix mold in bathroom promptly reduces health risks, including allergies and respiratory irritation, and protects surfaces from long-term damage. According to Mold Removal Lab, controlling moisture and employing a structured remediation plan are the keys to success. This section explains why moisture management is foundational and how even small mold problems can escalate if ignored. By treating bathroom mold early, you can keep your home safer, healthier, and more comfortable for everyone who lives there.
In many homes, bathrooms are the most humid rooms, especially after showers. The combination of warm air and damp surfaces creates the perfect environment for mold to thrive on grout, caulk, drywall, and wood trim. A practical remediation plan focuses on removing active growth, drying all materials, and addressing the underlying moisture source. The Mold Removal Lab team emphasizes that success depends on both cleaning and moisture control—without reducing humidity, mold is likely to return.
This guide is written for homeowners and renters who want reliable, safe strategies to fix mold in bathroom without unnecessary expense or risk. You’ll learn how to identify problem areas, choose appropriate cleaners, and implement a moisture-control plan that lasts.
Safety first: protective gear and precautions
Before you touch any mold, prepare yourself with the right PPE and plan. Wear an N95 respirator (or higher), chemical-resistant gloves, protective goggles, and long sleeves to minimize exposure. Open windows or run a vent fan to supply fresh air, and never mix cleaning agents such as bleach with ammonia, which can release dangerous fumes. Keep children and pets out of the area while you work. If you have chemical sensitivities or asthma, consider hiring a professional. The goal is to safely remove active growth while reducing exposure and protecting your indoor air quality.
In tight spaces like bathrooms, mold spores can become airborne during cleanup. A PPE-first approach protects your lungs and skin and helps you perform the steps with confidence. After finishing, wash your PPE separately and launder contaminated fabrics outside the living area to prevent reintroduction of spores. These precautions align with general health-and-safety guidelines for mold remediation.
Common bathroom mold culprits and how it forms
Mold in bathroom spaces often grows where moisture lingers: shower stalls, around caulked joints, under sinks, and behind wallpaper or drywall near plumbing. Leaks, condensation, and inadequate ventilation all contribute. Mold can appear as fuzzy patches or dark spots, and some species produce musty odors without obvious staining. Understanding the typical culprits helps you target the remediation effectively.
A practical approach starts with locating hidden moisture signals—peeling paint, warped panels, or staining behind fixtures. Even routine cleaning won’t fully remove mold if humidity stays high. The goal is to address both visible growth and the moisture source that allowed it to thrive in the first place. In many cases, addressing ventilation and leaks can dramatically reduce future mold development.
Assessing the scope: DIY vs professional remediation
Small, clearly contained mold patches on non-porous surfaces are often manageable for a DIY remediation. If the affected area is under 10 square feet and there’s no extensive water damage, you can proceed with caution following proper PPE and cleaning protocols. Larger areas, damage to structural components, or mold growth on porous materials (like drywall or insulation) may indicate a need for professional remediation.
When in doubt, err on the side of safety. DIY methods can be effective for routine bathroom mold, but professional remediation is warranted for pervasive growth, suspected hidden colonization, or growth adjacent to electrical or HVAC systems. Mold growth around a constant leak or ongoing condensation signals a moisture problem that should be addressed promptly to prevent recurrence.
Preparation steps before cleaning
Clear the room, move towels, soaps, and other items away from the work area. Use plastic sheeting to seal off the bathroom from adjacent spaces and prevent the spread of spores. Turn off the bathroom exhaust fan only if it’s a source of moisture; otherwise keep ventilation to manage air flow. Gather your PPE, cleaning agents, scrubbing tools, and absorbent towels. Label any contaminated waste for disposal and prepare a clean area for reassembly. This prep work helps you fix mold in bathroom more efficiently and safely.
Think through the materials you’ll discard and those you’ll dry and reuse. Store cleaning solutions out of reach of children and pets, and ventilate the space during and after cleaning to reduce airborne spores. Proper preparation reduces cleanup time and improves outcomes.
Cleaning strategies by mold type
For non-porous surfaces (tile, glass, enamel), cleaners like distilled white vinegar, hydrogen peroxide, or a diluted bleach solution can be effective. For porous materials (drywall, wood framing, fabric), removal and replacement are often necessary because mold penetrates the material. Start with a mild approach: spray vinegar on the surface, let it sit for 10-15 minutes, then scrub with a stiff-bristled brush and rinse. If you choose hydrogen peroxide or a specialized mold cleaner, follow the manufacturer’s directions and allow surfaces to dry completely before proceeding.
Avoid mixing cleaners and never rely on a single method. In some cases, mold on porous substrates requires removal and replacement rather than cleaning. If you encounter black mold or suspect toxic species, stop and consult a professional. This conservative approach helps you fix mold in bathroom without risking your health or home.
Drying and moisture control to prevent recurrence
Drying is the critical step after cleaning. Mold returns quickly if moisture remains, so aim to dry every surface thoroughly within 24-48 hours. Use towels to blot moisture, run fans, and consider a dehumidifier in rooms with persistent humidity. Fix leaks promptly and inspect pipes behind walls for hidden moisture. Once the area is dry, replace any damaged materials and repaint with mold-resistant products to reduce future growth.
A moisture-control plan should include monitoring humidity levels and ensuring the bathroom vent fan operates effectively during showers. Keeping humidity low makes it harder for mold to reestablish. Consistent maintenance, not just one-time cleanup, is what keeps bathrooms mold-free over time.
Ventilation improvements to stop reoccurrence
Ventilation is often the missing piece in bathroom mold prevention. Upgrade or repair exhaust fans, clear vent ducts, and ensure adequate air movement. Consider upgrading to a higher-capacity fan or adding a window vent if feasible. If you have a humid bath routine, run the exhaust for at least 20-30 minutes after showering and keep interior doors open to facilitate cross-ventilation.
Additional steps include sealing gaps around doors and windows, insulating cold surfaces to reduce condensation, and using moisture-sensing devices to alert you when humidity spikes. Together, these actions dramatically reduce the chance of mold returning after you’ve fixed the bathroom mold problem.
Long-term maintenance and when to call a pro
Develop a regular bathroom maintenance routine: inspect caulk lines, check grout, and run the exhaust after use. Clean visible mold promptly and record humidity readings to identify trends. If you notice recurring growth, persistent damp patches, or signs of hidden mold behind walls, it’s time to contact a professional remediation service. Early intervention can save time and prevent more invasive repairs.
For homeowners, the plan is simple: address moisture, clean visible growth using safe methods, dry thoroughly, and monitor humidity. If in doubt, a qualified mold remediation specialist can assess without overhauling your living space.
Real-world case example and quick-start plan
A typical bathroom mold case involves a small shower alcove with little ventilation. The quick-start plan starts with sealing off the area, wearing PPE, and cleaning non-porous surfaces with vinegar and water. After scrubbing, surfaces dry within a day, and the ventilation system is upgraded. A follow-up humidity check shows levels trending below the threshold, and no new growth appears after two weeks.
This practical example highlights the importance of a stepwise approach. By following the steps outlined above, you can fix mold in bathroom in a realistic timeframe and with predictable results. Keep a simple log of areas inspected, cleaning methods used, and humidity readings to track progress over time.
Tools & Materials
- N95 respirator or higher(Protects lungs from mold spores during cleanup.)
- Chemical-resistant gloves(Prevents skin contact with cleaning solutions.)
- Protective goggles(Eye protection against splashes.)
- Disposable or reusable coveralls(Optional for large areas or prolonged work.)
- Plastic sheeting or painter's drop cloth(Seal off the work area to prevent spore spread.)
- Tape (painter’s tape)(Secures plastic sheeting and containment.)
- Scrub brushes (stiff-bristled)(Dislodges mold from grout and surfaces.)
- Spray bottle(For applying cleaners evenly.)
- Cleaning solutions (vinegar, hydrogen peroxide, or bleach)(Choose non-bleach alternatives for porous surfaces.)
- Old towels or rags(Pat dry surfaces after cleaning.)
- Dehumidifier or fan(Assists drying and moisture control.)
- Moisture meter (optional)(Helps track humidity levels.)
Steps
Estimated time: 3-6 hours depending on area and severity
- 1
Inspect and assess the mold
Identify all growth areas and determine whether the mold is surface-only or has penetrated porous materials. Note any leaks or hidden moisture behind walls. This assessment guides the remediation plan and helps decide if professional help is needed.
Tip: Document locations with notes or photos to avoid missing spots later. - 2
Put on PPE and prepare the space
Don PPE before touching any mold, and set up containment with plastic sheeting to prevent spores from escaping to adjacent rooms. Ensure there is adequate ventilation while you work.
Tip: Ventilate the area early and keep pets out of the work zone. - 3
Isolate the work area
Seal the bathroom with plastic sheeting and tape to prevent spores from migrating to other areas of the home. Close doors and cover any adjacent vents if possible.
Tip: Use a separate disposal bag for contaminated waste. - 4
Apply chosen cleaning solution
Apply a cleaning solution suitable for the surface (e.g., vinegar on non-porous surfaces). Let it sit for the recommended time to kill mold spores before scrubbing.
Tip: Don’t mix cleaners—stick to one product at a time. - 5
Scrub and remove visible mold
Use a stiff-bristled brush to scrub the affected areas, focusing on grout lines and corners where mold tends to hide. Rinse with clean water after scrubbing to remove residue.
Tip: For stubborn stains, repeat cleaning cycle once more. - 6
Rinse and dry surfaces thoroughly
Rinse away cleaning solution and dry all surfaces completely using towels and fans. Any remaining moisture can allow regrowth, so ensure every surface is dry.
Tip: Drying should occur within 24-48 hours for best results. - 7
Address moisture sources
Identify and fix the moisture source—leaks, plumbing, or poor ventilation. Repair or replace damaged materials if necessary to stop the cycle of mold growth.
Tip: Consider upgrading the exhaust fan or sealing leaks to reduce future mold risk. - 8
Repair and replace damaged materials
If porous materials show mold penetration, they should be removed and replaced to prevent recurrence. Use mold-resistant drywall or paint for long-term protection.
Tip: Inspect behind fixtures where leaks often occur. - 9
Monitor and maintain moisture control
After remediation, monitor humidity levels and perform periodic inspections. Maintain good ventilation and routine cleaning to prevent new mold growth.
Tip: Set a reminder to re-check humidity monthly.
FAQ
Is bathroom mold dangerous to health?
Yes. Mold exposure can trigger allergies, coughing, and respiratory irritation, especially for sensitive individuals. If you notice persistent symptoms, consult a healthcare professional and consider professional remediation for large or hidden growth.
Yes, mold can affect health, especially for sensitive people; seek professional help if symptoms persist.
Can I remove mold myself in all bathrooms?
Small, surface mold on non-porous surfaces is often removable with proper PPE and cleaners. Large areas, mold on porous materials, or recurring growth should be handled by a professional to ensure complete removal and safety.
You can handle small, surface mold yourself, but big jobs or porous materials usually need a pro.
What cleaning products are best for bathroom mold?
Vinegar or hydrogen peroxide are effective for many mold kinds on non-porous surfaces; bleach is sometimes used on non-porous areas but should not be used on porous materials. Always follow product directions and ventilation recommendations.
Vinegar or hydrogen peroxide work well on non-porous surfaces; bleach can be used carefully on non-porous areas.
How long does it take for cleaned areas to dry?
Drying times vary, but most surfaces dry within 24-48 hours if ventilation is good and moisture sources are controlled.
Most areas dry within a day or two with proper airflow and moisture control.
When should I call a professional remediator?
Call a professional if mold covers a large area, is behind walls or behind cabinets, or if you notice recurring growth after cleaning. A pro can assess hidden damage and properly remediate.
If mold keeps coming back or covers a large area, get a pro to evaluate and treat it.
Will mold come back after cleaning?
Mold can return if moisture remains. Fixing the moisture source, improving ventilation, and ongoing maintenance reduces the chance of recurrence.
Mold comes back mainly when moisture isn’t controlled, so moisture management is key.
Watch Video
The Essentials
- Tackle moisture first to prevent recurrence
- Use appropriate cleaners by surface type
- Dry thoroughly within 24-48 hours after cleaning
- Upgrade ventilation to reduce humidity long-term
- Monitor humidity and inspect regularly