How to Fix Mold in Your House: A Practical Guide
Learn how to fix mold in house safely with a structured moisture-control plan, practical DIY remediation steps, and prevention tips. This Mold Removal Lab guide covers safety, assessment, cleaning, drying, and when to call a pro for lasting health and home durability.

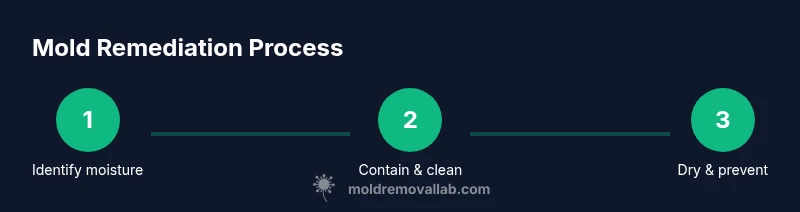
You can fix mold in house by following a safe, structured remediation plan that addresses moisture, infestation, and prevention. Start with identifying moisture sources, wearing appropriate PPE, and selecting non-toxic cleaners. This guide provides a step-by-step approach—from assessment to cleanup, drying, and prevention—so you can restore a healthier home with confidence.
Understanding Mold Growth and Why It Happens
Mold thrives where moisture is present, feeding on organic materials like wood, drywall, wallpaper, and fabric. In homes, common moisture sources include roof leaks, plumbing drips, condensation, and high indoor humidity. When these conditions persist, mold can establish colonies that release spores into the air. Early warning signs—visible growth, musty odors, staining, peeling paint, or warped surfaces—signal the need for action. The goal of fixing mold in house is to remove active growth and, more importantly, stop recurrence by controlling moisture, improving airflow, and repairing damaged materials. According to Mold Removal Lab, moisture control is the cornerstone of effective remediation. A careful assessment helps decide whether DIY steps are safe or if a pro is needed. Understanding moisture problems first reduces health risks and limits further damage.
PPE and Safety Essentials
Before touching any moldy surface, assemble a safety kit to protect yourself and others. Wear an N95 respirator (or better), protective goggles, and chemical-resistant gloves. Long sleeves, pants, and disposable coveralls keep skin from contact with spores. Use plastic sheeting to contain the space and tape to seal seams. Ensure the area is ventilated but avoid creating drafts that spread spores to other rooms. Keep children and pets away during remediation. PPE and containment are non-negotiable steps; skipping them increases exposure risk and can worsen symptoms for sensitive individuals. If dealing with large infestations, consider renting a HEPA-filtered vacuum or air purifier to reduce airborne spores during cleanup.
Assessing the Extent of Growth and Moisture Source
Start with a careful inspection of the affected area to gauge the size of the problem. Look for damp patches, staining, warped surfaces, and recurring leaks. Use a moisture meter on walls, ceilings, and hidden cavities to determine moisture levels and guide your plan. Document findings with photos; this helps track progress and provides records if you need professional help. After identifying the moisture source, target repairs—pipes, roof penetrations, or drainage issues—and then address the mold growth itself. The goal is to remove moisture first, then clean mold, then dry thoroughly. Mold can hide behind drywall or in insulation; if you suspect hidden growth, proceed with caution and consider professional testing if accessible.
DIY Remediation Basics: What You Can Do
If visible mold is limited to a small area and there is no structural damage, you can start with basic DIY remediation. Isolate the area, then gently scrub mold from non-porous surfaces with soap and water. Avoid aggressive scrubbing on porous materials like drywall, which can release spores. After cleaning, wipe surfaces with a mild disinfectant and let them dry completely before replacement. Porous materials contaminated beyond cleaning (insulation, drywall, carpeting) should be removed and replaced to prevent regrowth. Seal used materials in plastic bags and dispose of them safely. This section clarifies the practical limits of DIY work; for more complex situations, professional guidance is advised.
Cleaning and Disinfection: Methods that Work
Cleaning removes visible mold, while disinfection targets residual spores. Use non-ammonia cleaners and apply a two-step approach: wash with soap and water, then apply a disinfectant approved for mold remediation. Do not mix cleaners; mixing can release toxic vapors. For hard, non-porous surfaces, a safe disinfectant following label directions can be effective. On porous materials, avoid harsh chemicals that can damage the surface and release spores. If opting for natural options like vinegar or hydrogen peroxide, apply, allow contact time per product instructions, then rinse. For fabrics and soft furnishings, consider steam cleaning or professional remediation. This section emphasizes safe, effective cleaning protocols to minimize exposure and cross-contamination.
Drying, Ventilation, and Humidity Control
Mold needs moisture to survive, so drying the space after cleaning is essential. Use a dehumidifier and fans to promote air movement and reduce humidity toward safer levels (ideally below 50-60%). Maintain moderate temperatures to support evaporation, and run equipment until surfaces feel dry and moisture readings are low. Open windows when outdoor conditions permit, but avoid drafts that spread spores to other rooms. Monitor progress with a moisture meter and dampness indicators in walls, and don’t seal the area too early. After drying, re-check for odors or staining that could indicate hidden moisture.
When to Call a Professional Remediation
Some mold problems require licensed professionals. If you notice extensive growth, mold behind walls, persistent musty odor after cleaning, or any signs of structural damage, contact a certified remediation contractor or your local health department for guidance. A professional team can perform targeted moisture control, containment, specialized cleaning, and post-remediation verification. If occupants have allergies, asthma, or compromised immune systems, professional help is especially important. According to Mold Removal Lab, knowing when to escalate is crucial to safety and long-term durability of your home.
Prevention and Maintenance to Stop Mold Recurrence
Prevention is the best remediation. Keep indoor humidity low, fix leaks promptly, and improve ventilation in kitchens, bathrooms, laundry rooms, and basements. Regularly inspect windows, roofs, and pipes for drips and condensation. Use exhaust fans, keep wardrobes dry, and establish a mold-safe cleaning routine that avoids moisture-trapping products. Consider a dehumidifier in damp spaces and inspect areas after heavy rains. Document changes in humidity or condensation as part of maintenance. Real-world success depends on consistent actions: drying, ventilating, cleaning, and timely repairs.
Mold Removal Lab Verdict: A Practical Recommendation
The Mold Removal Lab Team recommends homeowners adopt a proactive moisture-control mindset and follow a structured remediation process rather than rushing to a cosmetic fix. A staged approach—identify moisture, contain the area, remove contaminated materials, dry thoroughly, and implement prevention—offers the best chance of lasting results. By focusing on safety, containment, and humidity control, you’ll minimize health risks and property damage. Remember that mold is a symptom of a moisture problem, not a standalone nuisance. For more detailed steps, see our full guide and the accompanying resources.
Tools & Materials
- N95 respirator (fit-tested)(Provide a tight seal and replace if damp or soiled)
- Protective goggles(Eye protection against splashes and spores)
- Nitrile gloves(Chemical resistant)
- Disposable coveralls(Keeps skin and clothing clean)
- Plastic sheeting (6-mil)(Create containment barrier)
- Duct tape(Seal plastic barriers)
- HEPA vacuum(Optional for cleanup)
- Soap and water(Initial cleaning)
- Mild disinfectant (EPA-approved)(For hard surfaces)
- White vinegar(Natural cleaner option)
- Hydrogen peroxide 3%(Alternative disinfectant)
- Baking soda(Deodorizer and mild cleanser)
- Moisture meter / hygrometer(Track humidity)
- Dehumidifier(Reduce moisture)
- Fans or air movers(Promote airflow)
Steps
Estimated time: 2-5 days
- 1
Assess and Prep Safety Gear
Identify the work area and put on PPE before touching any moldy surfaces. Ensure respirator fits properly, goggles secure, and clothing covers skin. This ensures you are protected from spores during the initial inspection.
Tip: Test the respirator seal before entering the area. - 2
Contain the Work Area
Seal off the room with plastic sheeting to minimize spore spread to other areas. Use tape to seal the seams and ensure doors are closed. This keeps your home safer during remediation.
Tip: Keep a dedicated entry/exit to avoid tracking mold between rooms. - 3
Inspect for Visible Growth
Carefully look for visible mold patches, staining, dampness, and any hidden growth behind walls. Document conditions with photos for progress and potential claims.
Tip: Check behind baseboards and in corners; mold hides where air flows stagnate. - 4
DIY vs Pro Decision
If growth is extensive or behind walls, or if you have health concerns, consult a licensed remediation professional. For small, accessible areas you may proceed with caution.
Tip: When in doubt, err on the side of safety and call a pro. - 5
Clean Non-Porous Surfaces
Scrub non-porous surfaces with soap and water to remove visible mold. Rinse and dry promptly. Avoid aggressive scrubbing on porous materials like drywall, which can release spores.
Tip: Use a stiff brush and rinse between sections to prevent cross-contamination. - 6
Handle Porous Materials
Porous materials (drywall, insulation) with mold growth may need removal and replacement. Do not attempt to salvage heavily contaminated porous materials; dispose of them safely in sealed bags.
Tip: Seal contaminated material in bags before removal to limit spread. - 7
Disinfect Treated Areas
After cleaning, apply an EPA-approved disinfectant and allow appropriate contact time. Do not mix cleaners; follow label directions. Wipe surfaces dry after disinfection.
Tip: Never mix ammonia with chlorine bleach. - 8
Drying and Final Checks
Run a dehumidifier and fans to dry the space completely. Monitor moisture levels until readings are low and surfaces feel dry. Re-check for hidden moisture and odors before closing the project.
Tip: Keep humidity below 50-60% during and after remediation.
FAQ
Can I fix mold in house myself?
Small, accessible mold growth on non-porous surfaces may be addressed by a careful DIY approach. For larger areas, or if mold has penetrated porous materials or drywall, professional remediation is advised.
You can tackle small mold areas yourself, but larger problems should be handled by professionals.
Is bleach effective for mold cleanup?
Bleach can kill surface mold on non-porous surfaces, but it often does not reach porous materials inside. It can also create hazardous vapors if misused, so follow label directions and consider safer alternatives when cleaning porous materials.
Bleach can kill surface mold on hard surfaces, but use it with caution and avoid mixing with other cleaners.
What PPE do I need?
Essential PPE includes an N95 respirator (or higher), eye protection, gloves, and protective clothing. PPE protects you from spores and chemical exposure during cleanup.
Wear an N95 mask, gloves, and eye protection when dealing with mold.
How long does remediation take?
Remediation duration depends on the extent of growth and moisture control. Small jobs can be completed in a day or two, while drying and follow-up checks may take several days.
It can take a day or two for small jobs, longer if drying and moisture control are needed.
Should I test for mold after remediation?
Post-remediation testing is optional in many cases but can be useful if health concerns exist or you suspect hidden mold. A professional can conduct a visual assessment and, if needed, air sampling.
Testing after remediation can confirm mold clearance if health concerns exist.
How can I prevent mold recurrence?
Fix leaks promptly, control humidity, and ensure proper ventilation. Regular inspections after heavy rains or changes in temperature help catch problems early.
Fix leaks and keep humidity low to prevent mold from returning.
Watch Video
The Essentials
- Identify the moisture source first.
- Wear proper PPE throughout remediation.
- Contain the area to prevent spread.
- Dry completely and monitor humidity after cleanup.
- Plan for prevention to reduce recurrence.