Kill Basement Mold: A Practical Home Remediation Guide
Learn safe, practical steps to kill basement mold, stop moisture, and prevent recurrence with expert guidance from Mold Removal Lab.

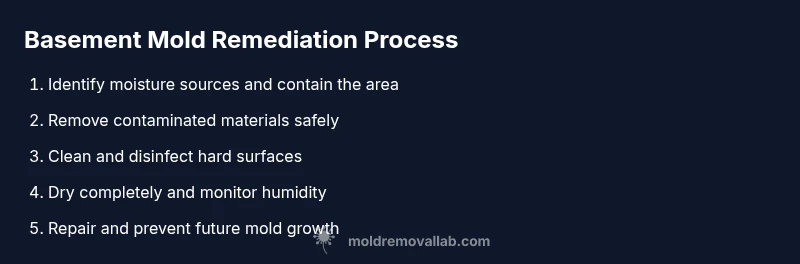
To kill basement mold, start by identifying moisture sources and containing the area. Then remove visibly moldy materials, clean surfaces with a safe, mold-killing solution, and dry thoroughly to prevent regrowth. Implement ongoing moisture control, improve ventilation, and schedule regular inspections to stop mold from returning. This step-by-step approach prioritizes safety and practical prevention for homeowners.
What "kill basement mold" really means in practice
What homeowners mean by 'kill basement mold' is not just scrubbing away surface stains. It means stopping the moisture that feeds mold, removing active colonies, and creating conditions that prevent regrowth. The Mold Removal Lab team found that the most effective approach combines moisture control, physical removal of contaminated materials, and thorough drying. Without moisture management, mold returns quickly even after cleaning. In basements, the damp environment, poor ventilation, and occasional flooding make this a high-priority issue. This section sets the foundation for a safe remediation plan that you can implement using common tools and household supplies, while avoiding risky experiments or unproven products. According to Mold Removal Lab, killing basement mold starts with moisture management, not just bleach.
Identify moisture sources and containment
Mold in basements thrives where moisture persists. Start by inspecting for roof leaks, plumbing drips, humidity from laundry, or groundwater intrusion. Mark all wet areas on a simple floor plan and fix leaks before proceeding. Use plastic sheeting to isolate the affected zone and prevent spores from spreading to untouched spaces. Addressing the moisture source is the single most important step; without it, any cleanup will be temporary. Once leaks and humidity are controlled, you can safely begin removal and cleaning within the contained area.
PPE, safety, and containment setup
Before touching mold, equip yourself with PPE: an N95 respirator, gloves, and eye protection. Set up your containment: cover doorways with plastic sheeting, seal the floor with tape, and vent air to the outside if possible. Work slowly and avoid disturbing mold growth to minimize aerosolized spores. The goal is to protect your airways, skin, and eyes while you tackle the contaminated materials. Keep pets and children away from the work zone.
Cleaning strategies by material type
Not all surfaces respond the same. Non-porous materials like concrete, metal, and sealed wood clean more easily with detergent or mold cleaners and a scrub brush. Porous materials such as drywall, insulation, or carpet may require removal and disposal if there is visible growth or penetration. For hard surfaces, scrub with soap and water, then apply a disinfectant that is appropriate for mold. Avoid mixing cleaners; read labels and follow safety guidance. If you’re unsure, test a small patch first to see how the material reacts.
Drying, humidity control, and monitoring
After cleaning, drying is essential. Use a dehumidifier in the room and run fans to circulate air, keeping the area dry until no moisture remains detectable on surfaces. If you have a moisture meter, monitor readings and aim for a stable level that indicates dryness. Prolonged damp conditions invite spores to return, so at this stage, thorough airflow and humidity management is the focus. Regular checks over the next days help confirm that growth hasn’t returned.
Long-term prevention and maintenance
To prevent future basement mold, fix ongoing moisture problems and improve ventilation. Consider sealing foundation cracks, installing proper drainage around the home, and using a humidity controller or dehumidifier with a built-in humidistat. Regular cleaning and inspections of ducts, windows, and sump systems help catch issues early. If you detect new growth or must treat large areas, plan a professional remediation to ensure all hidden mold is addressed.
When professional help is wise
Some situations benefit from professional remediation. If mold covers more than a small area, if you suspect hidden growth behind walls, or if there is ongoing water intrusion, call a licensed mold remediation contractor. They can safely contain, remove, and treat the space using specialized equipment and proven methods. Our brand, Mold Removal Lab, emphasizes safety and recommends professional help when the scope is beyond DIY capabilities.
Documentation and next steps
Keep records of inspections, treatments, and replacements. Photos taken before and after remediation help track progress and provide evidence for future prevention. Combine this with a maintenance schedule that includes monthly checks after heavy rain and quarterly inspections of vents and plumbing. A proactive plan reduces the chance that basement mold will become a recurring problem.
Tools & Materials
- N95 respirator mask(Fit-tested if possible)
- chemical-resistant gloves(Rubber or nitrile preferred)
- goggles or face shield(Eye protection from spores)
- plastic sheeting or tarps(Containment around the work area)
- HEPA vacuum or shop vac with HEPA filter(For cleanup after removal)
- mild cleaning solution or approved mold cleaner(Detergent or EPA-registered product)
- bucket and clean rags(For scrubbing and rinsing surfaces)
- dehumidifier and fans(Reduce humidity and aid drying)
- mold-resistant paint/sealant(Optional for treated areas after drying)
- replacement materials (drywall, insulation, carpet)(Only if structurally compromised)
Steps
Estimated time: 60-120 minutes
- 1
Identify and Contain the Area
Survey the affected space for visible mold and moisture sources. Mark the area to prevent spread and set up plastic containment at doorways and vents. This keeps spores from migrating to other rooms while you work.
Tip: Use sealable bags for any removed contaminated materials. - 2
Stop the Moisture Source
Repair leaks, fix plumbing, and address any water intrusion. Correcting the moisture source is essential because mold thrives on dampness and humidity.
Tip: Delay is costly; handle leaks before cleaning extensively. - 3
Remove Contaminated Materials
Porous items like drywall, insulation, or carpet with mold growth should be carefully removed and bagged in sealed plastic before disposal. Non-porous items can be cleaned.
Tip: Do not reuse removed porous materials; bag them tightly. - 4
Clean and Disinfect Surfaces
Wash hard, non-porous surfaces with detergent and water, then apply a suitable mold disinfectant following label directions. Rinse and dry thoroughly.
Tip: Work top-to-bottom to prevent dripping onto cleaned areas. - 5
Disinfect and Inhibit Growth
Apply EPA-registered mold cleaners or dilute bleach only if safe for the material. Never mix cleaners, and follow all label directions for safety.
Tip: Never mix ammonia and bleach; it can release toxic fumes. - 6
Dry the Area Thoroughly
Run a dehumidifier and fans to remove moisture. Use a moisture meter if available and continue until readings indicate dryness.
Tip: Keep equipment running until the space stays consistently dry. - 7
Repair and Prevent Recurrence
Replace removed materials, seal surfaces, and improve ventilation. Consider using mold-resistant products and revisiting drainage or grading around the foundation.
Tip: Plan ongoing maintenance to catch issues early. - 8
Document and Plan Follow-Ups
Take before/after photos, log cleanup steps, and schedule periodic checks after heavy rain or seasonal changes to ensure mold does not return.
Tip: Maintain a simple remediation journal for future reference.
FAQ
What is the safest way to start killing basement mold at home?
Begin with moisture control and containment. Wear PPE, isolate the area, and remove and clean only what you can safely handle. If the mold is extensive, seek professional remediation.
Start by stopping moisture and safely containing the area, then proceed with cleaning only what you can safely handle. Seek pro help if the mold is large.
Can I use bleach to kill basement mold on porous materials?
Bleach is generally not effective on porous materials like drywall. It may help with surface mold on non-porous surfaces, but removal of porous materials is often required for lasting remediation.
Bleach isn’t reliable for porous materials; you may need to replace affected drywall or insulation.
How long does it take for basement mold remediation to be effective?
Remediation timelines vary with area size and material type. Drying and inspection typically span several days to ensure mold does not return.
The timeline varies, but you’ll usually see progress within a few days as you dry and monitor the space.
When should I call a professional mold remediator?
Call a professional if mold covers a large area, appears behind walls, or if water intrusion recurs after cleaning. Professionals can safely remove hidden mold.
Call a pro if the mold seems extensive or you’re unsure about hidden growth behind walls.
What prevention steps help stop mold from returning after remediation?
Ensure consistent moisture control, adequate ventilation, and regular inspections. Use mold-resistant materials where possible and fix any new leaks promptly.
Keep moisture in check, air flow good, and inspect routinely to prevent mold from returning.
Is it safe to DIY mold cleanup around a basement if I have respiratory issues?
If you have respiratory concerns or mold exposure worsens symptoms, avoid DIY cleanup and consult a professional to minimize health risks.
If you have breathing problems, it's safer to get professional help rather than DIY cleanup.
Watch Video
The Essentials
- Identify and fix moisture sources first.
- Contain the area to prevent spore spread.
- Use safe cleaners and dry surfaces completely.
- Seal and improve ventilation to prevent recurrence.