Fix Mold in Basement: A Practical DIY Guide
Learn how to fix mold in basement safely with a practical, step-by-step approach. This guide covers moisture control, cleaning methods, and prevention to keep your basement dry and healthy. Includes safety tips and when to call a professional.

According to Mold Removal Lab, fixing mold in a basement starts with stopping moisture, isolating the area, and following a careful cleaning plan. This guide provides practical steps to assess the extent, choose DIY or pro help, and prevent recurrence. By following these steps, you can remove visible mold, minimize health risks, and protect your home's structure.
What fixing mold in basement entails
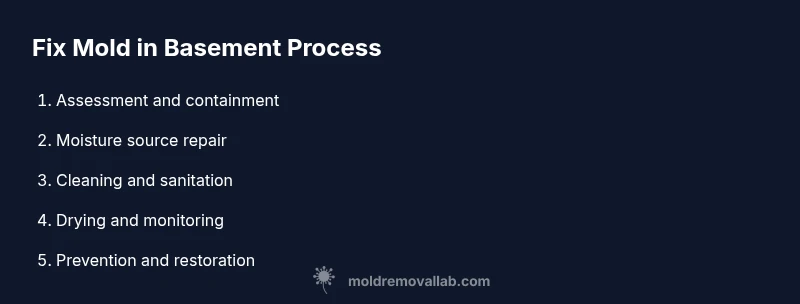
Fixing mold in basement isn't just about scraping off stains. It's a systematic process that tackles moisture, airflow, materials affected, and ongoing prevention. According to Mold Removal Lab, moisture control is the single most important step: without reducing water activity, mold is likely to return even after cleanup. The approach combines a three-part sequence: inspect and contain, clean and sanitize, and dry and monitor. First, identify the extent of growth and whether porous materials like drywall or insulation are involved. Then establish containment to prevent spores from drifting into other areas of the home. Finally, implement a drying plan and monitor humidity to ensure levels stay low enough to deter regrowth. In many basements, the root cause is hidden moisture—leaks, seepage, or high humidity—that fuels mold over time. Understanding the source lets you select a remediation strategy that fits your space and budget. For homeowners, the big decision is whether a DIY cleanup is safe and appropriate or whether professional remediation is warranted. Regardless of method, the aim remains the same: remove visible mold, reduce moisture, and restore a dry, healthy basement environment.
Causes of basement moisture and how to address them
Basement moisture comes from both bulk water and humidity. Common sources include exterior foundation cracks, poorly graded landscaping directing water toward the house, rainwater infiltration through window wells, leaky or sweating plumbing, and concrete walls that hold moisture. Mold thrives when damp air circulates in cold, poorly ventilated spaces. A practical approach is to stop water at the source: seal cracks with appropriate sealant, improve drainage around the foundation, repair roof or gutter issues, and install or repair sump pumps if present. Inside, manage humidity with proper ventilation and dehumidification. A damp basement often hides mold behind drywall, under insulation, or inside wall cavities, so visual checks may miss hidden growth. Regular moisture monitoring with a hygrometer helps you see trends, especially in spring and fall when humidity fluctuates. By targeting both bulk water and humidity, you reduce the opportunity for mold to return.
DIY vs professional remediation: making the call
Not every mold problem requires a pro, but significant growth or contamination demands expert help. For small, localized patches on non-porous surfaces, a careful DIY cleanup may be feasible with proper PPE, containment, and cleaning methods. If the mold covers porous materials, or if the area is large, or if anyone in the home has allergies or asthma, it's prudent to hire a licensed mold remediation contractor. The Mold Removal Lab team emphasizes starting with a clear plan: determine the area size, check for hidden growth behind walls, and verify that moisture sources are addressed before sealing off the space. Documentation and safety are essential; mistakes can spread spores and lead to ongoing problems. If you proceed yourself, limit disturbance, avoid blasting corroded materials, and stop work if you notice feverish symptoms or significant contamination. In any case, ensure you comply with local regulations and waste disposal rules.
Safety and containment: PPE, barriers, and air quality
Safety first: mold exposure can irritate the skin, eyes, and lungs. Always wear an N95 respirator or better, chemical-resistant gloves, goggles, and long sleeves. Before you start, seal the work area with plastic sheeting and tape to prevent spores from spreading through the house. Use a dedicated vacuum (HEPA), and let the space vent to the outside when possible. Use your HVAC system only if the space is properly contained to avoid circulating spores. If the mold is extensive or if you feel unwell, pause and seek professional guidance. The right PPE protects you, and containment prevents cross-contamination.
Cleaning and disinfection basics
Cleaning is more than wiping away stains; it’s about removing the mold on porous and nonporous surfaces and reducing residual spores. Start by removing mold-damaged porous materials (drywall, insulation) if they are severely affected. For hard, nonporous surfaces, wash with detergent and water, then scrub with a stiff brush to lift embedded spores. After cleaning, rinse with clean water and dry thoroughly. Avoid mixing chlorine bleach with ammonia or using bleach on wood and some porous materials, as this can create hazardous fumes and damage surfaces. When needed, apply an EPA-registered mold cleaner following the label directions. Ventilate the space during cleaning and keep moisture low to speed drying. After cleanup, run a dehumidifier or air mover to accelerate drying and monitor progress with a moisture meter.
Drying, humidity control, and monitoring
Drying is the critical step that prevents regrowth. Use a combination of dehumidifiers and high-output fans to bring relative humidity down to a safe level (usually below 50–60%). Keep the space well-ventilated to expedite evaporation, but avoid blowing air directly onto damp materials if the area isn’t fully contained. Monitor moisture with a hygrometer or moisture meter, checking several times over the first 24–72 hours after cleanup. If readings rise again, you may have an unresolved moisture source or hidden growth. Plan for a deliberate drying period before finishing surfaces or repainting, and recheck after installation to confirm the space stays dry.
Long-term prevention: maintenance and home improvements
Prevention is easier than remediation. Repair any foundation cracks and improve exterior drainage so water slopes away from the home. Inspect gutters and downspouts and ensure proper grading around the foundation. In the basement itself, seal gaps around pipes, install vapor barriers on concrete walls if needed, and consider insulation improvements to reduce condensation. Install a reliable sump pump if groundwater ingress is a risk, and maintain it regularly. Finally, ensure good ventilation in the basement by using exhaust fans or a dehumidifier with automatic humidity control. Regularly inspect for signs of moisture after heavy rain and address leaks promptly to stop mold from returning.
When to escalate to a professional
If you encounter extensive growth (large areas with visible mold, mold on porous materials like drywall, or suspected hidden growth behind walls), if you experience health symptoms, or if moisture sources remain after remediation attempts, call a licensed mold remediation contractor. A professional can perform professional-grade containment, use specialized equipment, and provide documentation for insurance or local regulatory purposes. Remember, mold issues are not just cosmetic; they can indicate structural problems or ongoing water intrusion that requires comprehensive solutions.
AUTHORITY SOURCES
- CDC: Dampness and Mold in Buildings (https://www.cdc.gov/mold/dampness.html)
- EPA: Mold Basics (https://www.epa.gov/mold/mold-basics)
- OSHA: Mold (https://www.osha.gov/mold)
- Additional guidance may be found in state and local health department resources.
Tools & Materials
- N95 respirator or higher(Fit-tested if possible; use disposable respirators for mold work)
- Chemical-resistant gloves(Long sleeves; latex-free if latex allergy)
- Goggles or protective eyewear(Wraparound style preferred)
- Plastic sheeting (6 mil or thicker)(For barrier walls and containment)
- Painter’s tape and duct tape(To seal barriers and coverage)
- HEPA vacuum(Use only for mold containment; not for wet cleanup)
- Mild detergent or EPA-registered cleaner(Avoid ammonia-based cleaners on porous materials)
- Stiff-bristle scrub brushes(For removing surface spores)
- Spray bottle(For applying cleaning solution)
- Microfiber cloths(Dispose after use on contaminated areas)
- Heavy-duty trash bags(For disposal of contaminated materials)
- Dehumidifier(Aim for RH below 50%)
- Fans or air movers(For air circulation; ensure proper containment)
- Moisture meter/hygrometer(To track drying progress)
Steps
Estimated time: 8-14 hours (varies by area size, material porosity, and moisture source complexity)
- 1
Assess the scope and contain the area
Begin with a visual inspection to determine how widespread the mold is and what materials are affected. Mark off the space with plastic barriers to prevent spores from spreading to the rest of the home. Remove people and pets from the area during the cleanup.
Tip: Keep doors closed and set up a dedicated path for equipment to minimize cross-contamination. - 2
Identify and fix moisture sources
Look for leaks, seepage, or plumbing issues and repair them before cleaning. Check exterior drainage and ensure water is diverted away from the foundation. If the moisture source persists, remediation won’t be effective long-term.
Tip: Document any leaks with photos for reference and insurance claims. - 3
Put on PPE and establish containment
Wear the required PPE before touching mold surfaces. Seal the work area with plastic sheeting and ensure the HVAC is off or contained to prevent spores from circulating.
Tip: Avoid dry scraping; it can release more spores into the air. - 4
Remove and bag damaged porous materials
If drywall or insulation is damp or moldy beyond cleaning, carefully remove and place in sealed bags for disposal. Do not reuse mold-contaminated materials.
Tip: Wipe down nearby non-porous surfaces to reduce residual spores before removal. - 5
Clean and sanitize nonporous surfaces
Wash hard surfaces with detergent and water. Use a stiff brush to dislodge mold from grout lines or textured surfaces. Rinse and dry thoroughly before proceeding.
Tip: For stubborn spots, consider an EPA-approved antimicrobial; always follow label directions. - 6
Dry the space thoroughly
Run dehumidifiers and fans to drive humidity below 50% while the space is ventilated to outside. Use a moisture meter to confirm drying progress and keep the area dry for at least 24–48 hours after visible growth is removed.
Tip: Do not seal the area until you’re sure all moisture sources are fixed. - 7
Inspect and monitor after cleanup
Recheck for new mold growth during the days following cleanup. Maintain humidity control and address any new leaks promptly. Document progress with photos and notes.
Tip: Schedule a follow-up check in 1–2 weeks to ensure the problem didn’t recur. - 8
Finalize restoration and prevention
Repair or replace any removed materials, seal surfaces to prevent moisture penetration, and install triggers for ongoing moisture control such as a sump pump or ventilation improvements.
Tip: Implement a simple maintenance routine to keep humidity in check year-round. - 9
Decide on professional involvement if needed
If mold covers large areas, is embedded in porous materials, or you have health concerns, contact a licensed remediation contractor. A professional can provide advanced containment, air-sampling, and documentation.
Tip: When in doubt, consult a professional early to avoid risky DIY mistakes.
FAQ
Is it safe to fix mold in basement myself?
For small, localized patches on non-porous surfaces, DIY cleanup can be feasible with proper PPE, containment, and cleaning methods. More extensive growth or porous materials usually requires a professional.
For small spots you can DIY safely with PPE, but for larger growth or porous materials, it's best to hire a pro.
How long does basement mold remediation take?
Time varies with the extent of growth and moisture containment. A simple cleanup can be completed in a day; larger projects may require several days and follow-up checks.
The duration depends on how widespread the mold is; some jobs finish in a day, others take days.
What is the best way to kill mold on concrete or nonporous surfaces?
Clean with detergent and water for most surfaces, then consider an EPA-registered antimicrobial following the label directions. Bleach is not always effective and should not be used on all surfaces.
Use detergent and water, then an approved antimicrobial if needed; avoid overusing bleach on porous materials.
Should I remove drywall or insulation if mold is present?
If mold has penetrated porous materials like drywall or insulation, removal is often necessary for thorough remediation. Nonporous materials may be cleaned and saved if not structurally damaged.
Porous materials with mold usually need removal; nonporous surfaces can sometimes be cleaned.
What humidity level should basement spaces stay at after remediation?
Aim for relative humidity around 45–60% depending on climate, with a preference toward the lower end to inhibit mold growth. Monitor regularly.
Keep humidity around mid-50s and check it often to prevent mold return.
Are mold spores dangerous to health?
Mold exposure can cause allergic reactions and respiratory symptoms, especially for sensitive individuals. If you have health concerns, limit exposure and seek professional guidance.
Spores can affect health for some people; limit exposure and consider professional help if needed.
Can mold grow back after remediation?
If moisture sources aren’t fully addressed or the space isn’t dried thoroughly, mold can recur. Ongoing moisture control and monitoring greatly reduce this risk.
Mold can come back if moisture isn’t controlled; maintain dryness and monitor the space.
When should I call a professional for basement mold?
Call a professional if the mold covers large areas, is embedded in building materials, you suspect hidden growth, or if anyone in the home has health concerns. A licensed remediator can ensure proper containment and disposal.
If the problem seems large or you’re unsure, hire a professional for safe remediation.
Watch Video
The Essentials
- Stop moisture first to fix mold in basement.
- Contain the area and protect yourself during cleanup.
- Dry thoroughly and monitor humidity to prevent recurrence.
- Know when to DIY and when to hire a professional.
- Follow trusted sources for safety and disposal guidance.