Mold in Basement: Prevention and Safe Remediation Guide
Practical step-by-step guidance for mold in basement: identify signs, remediate safely, control moisture, and prevent recurrence with tips from Mold Removal Lab.

Dealing with mold in basement starts by stopping the moisture source and assessing the contamination. Begin with fixing leaks, reducing humidity, and isolating the affected area. This quick answer previews a practical remediation plan: identify moisture drivers, treat affected surfaces safely, replace damaged materials as needed, and implement long-term prevention to protect health and property.
What mold in basement means
Mold growth in basement spaces is typically driven by chronic moisture. Basements tend to be cooler, damper environments with limited airflow, which creates ideal conditions for mold spores to settle, colonize, and form visible colonies on walls, framing, and stored items. The presence of mold signals an ongoing moisture problem—perhaps a leaking pipe, groundwater intrusion, or high humidity due to poor ventilation. The Mold Removal Lab team emphasizes that addressing the moisture source is the first and most critical step, because without it mold can return even after cleaning. Readiness to act quickly is essential for protecting indoor air quality and reducing the risk of secondary issues such as wood rot or compromised insulation. In addition, homeowners should be aware that some mold species can impact health, especially for those with asthma, allergies, or a compromised immune system. A measured, cautious approach helps keep families safe while you assess scope and plan remediation.
Signs of basement mold can include visible colonies, musty odors, and dampness on walls or floors. Moisture sources such as roof leaks, plumbing faults, or leaking windows should be prioritized for repair. The Mold Removal Lab team notes that even small leaks can lead to significant mold growth if left unchecked. Early intervention minimizes damage to building materials and reduces the likelihood of costly restoration later.
What constitutes a safe containment plan? Establishing containment prevents spores from spreading to undamaged areas. Close doors and seal vents with plastic sheeting and tape. Use drop cloths to catch debris and prevent dust migration. Keep a dedicated entry point and practice minimal disturbance in the affected zone. Hand-picking mold growth or scrubbing vigorously can release spores into the air, so containment paired with careful cleaning methods is essential. This is not a DIY free-for-all; understand when to escalate to professionals if contamination is extensive.
The remediation mindset: assess, plan, execute, and verify
A structured remediation mindset helps homeowners stay organized. Start by documenting affected areas, measuring the extent of mold growth, and identifying porous materials that may require removal. Develop a plan that covers removal of contaminated materials, surface cleaning with appropriate cleaners, drying, and a follow-up moisture check. Safety профiled steps such as wearing PPE, avoiding inhalation of dust, and using HEPA-filter vacuums can reduce exposure. The plan should also include post-cleaning verification like re-inspecting surfaces and checking humidity levels to ensure a stable environment. Mold Removal Lab guidance encourages documenting each step for future reference and to inform any potential insurance claims.
Practical considerations for different surfaces
Nonporous surfaces like metal or ceramic can often be cleaned thoroughly with EPA-registered cleaners. Porous materials such as drywall or insulation may require removal and replacement to prevent regrowth. When cleaning brick, concrete, or plaster, choose cleaners that can penetrate deep into pores without creating excessive moisture. Always test a small area first and avoid over-wetting surfaces. The goal is to remove visible mold and destroy spores without causing collateral damage to the structure.
How moisture control ties everything together
Preventing recurrence hinges on controlling moisture. This means addressing interior humidity, improving ventilation, redirecting groundwater away from the foundation, and sealing gaps where water can enter. Install or upgrade vapor barriers, sump pumps, and smart dehumidifiers if needed. Routine checks for leaks and moisture buildup become part of a homeowner’s maintenance routine. The Mold Removal Lab team stresses that sustained humidity control not only reduces mold triggers but also improves comfort and energy efficiency in the basement.
Practical timeline and expectations
Remediation timelines vary with the extent of contamination. Small, localized mold growth on nonporous surfaces can often be addressed within a day, while extensive contamination requiring material removal or structural repairs may take several days. Drying times depend on ambient conditions and the performance of dehumidification equipment. People should plan for temporary disruption in basement use and ensure protected storage for valuables. Document the process for future maintenance and potential insurance purposes.
Long-term health considerations and documentation
Health considerations include minimizing exposure during cleanup, especially for sensitive individuals. After remediation, re-check air quality if necessary and monitor for odors that could indicate hidden moisture. Keeping a record of repairs, moisture control installations, and cleaning logs can be helpful for future maintenance and for any insurance or warranty claims. Mold in basement situations benefit from proactive prevention and consistent monitoring.
Tools & Materials
- Personal protective equipment (PPE)(N95 or higher respirator, chemical-resistant gloves, protective goggles, and disposable coveralls)
- Plastic sheeting and tape(Used to create containment zones and control dust/mold spores)
- HEPA-filter vacuum(For dry cleaning and debris collection; avoid using non-HEPA vacuums)
- Mold cleaner and rust inhibitors(Use EPA-registered, non-ammonia cleaners appropriate for basement materials)
- Fragrance-free, non-ammonia detergent(For surface cleaning if cleaners alone are not sufficient)
- Disposal bags(Heavy-duty bags for removing contaminated materials)
- Dehumidifier or continuous air mover(To maintain moisture control and drying; monitor humidity below target level)
- Moisture meter or hygrometer(To track relative humidity and ensure drying progress)
- Utility knife and pry bar(For removing damaged drywall or insulation when required)
Steps
Estimated time: 8-16 hours depending on scope and ventilation
- 1
Stop the moisture source
Identify and repair any leaks or water intrusion in the basement. If possible, shut off the water source to limit ongoing moisture while you plan the remediation.
Tip: Document the leak and the fixes for insurance and future reference. - 2
Set up containment
Seal off the affected area with plastic sheets and tape to prevent spores from migrating to clean zones. Minimize doorway openings during cleanup.
Tip: Keep doors closed and use a dedicated entry point to reduce cross-contamination. - 3
Wear proper PPE
Put on a respirator, gloves, and eye protection before handling moldy materials. Avoid touching your face and remove contaminated clothing afterward.
Tip: Do not reuse disposable PPE; discard after a mold cleanup to prevent cross-contamination. - 4
Remove damaged materials
If drywall, insulation, or porous materials are mold-impacted beyond cleaning, remove and bag them in sealed disposal bags for safe removal.
Tip: Label bags clearly and avoid over-wetting during removal. - 5
Clean nonporous surfaces
Clean metal, glass, and hard plastics with EPA-registered cleaners. Rinse and dry thoroughly, then use a HEPA vacuum to capture residual spores.
Tip: Follow cleaner product directions and never mix cleaners with bleach unless specified. - 6
Dry the space completely
Run dehumidifiers and air movers to reduce humidity; aim for relative humidity below 60% and ideally around 50%.
Tip: Check progress with a hygrometer every few hours during active drying. - 7
Reinsulate and repaint (if needed)
Replace removed materials with mold-resistant options and seal surfaces before repainting. Consider moisture barriers for future protection.
Tip: Choose paints with mold-inhibiting properties and ensure the area is fully dry before painting. - 8
Verify and monitor
Reinspect the area after cleaning and drying. Continue to monitor humidity and signs of moisture changes weekly for several months.
Tip: Set up a simple maintenance plan to check for leaks and humidity regularly.
FAQ
What are the most common causes of basement mold?
Most basement mold results from moisture, including leaks, groundwater intrusion, condensation, or high humidity. Addressing the moisture source is the key to preventing regrowth.
Basement mold usually comes from moisture like leaks or high humidity. Fix the moisture, and mold growth is less likely to return.
Can I remove mold with household cleaners alone?
For small, nonporous surfaces, you can clean with EPA-approved cleaners. Porous materials often require removal and replacement. Always follow product directions and wear PPE.
For small nonporous surfaces, cleaners can work, but porous materials usually need removal. Wear protective gear.
When should I hire a mold remediation professional?
Call a professional for large areas, structural contamination, or if you have health concerns or persistent moisture after DIY cleanup.
If the area is large or structural, or if symptoms persist after DIY cleanup, it's time to hire a pro.
Is mold in basement always dangerous to my health?
Mold exposure can affect health for sensitive individuals. It’s prudent to limit exposure during cleanup and to remediate promptly.
Exposure can affect sensitive people, so limit contact during cleanup and remediate promptly.
How long does basement mold remediation take?
Duration depends on extent. Small areas can be done in a day; extensive contamination may take several days including dry-out time.
Small jobs can finish in a day; bigger ones may take several days with drying time.
What maintenance helps prevent future basement mold?
Control humidity, fix leaks promptly, improve ventilation, and perform regular inspections, especially after heavy rain or thaw.
Keep humidity down, fix leaks, and inspect regularly after rain to prevent mold.
Watch Video
The Essentials
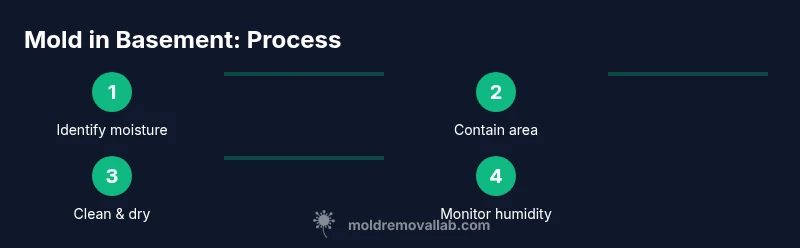
- Identify and fix the moisture source first
- Contain the area to prevent spread of spores
- Use proper PPE and HEPA equipment during cleanup
- Differentiate between cleaning porous vs nonporous surfaces
- Prioritize drying and humidity control to prevent recurrence