Toxic Mold Testing: A Practical Homeowner Guide 2026
A comprehensive guide from Mold Removal Lab on toxic mold testing for homes. Learn when to test, testing types, costs, and how to interpret results to protect health.

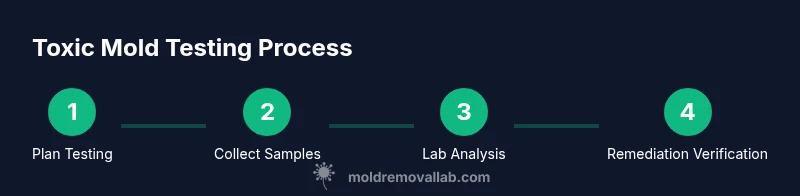
Toxic mold testing helps confirm whether harmful mold is present, locate contamination, and guide remediation. It distinguishes toxic species from benign mold and informs whether repairs or ventilation improvements are needed. This guide walks homeowners through practical, budget-conscious options, from DIY test kits to professional lab analysis, plus steps to reduce exposure while waiting for results.
What is Toxic Mold Testing and Why It Matters
Toxic mold testing is a targeted approach to determine if dangerous mold species are present in your home, where they are growing, and how extensive the contamination might be. While not all molds are equally hazardous, certain species can produce mycotoxins or trigger allergic reactions and respiratory symptoms. According to Mold Removal Lab analysis, testing helps homeowners distinguish dangerous contamination from harmless dust and ensures remediation efforts are properly focused. A well-planned test also provides a baseline to verify cleanup and to guide moisture-control strategies that prevent future growth. Understanding the science behind testing makes it easier to choose appropriate methods and to interpret results without overreacting or underreacting to a finding.
When to Consider Testing in Your Home
You should consider toxic mold testing after any significant water event (leaks, flooding, burst pipes), visible mold growth, persistent musty odors, or mounting health symptoms (coughing, wheezing, sinus irritation) that don’t improve with regular cleaning. Testing isn’t a substitute for moisture control; it complements it by locating hidden colonies behind walls, under flooring, or in HVAC ducts. Early testing can save money by preventing unnecessary demolition, while late testing helps confirm that a remediation plan was effective. Mold removal specialists often recommend testing before and after remediation to ensure the area is safe for occupants and that indoor air quality is restored.
Testing Methods: Air, Surface, and Bulk Sampling
There are several testing approaches, each serving different purposes:
- Air sampling measures airborne spores at the time of collection and can indicate current exposure risk in occupied spaces.
- Surface sampling (swabs, tapes) targets visible growth on walls, ceilings, or furnishings to identify species.
- Bulk sampling collects material from suspected growth zones for laboratory analysis.
No single method is universally sufficient; many homes benefit from a combination to build a complete picture. Labs often analyze collected samples to identify specific species and quantify relative concentrations, which helps tailor remediation efforts.
How to Prepare for Testing and Collect Samples
Preparation reduces contamination risk and improves accuracy. Before sampling:
- Seal off the area from occupants and pets where practical and use PPE (gloves, N95 respirator, and disposable coveralls if available).
- Turn off fans and keep doors/windows closed for a stable sampling environment.
- Follow kit or lab instructions precisely for sample collection order, labeling, and storage.
- If using a DIY kit, collect multiple samples from different locations to compare results and better map distribution.
Collect samples during dry conditions to prevent dilution by moisture, and avoid disturbing dust unnecessarily, which can alter results. After collection, transport samples promptly to the lab following the provided packaging guidelines.
Interpreting Lab Reports and Next Steps
Lab reports will list detected species and, in many cases, a semi-quantitative measure of concentration. A result showing toxic or allergenic species warrants prompt containment and remediation planning. However, interpretation should consider the whole-house context—moisture sources, air exchange, and occupant exposure. If results indicate problematic mold, the most important next steps are to fix moisture issues, remove contaminated materials safely, and re-check after remediation to confirm the space is safe for occupancy. For homeowners, engaging a qualified contractor or mold remediation specialist is often the most reliable path to effective cleanup.
DIY Testing vs Professional Lab Testing: Pros and Cons
DIY test kits can offer a quick, low-cost snapshot and are useful for screening, but they may have limitations in accuracy and species identification. Professional lab testing provides validated results, precise species identification, and a formal report that helps with insurance claims and compliance. If you have a history of health issues or a large, complex contamination, professional testing is typically the more reliable option. A blended approach—beginning with DIY screening and following up with a lab test if results suggest growth—can balance cost and accuracy.
Costs, Insurance, and Wait Times
Testing costs vary widely based on the scope and method, typically ranging from a few hundred to over a thousand dollars when professional lab analysis is included. DIY kits are usually cheaper but may require additional lab work for confirmation. Insurance coverage for mold testing depends on the policy and whether testing is tied to a covered remediation event. Turnaround times depend on the lab and method: DIY kits may provide rapid preliminary results, while lab analyses generally take several days to a week. As with any health-related assessment, plan for some variability in timing and costs.
Tools & Materials
- Nitrile gloves(Disposable; use one pair per sampling location)
- N95 respirator(Protects against inhalation of spores; fit properly)
- Disposable coveralls(Optional but helpful in dusty areas)
- Air sampling pump (professional)(Used with filter cassettes for air samples)
- Surface sampling kit (swabs/tapes)(For visible growth areas)
- Bulk sample containers(Sealable bags or sterile tubes)
- Permanent markers and labels(Label every sample clearly)
- Lab submission forms(Complete with location details)
- DIY mold test kit (optional)(Can be used for initial screening)
- Sealable plastic bags for PPE disposal(Containment after sampling)
Steps
Estimated time: 5-12 days (collection to lab results), plus remediation time
- 1
Plan your sampling strategy
Decide which rooms and locations to test based on moisture history and visible growth. Choose air, surface, or bulk sampling as appropriate. Document the plan to compare results across locations.
Tip: Plan at least two to three sampling points in each moisture-prone area. - 2
Prepare your space and PPE
Put on gloves and an N95 respirator; ensure pets and children are out of the area. Minimize movements to avoid cross-contamination.
Tip: Keep doors closed and avoid turning on HVAC in the testing area. - 3
Collect air or surface samples
Follow the kit instructions to collect air samples with a pump or surface samples with swabs/tapes. Label samples precisely with location and date.
Tip: Avoid touching sample surfaces with bare hands; use sterile tools. - 4
Seal, store, and transport samples
Seal samples in their containers, store them as recommended, and transport to the lab promptly to preserve integrity.
Tip: Keep samples away from direct sunlight and extreme temperatures. - 5
Submit samples for analysis
Fill out lab submission forms with room details and any health symptoms, if relevant. Ensure all samples are accounted for.
Tip: Double-check patient or occupant details if required by the lab. - 6
Review results and plan remediation
Interpret lab reports with an expert if possible; identify moisture sources, containment zones, and remediation priorities. Validate cleanup with follow-up testing.
Tip: Coordinate with a licensed mold remediation professional for the cleanup plan.
FAQ
What is the difference between air testing and surface testing?
Air testing analyzes spores in the air to assess current exposure risk, while surface testing identifies mold on walls or other surfaces. Using both can provide a fuller picture of contamination and help target remediation.
Air tests tell you what you’re breathing, surface tests show where mold is growing. Using both helps plan cleanup.
How long does toxic mold testing take?
Lab results typically take a few days after samples are submitted, depending on the test type and lab workload. Based on Mold Removal Lab Analysis, 2026, the overall timeline from collection to report is usually within 5-12 days.
Most results arrive within about a week, depending on the lab and test type.
Can DIY mold test kits be trusted?
DIY kits can offer a preliminary indication but are generally less reliable than professional lab testing for identifying species and confirming contamination. Use them for screening and consider lab confirmation if results are positive.
DIY kits are good for screening, but labs confirm the exact species and contamination levels.
What does a positive result mean for remediation?
A positive result indicates there is mold present, but remediation decisions depend on species, extent of growth, and moisture sources. Plan cleanup with a licensed professional and verify the space after remediation with follow-up tests.
Positive results show mold is present; remediation should be guided by the species and growth extent, followed by re-testing.
Should testing occur before or after remediation?
If mold is visible or there has been significant moisture, testing before remediation helps quantify risk. Post-remediation testing confirms cleanup success and ensures indoor air quality is restored.
Test before to assess risk, and test again after remediation to confirm cleanup.
How should homeowners respond to moisture problems after testing?
Address moisture sources immediately after testing. Use dehumidifiers, fix leaks, improve ventilation, and consider a professional assessment if lingering dampness persists.
Fix leaks, lower humidity, and improve ventilation to prevent future mold growth.
Is there a universal safe level for mold in homes?
There is no universal 'safe' mold level; risk depends on species, concentration, occupant sensitivity, and exposure duration. Lab identification helps determine whether remediation is necessary.
There isn’t a single safe count; it depends on the species and exposure.
Can testing be done in a rental property?
Yes, tenants and landlords can order testing when concerns arise. Landlord-tenant agreements and local regulations may influence how tests are conducted and who pays for them.
Testing is possible in rentals, but costs and responsibilities vary by locality and lease terms.
Watch Video
The Essentials
- Choose testing method based on exposure risk and area complexity
- Professional lab analysis provides the most reliable results
- Moisture control is the cornerstone of successful remediation
- Remediate first, then re-test to confirm cleanup
- Balance cost with accuracy using a phased approach