Testing for Toxic Mold: A Practical Home Guide
Learn how to test for toxic mold safely, compare DIY kits vs professional testing, collect samples, and interpret results to protect your home and health.

By the end of this guide, you will know how to test for toxic mold safely, choose between DIY kits and professional testing services, and interpret results accurately. Key requirements include PPE, a clean sampling area, and awareness of false positives/negatives. This how-to covers when to test, what samples to collect, and how to act on findings to protect your home.
What is testing for toxic mold?
According to Mold Removal Lab, testing for toxic mold helps identify whether mold growth poses health risks and reveals hidden sources behind musty odors. This kind of testing distinguishes suspect odors from actual allergenic or pathogenic species by analyzing air samples, surface swabs, or dust. It's not a substitute for a full moisture assessment, but it can pinpoint sources after water damage or chronic humidity. The goal of testing for toxic mold is to confirm exposure risk, locate the contamination source, and inform an effective remediation plan. A key nuance is that many molds are harmless in small quantities, but certain species or high concentrations can trigger symptoms in sensitive individuals. Therefore, your testing plan should align with health concerns, building history, and moisture patterns. Mold Removal Lab notes that a thoughtful approach reduces false alarms and unnecessary remediation, saving time and reducing disruption. In the following sections, we explore when to test, what methods exist, how to collect samples safely, and how to interpret results within context.
When to test and what to expect
Testing for toxic mold is most prudent after water intrusion, persistent moisture, or new health symptoms without another clear cause. If you notice a musty odor, visible growth, or dampness that won’t go away, testing can help verify whether problematic species are present. Mold Removal Lab analysis shows that samples taken from multiple areas, including air and surfaces, yield more reliable conclusions than single-point tests. Expect a process that includes selecting a sampling method, collecting the samples with proper PPE, and submitting them to a lab or using an approved DIY kit. Results typically arrive in a lab report with identified species and concentration estimates, which you then interpret in the context of occupancy health concerns and moisture history.
Types of tests and how they work
Tests for mold generally fall into three categories: air tests, surface tests, and bulk/dust tests. Air tests trap spores to estimate airborne exposure; surface tests collect material from walls, ceilings, or problem areas; bulk tests examine a chunk of material for direct identification. Labs may use DNA-based methods or culture to identify species, with PCR-based techniques offering faster turnaround on some kits. It’s important to understand that results reflect exposure potential at the time of sampling and may be influenced by recent activities, ventilation, and cleaning. When combined with a moisture assessment, test results provide a clearer picture of where remediation should begin and what controls are most effective.
How to collect samples safely
Sample collection requires careful preparation to avoid contaminating specimens and to protect your health. Always wear PPE: a properly fitted N95 or equivalent, gloves, and eye protection. Label each sample clearly with location, date, and sampler initials. For air tests, follow kit instructions for pump operation and filter handling; for surface tests, use sterile swabs or clear tape to lift material from the exact spot of concern. Place samples in sealed, labeled containers or bags and keep them away from direct sunlight or extreme temperatures. If you’re unsure about technique, stop and consult a professional to prevent invalid results.
Interpreting results and next steps
Interpreting mold test results requires context: species identity, concentration, room usage, and moisture sources. A positive result for a toxigenic species doesn’t automatically indicate imminent danger, but it does warrant action—especially in homes with vulnerable occupants. Use results to identify moisture sources and prioritize remediation zones. If you have ongoing symptoms or high-risk individuals, consult a professional for a comprehensive assessment and tailored remediation plan. Regardless of results, controlling humidity (ideally 30-50%) and addressing leaks will reduce recurrence and improve indoor air quality.
Do-it-yourself vs professional testing
DIY test kits offer quick initial insights and can be cost-effective for a baseline understanding, but they vary in sensitivity and accuracy. Professional testing provides standardized sampling, lab-grade analysis, and clear guidance based on health risk and building science. Mold Removal Lab recommends weighing the benefits of DIY versus pro testing against your health concerns, the complexity of your space, and the likelihood of hidden moisture sources. For high-risk homes or uncertain results, a professional assessment is usually the safer choice.
Tools & Materials
- N95 respirator or P100 respirator(fit-tested if possible)
- Nitrile gloves(two pairs)
- Safety goggles(eye protection)
- Mold testing kit (air or surface)(validated kit; includes collection tools)
- Sterile swabs, tape, or collection cards(as per kit instructions)
- Sealable bags or sterile sample containers(for preserving samples)
- Alcohol wipes or disinfectant(surface prep and tools)
- Labels and marker(for sample identification)
- Permanent marker or labelling pen(document locations)
- Notebook or digital device(record locations, conditions)
- Camera or smartphone(photographic record)
- Disposable waste bags(PPE disposal)
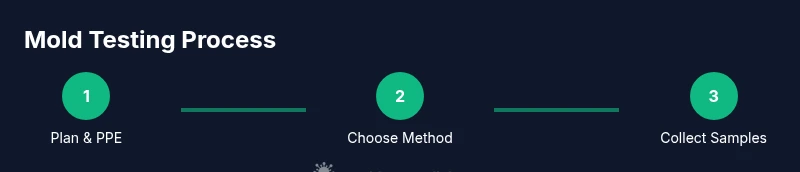
Steps
Estimated time: 45-90 minutes for sampling; lab turnaround 2-7 days depending on test type
- 1
Prepare PPE and plan sampling
Put on PPE and outline zones to test based on moisture history and odor. Decide whether you’ll do air, surface, or dust testing and identify entry points that minimize disruption.
Tip: Ensure a clear path to all areas; avoid cross-contamination. - 2
Choose sampling method
Select air sampling to assess airborne spores or surface/dust sampling for contamination on surfaces. Follow kit instructions for the chosen method and ensure equipment is calibrated or validated.
Tip: Multi-method sampling increases reliability. - 3
Collect air samples
Set up the air pump if using an air kit and follow the manufacturer’s timing. Place the sampler away from doors and vents to avoid skewed results. Seal and label the sample after collection.
Tip: Run the pump steadily; avoid drafts during sampling. - 4
Collect surface samples
Swab or tape-over suspect areas with sterile materials. Label each sample with location, date, and sampler initials. Keep samples sealed and cool until processing.
Tip: Target the most moist or recently damaged areas for relevance. - 5
Seal, label, and store samples
Seal all samples in labeled containers, log the details, and store according to kit instructions to prevent contamination before lab submission.
Tip: Double-check that caps are secure and containers are leak-proof. - 6
Submit to lab or follow DIY protocol
Send samples to the designated laboratory or complete the DIY kit workflow. Record receipt tracking numbers and expected turnaround times.
Tip: Keep a copy of the submission form for reference. - 7
Review results and plan remediation
Review lab results in the context of moisture sources and occupancy. Use findings to prioritize remediation steps and hire professionals if needed.
Tip: If results are inconclusive, consider a professional moisture assessment.
FAQ
What is the difference between air testing and surface testing for mold?
Air testing captures airborne spores to estimate exposure, while surface testing collects material to identify species present on surfaces. Each has strengths and limitations, and using both can provide a fuller picture. Results must be interpreted with moisture history and occupant health considerations.
Air tests assess what you breathe, while surface tests show what’s on surfaces. Using both helps confirm exposure risk and guide remediation.
How long do mold test results take to come back?
Turnaround depends on the method and lab workload, typically ranging from 2 to 7 days for many tests. Some DIY kits provide faster, though less comprehensive, results. Always check expected timelines with the lab or kit provider.
Most tests take a few days to a week. Check the lab’s stated turnaround time for precision.
Can DIY mold tests be trusted?
DIY tests can indicate presence and types of mold but may be less reliable than professional tests due to sampling variability and lab standards. Use DIY results as a starting point and consider a professional assessment for confirmation, especially in high-risk spaces.
DIY tests are useful for a general sense, but professional tests are more reliable for decisions about remediation.
Should I vacate the area during testing?
You don’t typically need to evacuate the entire house, but you should limit occupancy in testing zones and ensure proper containment to avoid cross-contamination. Follow kit instructions and lab guidance for safety.
Limit occupancy in testing zones and seal off areas as directed by the testing kit or professional.
What are typical costs for mold testing?
Costs vary by method and region, with DIY kits generally cheaper and professional services more expensive. Expect to budget for initial testing plus potential follow-up assessments if remediation is needed.
DIY kits cost less upfront; professional testing costs can be higher but may save money by providing actionable remediation plans.
What should I do if testing confirms mold growth?
Contain the area to limit spread, address moisture sources, and contact a qualified remediation professional. Early action reduces health risks and prevents recurrence.
Contain the area, fix moisture, and get professional remediation if needed.
Watch Video
The Essentials
- Wear PPE before collecting samples.
- Choose the right test type for your goals.
- Interpret results with lab context and moisture history.
- Engage a pro for high-risk sites or unclear results.