Mold Testing Homes: A Practical Guide to Safe Living
Learn how to test for mold in homes—when to test, sampling methods, lab interpretation, and remediation steps. Practical, expert guidance from Mold Removal Lab helps homeowners and renters protect health and comfort.

Mold testing homes can be done with DIY sampling or professional labs. The aim is to identify moisture sources and mold presence, interpret results accurately, and guide remediation. Use accredited labs when possible and follow proper sample handling to ensure trustworthy conclusions you can act on.
Why mold testing homes matters
Mold testing homes is not just about finding a black spot on a wall; it’s about protecting health, preserving property value, and ensuring long-term comfort. When moisture enters a structure, mold can begin to grow in hidden areas where it’s easily missed during routine cleaning. Early detection helps prevent structural damage, reduces exposure to mold spores, and informs a practical remediation plan. According to Mold Removal Lab, testing identifies sources of dampness and pinpoints the extent of contamination, guiding you to targeted actions rather than guesswork. For homeowners and renters, understanding what the test shows—especially in moisture-prone spaces like basements, bathrooms, and kitchens—builds confidence in the next steps. The goal is actionable information: where the mold is, how extensive it is, and what conditions need to change to stop it from returning. Keep in mind that mold testing is part of a broader strategy to improve indoor air quality, not a stand-alone fix.
When to test: signs and thresholds
Not every mold problem needs testing, but certain situations warrant it. If you notice persistent musty odors, allergic symptoms that worsen indoors, or damp patches that won’t dry, testing is wise. Visual inspection may miss hidden colonies behind drywall, under flooring, or inside wall cavities. In climates with high humidity, or after a flood, moisture control is essential before remediation begins. Mold Removal Lab's analysis highlights that testing is most effective when moisture sources are identified and managed. Pair testing with a moisture assessment to distinguish current growth from residual staining. For landlords and homeowners, documenting findings with dates, locations, and photos adds clarity for insurance or remediation professionals. Remember that tests measure presence or concentration at a moment in time; mold can return if underlying moisture isn’t addressed. Use results to prioritize repairs, ventilation improvements, and cleaning strategies that reduce future growth.
Methods of mold testing
Mold testing employs several approaches, each with strengths and limitations. Surface sampling (swabs or tape lifts) is quick and relatively inexpensive, best for suspect surfaces. Bulk sampling collects small material chunks for laboratory analysis. Air sampling compares indoor and outdoor spore counts to gauge indoor air quality, but results require careful interpretation by a lab. DIY mold testing kits offer convenience but can be unreliable if not used correctly; always follow kit instructions and consider sending samples to a certified lab for confirmation. Moisture meters and infrared thermography help locate hidden moisture sources that fuel growth. When selecting a lab, prioritize accreditation, clear chain-of-custody procedures, and transparent reporting that aligns with professional standards. Be mindful of avoiding contamination during collection and transport.
Interpreting results and limitations
Results indicate presence or concentration of mold at the time of sampling, not a universal verdict on health risk. Different species have different implications, and a high spore count does not always mean a dangerous exposure if moisture sources are controlled. Always interpret results in the context of moisture problems, building materials, and occupant symptoms. DIY tests lack the rigor and context of professional analyses, so consider consulting an IAQ professional for interpretation. Labs accredited by recognized standards provide more reliable species identification and actionable recommendations. Remember that remediation decisions should focus on eliminating moisture, improving ventilation, and cleaning affected areas using validated methods.
DIY vs professional testing: what to expect
DIY testing can identify obvious issues and guide next steps, but professional testing offers higher reliability, expert interpretation, and detailed remediation recommendations. Professionals typically perform comprehensive sampling, including air and surface tests, with validated laboratory analysis. Costs, turnaround times, and reporting depth vary by provider and method. If results indicate elevated contamination or if there are ongoing moisture problems, a professional assessment is often the safest path to ensure thorough remediation and to reduce the risk of regrowth.
Step-by-step testing plan for homeowners
Develop a clear plan before you begin sampling. Start by defining the problem areas (moisture hotspots, humid rooms, or flood-damaged zones). Gather PPE, labeling materials, and sampling kits or containers. Decide which sampling types to use based on symptoms and space constraints, then plan a lab submission or professional consultation. Keep a simple log of locations, dates, and observed conditions. After sampling or a lab submission, review the lab report with a professional to translate terminology into a practical remediation plan.
Safety and remediation considerations after testing
Prioritize immediate moisture control after testing, such as fixing leaks, drying damp areas, and improving ventilation. Do not delay remediation if you suspect active growth or an ongoing moisture source. Use proper PPE when cleaning and disposing of contaminated materials, and follow lab guidance for disposal of samples. Once remediation is completed, plan for retesting to confirm the absence of active growth and to verify that moisture levels have stabilized. Continuous maintenance—monitoring humidity and inspecting vulnerable areas—helps prevent recurrence.
How mold testing homes fits into overall indoor air quality
Mold testing is a key component of indoor air quality (IAQ) management. It complements humidity control, air filtration, and source remediation. Effective IAQ strategies include maintaining indoor humidity between roughly 30% and 50%, ensuring adequate ventilation, and addressing all moisture sources promptly. Reducing occupant exposure to mold spores improves comfort, reduces respiratory symptoms, and protects vulnerable populations such as children and the elderly. Regular awareness and a proactive testing mindset help homeowners sustain a healthier living environment.
Costs and scheduling: what homeowners should budget
Costs for mold testing vary based on sampling scope, the number of zones tested, and whether the analysis is performed by a DIY kit or a professional laboratory. Availability of a lab, turnaround times, and report depth influence pricing. Budget considerations should also include moisture remediation planning and potential follow-up testing. The goal is a comprehensive plan that connects testing results to actionable steps and a sustainable moisture-control strategy.
What’s next after testing: from data to action
Turn test results into a remediation plan focused on moisture elimination. Prioritize leaks, condensation, inadequate ventilation, and water intrusion. Clean and disinfect affected areas with methods recommended by professionals, then recheck after remediation. If symptoms persist, consider follow-up testing or a second opinion from a Mold Removal Lab expert to ensure you’re addressing root causes and preventing recurrence. The ultimate objective is a healthier home with fewer mold-related risks.
Tools & Materials
- N95 respirator mask(Protects against inhaling spores; ensure proper fit)
- Disposable gloves(Use nitrile gloves; change between samples)
- Safety goggles or eye protection(Prevents splashes from samples)
- Disposable coveralls or apron(Keeps clothing clean and reduces contamination)
- Sterile swabs and/or tape lift materials(For surface sampling)
- Sterile sample containers or bags(Seal samples securely for lab submission)
- Labels and permanent marker(Label samples with location and date)
- Moisture meter or humidity gauge(Helpful for locating moisture sources)
- Camera or smartphone(Document conditions and odors)
- Notepad and pen(Record observations and locations)
- Sealable trash bags(Contain used PPE and disposable materials)
- Lab submission kit or shipping materials(Follow lab instructions for submission)
Steps
Estimated time: 1-2 weeks (depending on lab turnaround and remediation complexity)
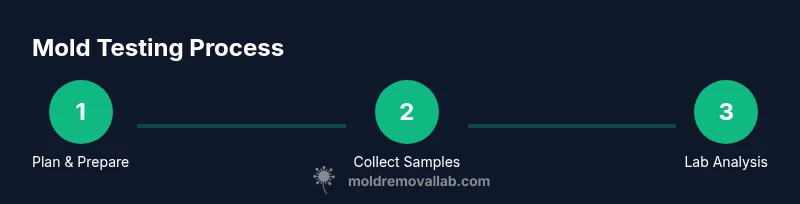
- 1
Plan and prepare
Define testing goals, identify problem areas, and gather PPE and labeling supplies. Decide which sampling types best fit the space and symptoms, and note any moisture concerns to address later.
Tip: Create a simple map of the home marking suspected zones before you begin. - 2
Gather sampling materials
Assemble all required tools and labeling materials. Pre-label containers with location and date to avoid mix-ups and to simplify lab submission.
Tip: Check kit expiry dates and laboratory submission instructions in advance. - 3
Collect surface samples
Swab or tape lift target surfaces in suspected areas, following kit or lab protocols to avoid contamination. Use clean technique and avoid touching the sampling area with bare hands.
Tip: Sample multiple spots on a suspected surface for accuracy. - 4
Collect air samples (if available)
Set up any available air sampling equipment according to manufacturer directions, aiming for representative indoor air compared to outdoor air. Run for the recommended duration and keep doors closed during sampling.
Tip: Include an outdoor control sample to provide a reference point. - 5
Label, package, and document
Seal samples securely in labeled containers or bags. Maintain a simple log of sample locations, dates, and any observed moisture signs to support interpretation.
Tip: Keep samples cool and avoid extreme heat during transport. - 6
Submit samples to a lab or arrange professional testing
Follow lab instructions for submission; include chain-of-custody forms if required. Decide between a DIY lab submission or booking a professional assessment.
Tip: Ask about turnaround time and report formats before submitting. - 7
Review results and plan remediation
Read the lab report with your remediation plan. Identify moisture sources and recommended cleaning or containment measures before proceeding.
Tip: If results show elevated contamination or persistent moisture, consult a qualified IAQ professional. - 8
Schedule retesting and implement controls
After remediation, plan a retest to confirm the issue is resolved and moisture controls are effective. Implement humidity control, ventilation improvements, and regular inspections.
Tip: Set a reminder to recheck moisture quarterly and after heavy rain.
FAQ
What is the difference between DIY mold test kits and professional testing?
DIY kits are convenient but may lack accuracy and professional interpretation. Professional testing provides comprehensive sampling, accredited analysis, and clearer remediation guidance.
DIY kits are quick but testing accuracy varies; professional testing offers thorough analysis and clearer remediation guidance.
Can I rely on DIY mold test results?
DIY results can indicate potential problems, but they are not a substitute for professional interpretation, especially for health-related decisions. Always consider a lab-based confirmatory test if concerns persist.
DIY tests can show potential issues, but professional interpretation is important for accuracy and safety.
How long does mold testing take?
Turnaround depends on the lab and method; typical timelines range from a few days to a couple of weeks. Plan for processing and reporting before decisions on remediation.
Turnaround varies; plan for a few days to a couple of weeks depending on the lab and tests.
Do I need to test after remediation?
Yes. Retesting confirms that moisture sources are controlled and mold growth has been halted. It helps validate the success of remediation before occupancy continues.
Yes, retesting confirms the issue is resolved and helps ensure it doesn’t come back.
Who should interpret mold test results?
A qualified IAQ professional or the lab that conducted the test can interpret results and translate them into actionable remediation steps.
A trained IAQ professional or the lab can interpret the results accurately.
Watch Video
The Essentials
- Identify moisture sources before remediation
- Choose testing methods based on space and symptoms
- Rely on accredited labs for interpretation
- Remediation should target moisture control first
- Retest to confirm safety after cleanup