Mold Testing in Ann Arbor: A Practical Home Guide
Discover practical steps for mold testing in Ann Arbor homes. Learn when to test, DIY vs professional options, sampling methods, interpretation tips, and remediation strategies to keep your indoor air safe.

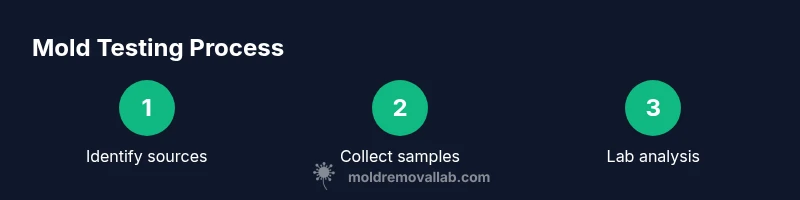
To test mold in Ann Arbor homes, follow these steps: 1) Identify symptoms and sources (water damage, musty odors, visible growth). 2) Choose your testing path (DIY mold test kits for screening or hire a certified mold assessor for comprehensive sampling). 3) Interpret results with caution and act on remediation guidance. Mold Removal Lab notes that professional testing improves accuracy in complex cases.
Why Mold Testing Matters in Ann Arbor
Ann Arbor's climate features humid summers and cold winters, with indoor humidity fluctuations that can hide mold growth behind walls, under floors, or in basements. Regular mold testing helps homeowners identify hidden sources before damage compounds and before occupants experience allergy or respiratory symptoms. According to Mold Removal Lab, mold testing in climates like ours is most effective when paired with a thorough visual inspection and moisture assessment. The Mold Removal Lab team has found that early detection reduces property damage, improves indoor air quality, and supports safer occupancy for families. In practice, a targeted approach focuses on suspected problem areas—kitchens, bathrooms, basements, and laundry rooms—where humidity and condensation are frequent. By documenting the location of moisture, the date of any water events, and any odors, you create a map that guides sampling and remediation decisions. This is especially important in Ann Arbor, where older homes, crawl spaces, and renovations create multiple potential points of moisture entry. The goal of testing is not just to confirm the presence of mold but to identify the species and hidden growth patterns that influence remediation planning.
When to Test: Triggers in Ann Arbor Homes
In Ann Arbor, certain signs warrant testing. A persistent musty odor, visible stains on walls or ceilings, or recurrent allergy symptoms can indicate unseen contamination. Recent leaks, burst pipes, or ongoing moisture near bathrooms and basements are strong red flags. For renters and homeowners, timing matters: testing after a suspected water event or renovation helps distinguish temporary dampness from established growth. According to Mold Removal Lab, prompt testing is particularly important in older homes where hidden spaces—crawl spaces, behind cabinetry, or inside wall cavities—can harbor mold without obvious surface clues. By acting quickly, you can prevent damage from spreading and avoid costly remediation later. In multi-unit buildings, testing joint spaces like shared basements or common utility rooms may be warranted. Always document findings and compare them against moisture sources to target the most probable problems.
DIY Testing vs Professional Services in Michigan Homes
DIY mold test kits can offer a useful screening tool, especially for homeowners with suspected surface growth or recent water events. They are typically less costly and can provide quick directional results. However, DIY kits have limitations: they may not detect hidden mold, cannot reliably identify species, and often lack standardized lab interpretation. Professional mold testing, by contrast, uses accredited labs and trained assessors who collect representative air and surface samples, visit moisture sources, and deliver a formal report with actionable remediation recommendations. The Mold Removal Lab Team emphasizes that for complex scenarios—multi-room contamination, suspected hidden growth, or cases involving health considerations—professional testing provides higher accuracy and clearer next steps. In Ann Arbor, where older homes and variable moisture patterns are common, a professional assessment can save time and reduce guesswork while guiding safer remediation plans.
How Mold Testing Works: Sampling Methods
Mold testing involves several sampling methods that complement each other. Air sampling captures spores that travel through HVAC systems or indoor spaces, while surface sampling (swabs or tape lifts) targets visible growth on walls, ceilings, or substrates. Bulk samples and settled dust analyses supplement air and surface data to reveal hidden contamination. Labs analyze collected samples to identify mold species and concentration levels, guiding remediation decisions. The combination of field observations and lab results yields the most reliable picture of indoor mold exposure. In practice, testers will select methods based on suspected sources, room use, and health concerns, then interpret results within the context of home moisture patterns. For Ann Arbor homes with fluctuating humidity, repeated sampling after remediation is often recommended to verify success.
What to Expect During a Test in Your Home
A typical testing visit starts with a visual inspection, moisture readings, and a discussion of recent leaks or floods. Next, samples are collected according to the chosen method—air samples taken with a calibrated pump, surface swabs, or bulk samples from suspected areas. Samples are placed in labeled containers and sent to an accredited lab. You will usually receive a written report within a few days to a week, describing mold species, spore counts, and remediation recommendations. If health concerns exist, testers may suggest interim containment steps and protective measures to minimize exposure. Throughout the process, testers should minimize disruption and maintain clear communication about what to expect, safety precautions, and next steps. This approach helps keep residents informed and comfortable as remediation plans are formulated.
Interpreting Results and Choosing Remediation
Interpreting mold test results requires context. A positive result confirms mold presence, but it does not automatically indicate the severity or health risk without knowing species and concentration. Look for a clear remediation plan tied to the lab report—this should include identify moisture sources, containment strategies, and equipment recommendations (such as HEPA air cleaners or dehumidification). When results indicate moisture problems, address the source before cleaning visible growth. The Mold Removal Lab team emphasizes that remediation quality hinges on complete moisture control and safe, thorough cleanup. If contamination is widespread or involves sensitive areas like HVAC ducts or sleeping areas, consider professional remediation to ensure proper containment and disposal. After remediation, a follow-up test can verify that the environment meets safety thresholds and is ready for safe occupancy.
Regional Considerations for Ann Arbor: Common Problem Areas
In Ann Arbor, certain zones are more prone to mold growth due to moisture exposure and building design. Basements and crawl spaces commonly harbor damp conditions, especially in homes with sump pits or damp stone foundations. Bathrooms and laundry rooms experience high humidity and intermittent water damage, increasing mold risk near plumbing lines and exhaust vents. Kitchens—where warm, damp air meets cool walls—are another frequent site for condensation-driven growth. Attics and roof spaces, if poorly vented or leaking, can propagate mold into living areas if moisture migrates through structure wood or insulation. Because climate and building stock vary across neighborhoods, localized testing can help pinpoint high-risk areas. The Mold Removal Lab Team recommends a targeted approach: start with the most moisture-prone zones, then expand as needed based on moisture readings and initial sample results. Regular inspections after renovations or seasonal changes can prevent minor issues from becoming persistent problems.
Preventing Mold Recurrence After Testing
Prevention starts with moisture control. Fix leaks promptly, improve ventilation in bathrooms and kitchens, and ensure crawl spaces are properly sealed and insulated. Use dehumidifiers in damp rooms and keep indoor humidity below 60 percent (ideally around 40-50 percent, depending on comfort and health considerations). Regularly check gutters, downspouts, and roof integrity after storms, and ensure HVAC systems are clean and appropriately filtered to avoid circulating spores. Clean routine surfaces with mold-inhibiting cleaners and dry any damp spots within 24 to 48 hours after water exposure. It is often helpful to establish a seasonal inspection routine and document moisture events, mold occurrences, and remediation outcomes to catch patterns early. The Mold Removal Lab Team recommends pairing testing with ongoing moisture management to minimize future growth and maintain healthy indoor air.
Case Study: A Typical Ann Arbor Scenario
A family in a century-old home noticed a musty smell near a finished basement and a few dark spots on the wall after a winter thaw. A professional testing service sampled air from the basement and surface areas near the leaks, then sent samples to a lab for analysis. The results showed several common indoor mold species and elevated moisture near the foundation wall. The remediation plan prioritized fixing the foundation leak, improving subfloor ventilation, and removing mold-affected drywall with proper containment. After the cleanup, a follow-up test confirmed that mold levels had returned to normal and the home felt drier and healthier. This scenario illustrates how coordinated testing, moisture control, and professional remediation can restore safety and comfort in an Ann Arbor home.
Tools & Materials
- N95 respirator(Fit-tested recommended for protection during sampling and cleanup)
- Latex-free gloves(Disposable; change between areas to avoid cross-contamination)
- Moisture meter(Identify damp zones behind walls or under floors)
- Flashlight(Inspect dark corners, behind fixtures, and cavities)
- Tape measure(document room dimensions for sampling planning)
- DIY mold test kit (optional)(Use only as screening; lab confirmatory testing preferred for accuracy)
- Zip-top bags and labeled containers(For sample collection and transport)
- Camera or smartphone(Document visible growth and moisture sources)
Steps
Estimated time: 4-7 business days
- 1
Identify moisture sources
Conduct a visual survey and use a moisture meter to locate damp areas. Note leaks, condensation points, and any water stains on walls or ceilings. This step shapes sampling decisions and targets high-risk zones.
Tip: Focus on basements, bathrooms, kitchens, and crawl spaces where moisture tends to accumulate. - 2
Choose testing approach
Decide between a DIY screening kit and professional assessment. DIY can screen for obvious growth, while professionals provide comprehensive sampling and formal lab analysis.
Tip: In complex homes or health-sensitive situations, lean toward professional testing for accuracy. - 3
Collect samples
Follow kit or tester instructions to collect air and surface samples. Use gloves and seal samples in labeled containers to prevent cross-contamination.
Tip: Label each sample with room, date, and suspected moisture source. - 4
Submit samples to lab
Send samples to an accredited lab or have the tester coordinate pickup. Ensure all paperwork and chain-of-custody forms are complete.
Tip: Ask about turnaround times and whether results include species identification. - 5
Review lab results
Read the report for mold species and concentration patterns. Compare findings with moisture sources and previous events to validate problem areas.
Tip: If results are unclear, request a discussion with the tester for interpretation help. - 6
Plan remediation
Develop a remediation plan that targets moisture sources first, then removal of contaminated materials. Decide whether to self-clean minor growth or hire professionals for larger jobs.
Tip: Prioritize containment during cleanup to prevent spore spread. - 7
Follow-up testing
After remediation, repeat targeted testing in previously affected zones to confirm success. Schedule periodic checks to catch reoccurrence early.
Tip: Document changes to monitor long-term moisture control.
FAQ
What is mold testing and why is it important in Ann Arbor?
Mold testing confirms whether mold is present, identifies species, and guides remediation. In Ann Arbor, moisture fluctuations and older homes make targeted testing especially valuable for protecting indoor air quality.
Mold testing confirms presence, helps you pick the right remediation, and is crucial in climates like Ann Arbor where moisture varies seasonally.
Should I hire a professional or use a DIY mold test kit?
DIY kits are useful for screening but may miss hidden growth or misinterpret results. A certified professional provides comprehensive sampling, lab analysis, and a formal remediation plan.
DIY kits can screen, but professionals give you a full, accurate plan backed by lab tests.
How long does mold testing take in a typical home?
Sampling and lab analysis often take a few days, with reports delivered within about a week. Follow-up testing adds additional time if remediation is required.
Most results come back within a week, with follow-up testing after remediation if needed.
Can mold be completely removed, and how do I prevent recurrence?
Mold can be removed and growth prevented with moisture control, proper ventilation, and thorough cleaning. Ongoing maintenance reduces reoccurrence risk.
Yes, with moisture management and thorough cleaning, mold can be controlled long-term.
What if the test shows mold but not a health risk?
Even low-risk findings warrant moisture source repair and a cleanup plan to prevent escalation, especially in homes with vulnerable occupants.
Even low-risk results should be addressed to keep indoor air healthy.
How much does mold testing typically cost in Ann Arbor?
Costs vary by method and scope, but plan for screening and laboratory analysis when needed. Get a written estimate before starting.
Prices vary; get a written estimate before testing.
Watch Video
The Essentials
- Test moisture-prone zones first
- DIY kits are screening tools, not full solutions
- Professional testing improves accuracy in complex homes
- Address moisture sources before cleanup
- Follow up to verify remediation success