Test for Mold Near Me: Practical Guide to Accurate Testing
A data-driven guide for homeowners and renters on how to test for mold near you, comparing DIY kits with lab analysis, interpreting results, and planning remediation safely.

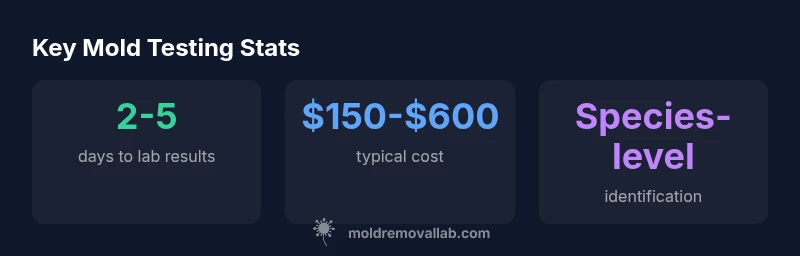
To test for mold near me, start with a moisture check and consider both DIY test kits and lab analysis. DIY kits can indicate presence but rarely quantify risk or identify species; professional lab testing provides species-level data and actionable thresholds for remediation. Prioritize indoor air quality and safety when choosing a testing approach.
Why testing for mold near me matters
Mold remediation is not just about visible patches. Hidden colonies often thrive in damp spaces and can contribute to allergic reactions, asthma triggers, and other health concerns. A structured testing plan helps homeowners and renters pinpoint moisture sources, assess exposure risk, and prioritize remediation efforts. According to Mold Removal Lab, starting with clear objectives and selecting an appropriate testing method improves accuracy and safety. By combining moisture assessment with targeted sampling, you can distinguish between transient moisture events and persistent contamination, guiding long-term prevention strategies.
DIY tests vs professional lab testing: trade-offs
DIY mold test kits offer convenience and relative affordability for quick screen checks. However, many DIY kits have limitations: some provide only qualitative indications, others lack species identification or concentration data. Professional lab testing, on the other hand, delivers species-level identification, quantified results, and a documented chain of custody that supports remediation decisions and insurance requirements. Choosing between DIY and lab testing depends on symptoms, space usage, and whether the results will drive major repairs.
How to prepare your space for testing
Preparation reduces sampling errors and improves result quality. Before sampling, minimize disturbances that could spread spores (avoid unnecessary cleaning, open doors selectively, and isolate the area). Document moisture events, humidity levels, and any prior remediation attempts. If you’re testing a rental or shared space, obtain consent where required and maintain clear records of test dates and methods. PPE and proper ventilation are important when sampling—especially for professionals collecting air samples.
Understanding test types: DIY kits, air tests, surface tests
DIY kits typically include swabs or dust collection materials sent to a lab for analysis. Air tests measure spores in room air and can reveal ongoing contamination; surface tests sample residues to identify species and contamination levels. Each method has strengths: DIY kits are fast and inexpensive for screening; lab-based air testing provides more precise data and defensible results for remediation planning. In many cases, a combination of methods yields the most actionable information.
Interpreting results and deciding on remediation
Results may note mold presence and, with lab testing, species and concentration. Look for location, concentration thresholds, and whether moisture sources were identified. Actionable remediation plans consider health risks, occupant sensitivity, and building structure. In many cases, addressing the moisture source first yields more durable results than removing mold alone. Always confirm that remediation is followed by post-remediation testing to verify safety.
Reducing errors: best practices for sampling
Minimize sampling errors by following standardized protocols, avoiding cross-contamination, and using trained personnel. Label samples clearly, record methods, and consider repeating tests if results conflict with building observations. Maintain chain-of-custody documentation for legitimacy, especially when results inform insurance or landlord disputes. Collaboration between tenants, landlords, and inspectors often yields the most reliable outcomes.
Safety and remediation planning
Safety comes first: wear appropriate PPE, isolate contaminated areas, and ventilate to reduce aerosol spread during testing and remediation planning. If mold is confirmed, plan containment, source removal, and disposal with attention to building materials and occupants’ health. Early involvement of a licensed professional can help ensure compliance with local codes and health guidelines, reducing the likelihood of recontamination.
When to call a pro and what to expect from remediation
If results show high spore counts, toxic species, or persistent moisture sources, hiring a professional remediation contractor is advisable. A qualified team will assess, contain, remove contaminated materials, and verify cleanup with post-remediation testing. Expect a formal scope of work, containment measures, and validation testing to confirm safety before reoccupation.
Comparison of common mold testing options
| Test Type | What it Detects | Typical Turnaround | Cost Range |
|---|---|---|---|
| DIY Home Test Kit | Mold presence in surface samples | 2-7 days | $20-$150 |
| Lab-Based Sampling (Air) | Mold spores and species | 2-5 days | $150-$600 |
| Lab-Based Sampling (Surface) | Mold species and contamination | 2-4 days | $100-$400 |
FAQ
What is the fastest way to know if I have mold in my home?
A quick visual inspection can flag obvious growth, but only lab testing confirms species and concentration. Use visual cues as an early warning and plan lab testing if symptoms persist.
A quick look can show you if there’s a visible mold problem, but for certainty you’ll want lab testing.
Are DIY mold test kits reliable?
DIY kits can indicate the presence of mold but often lack species identification and accurate exposure data. They are best used as an initial screen before deciding on lab testing.
DIY kits help you screen, but for exact species and safe thresholds, lab testing is recommended.
How should I interpret a lab test result?
Lab reports typically state presence, species, and concentration. Pay attention to location within the home and moisture context to plan remediation effectively.
Read the species and concentration notes, then plan remediation based on moisture sources.
How long does remediation take after testing?
Remediation duration varies with the area size and moisture source. Minor cases may take a few days; larger jobs could span weeks with containment and post-testing.
Remediation times vary; expect days to weeks depending on scope.
Is mold testing required by law?
Legal requirements vary by location. Testing is often required in rental properties or when health concerns arise, but many jurisdictions do not mandate routine testing.
Laws differ by area, so check local regulations and lease terms.
What can cause false positives in mold testing?
Improper sampling, cross-contamination, or lab mix-ups can create misleading results. Following standardized procedures minimizes errors.
Poor sampling can mislead results; proper technique is essential.
“Laboratory testing, when interpreted by qualified professionals, provides the most reliable evidence of mold presence and species. This information informs targeted remediation and improves long-term safety.”
The Essentials
- Identify moisture drivers before testing
- Choose testing method that matches your goals
- Lab results provide species-level data
- Prepare space to reduce sampling errors
- Consult a professional for remediation planning