Mold Test for Apartment: A Practical How-To Guide
Learn how to test for mold in an apartment, compare DIY kits vs professional testing, interpret results, and plan effective remediation with moisture control and prevention.

A mold test for apartment helps you confirm whether mold is present, locate hidden growth, and gauge contamination levels so you can act quickly. This guide covers DIY and professional options, what to expect from sampling, and safe next steps for remediation and prevention. It applies to rental units and owner-occupied apartments alike.
Understanding the Purpose of a Mold Test for Apartment
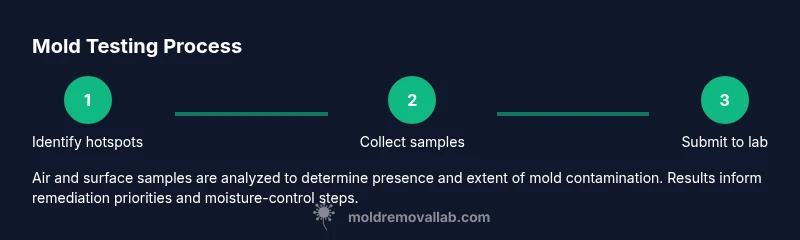
According to Mold Removal Lab, a mold test for apartment helps renters identify whether mold growth is present, where it grows, and how severe the contamination may be. Tests combine sampling with a moisture assessment to distinguish humidity-driven issues from actual mold colonies. A test is most informative when paired with a visual inspection, a history of water events (like leaks or floods), and a plan to control moisture. Hidden mold behind walls or under flooring is common in apartments where tenants can't access framing without disruption, so testing should consider likely hotspots such as bathrooms, kitchens, laundry alcoves, and window sills. The goal is not only to confirm presence but to map spread and prioritize remediation, especially in multi-unit buildings where one unit's moisture problem can affect neighbors. Mold Removal Lab’s analysis emphasizes that results are most actionable when the sampling strategy is tailored to the apartment's layout, HVAC usage, and ventilation patterns.
In many apartments, mold symptoms—like musty odors, recurring allergies, or breathing issues—can prompt testing. A well-planned mold test also helps occupants understand whether a mold problem is localized or systemic across rooms. Remember that mold can thrive in hidden spaces where moisture pools, such as behind cabinets, under sinks, or in crawl spaces. A careful approach combines physical inspection, moisture readings, and sample results to guide next steps and protect resident health.
note”:null},
toolsMaterialsExhibit?null
Tools & Materials
- Mold testing kit (air or surface sampling)(Choose a kit suitable for apartments; look for validated sampling methods per your local lab requirements.)
- N95 respirator or equivalent(Use during sampling to reduce inhalation of spores.)
- Disposable gloves(Protect hands when collecting samples and handling containers.)
- Safety goggles or eye protection(Shield eyes from aerosols during sampling.)
- Sterile sample containers (sealed)(Pre-sterilized vials or swabs included in kits; label clearly.)
- Marker and labeling supplies(Label samples with location, date, and type of test.)
Steps
Estimated time: 3-7 days
- 1
Define sampling scope
Identify likely problem areas (bathroom, kitchen, windows, laundry area) and decide whether to test air, surfaces, or both. A clear scope reduces wasted samples and speeds up interpretation.
Tip: Start with areas showing leaks or persistent moisture; test gradually to avoid over-sampling. - 2
Prepare the apartment
Clear the area if possible, avoid heavy cleaning in the day before sampling, and document any recent water events. Proper preparation reduces false negatives from recent disturbances.
Tip: Avoid wet cleaning methods immediately before sampling to prevent altering results. - 3
Collect air or surface samples
Follow kit instructions to collect either air samples using a pump or surface swabs for visible surfaces. Label each sample precisely with location and time.
Tip: Keep containers closed until sealing, to prevent contamination. - 4
Seal and label samples
Seal all samples in their provided containers and label with date, room, test type, and collector initials. Retain the chain of custody if sending to a lab.
Tip: Double-check caps are tight and containers are protected from leaks. - 5
Package and ship/deliver to lab
If using a DIY kit, follow shipping instructions or deliver samples to the recipient lab promptly for analysis. Keep tracking information in case of delays.
Tip: Use a courier or trackable mail to confirm receipt. - 6
Review results and interpret
When results arrive, compare units tested with expected norms. Look for multiple positive sites or high spore counts indicating active growth.
Tip: If results show suspected growth, plan remediation with moisture control measures. - 7
Plan remediation and prevention
Develop a moisture-control plan (fix leaks, improve ventilation, dehumidify) and schedule remediation if mold is confirmed. Consider professional remediation for larger infestations.
Tip: Address underlying moisture sources first to prevent recurrence.
FAQ
Do I need a professional to test for mold in an apartment?
Not always. DIY kits can identify presence and some growth zones, but large or complex infestations typically require a licensed inspector or remediation professional.
DIY kits can help, but for large or complex mold problems, hire a licensed inspector for accuracy and safety.
How long does mold testing take, and when will I know results?
Sample collection takes a short time, and lab analysis typically takes a few days. Results are usually delivered in a formal report with findings and recommendations.
Results usually come in a few days after samples reach the lab.
Can mold be present without visible signs or symptoms?
Yes. Mold growth can occur behind walls or in hidden spaces. Testing helps uncover hidden colonies that aren’t visible or causing obvious symptoms.
Mold can hide behind walls; testing helps uncover hidden growth.
What should I do if the test is positive for mold?
Act on the remediation plan provided, address moisture sources, and re-test after remediation to confirm effectiveness. Keep notes for tenants or landlords.
If mold is found, fix moisture, remediate, and re-test to confirm.
Are DIY mold test kits reliable for apartments?
DIY kits can indicate presence and common growth areas but may not capture all contamination. For comprehensive assessment, consider professional testing.
DIY kits help, but for a complete picture a professional test is best.
Watch Video
The Essentials
- Test mold presence and growth points in apartments
- Choose appropriate sampling method (air, surface) based on hotspots
- Prepare area to avoid false results and document moisture history
- Interpret results with a focus on remediation priorities and moisture control
- Follow up with moisture management to prevent recurrence