How to Check for Mold in an Apartment: A Practical Guide
Learn a practical, step-by-step method to check for mold in an apartment. Visual checks, moisture cues, simple tests, and guidance on when to contact Mold Removal Lab for professional remediation.

According to Mold Removal Lab, start with a careful visual check for moisture problems and signs of growth, then use simple, non-invasive tests if needed. This guide outlines a safe, renter- and homeowner-friendly approach to identifying mold, assessing risk, and deciding when to seek professional remediation. Prioritize ventilation and protective gear from the outset.
Understanding Mold in Apartments
Mold growth on a property is typically a response to excess moisture. In apartment settings, moisture can travel through shared walls, leaky plumbing, condensate from bathrooms and kitchens, or high indoor humidity during damp seasons. The presence of mold doesn’t only threaten the building; it can affect indoor air quality and occupant health. According to Mold Removal Lab, visual checks combined with awareness of moisture sources are the most practical, low-cost first steps for both renters and homeowners. This is why a targeted, methodical approach matters: you can detect risk factors early, document evidence, and decide whether a simple cleanup is sufficient or if you need professional remediation. Understanding where mold tends to hide—behind appliances, under sinks, in basements, or along exterior walls—helps you plan a focused inspection rather than a blind search.
Molds vary in color and texture, from fuzzy green to black or brown patches, and they can appear on walls, ceilings, wood trim, drywall, upholstery, and drywall behind panels. While many mold species are common and harmless in small amounts, some can trigger allergic responses or asthma-like symptoms in sensitive people. This is why approaching mold as a moisture-control problem, rather than a race to remove visible signs, yields better long-term results. As you begin, keep notes of visible growth, odors, and any leaks or condensation you observe during daily routines. The Mold Removal Lab Team emphasizes that moisture control is foundational: reducing humidity and fixing leaks dramatically reduces the likelihood of regrowth after cleaning.
Indicators of Mold in Your Living Space
You don’t need a lab to spot mold risks. Start with a checklist of common indicators that point to moisture problems and possible mold growth. Musty or earthy odors are a frequent early signal, especially in bathrooms, basements, laundry areas, or storage rooms. Visible growth may appear as spots or patches on walls, ceilings, or fabric-backed surfaces, often with fuzzy or powdery textures. Watch for brown, green, or black discoloration near moisture sources such as pipes, window frames, or behind appliances. Water stains, peeling paint, warped wall panels, and visible condensation are signs of ongoing moisture intrusion.
In apartments, mold can hide in unexpected places. Take time to inspect high-humidity spaces and areas with prior leaks. Mold spores can travel through the air and settle on surfaces well away from the original leak, so track moisture sources comprehensively: check under sinks, behind washers or refrigerators, and along baseboards where dampness tends to collect. During this phase, keep a simple log of where you see evidence and any health symptoms reported by occupants. Mold Removal Lab Analysis, 2026 notes that damp spots and frequent condensation are among the strongest practical correlates of mold risk in living environments, even when growth isn’t immediately visible. This reinforces the value of a thorough inspection rather than relying on a single clue.
Safe Visual Inspection: A Homeowner's Guide
A safe, effective inspection combines preparation, careful observation, and documentation. Before you start, wear PPE: disposable gloves, a respirator or N95 mask, and protective eyewear to minimize exposure to any spores. Use a bright flashlight to illuminate dark corners and behind furniture where moisture might accumulate. Begin with obvious hotspots: bathrooms, kitchens, laundry areas, basements, closets, and window frames. Look for visible mold growth, staining, or discoloration on walls, drywall seams, tile grout, or grout lines. Note any musty odor and compare rooms with higher humidity to drier spaces.
To stay organized, photograph suspicious areas from multiple angles and keep a dated log. If you find a suspected area behind furniture or under sinks, gently move coverings to inspect the back sides and corners. If you’re unsure about a signature look (e.g., a powdery white film or greenish growth), avoid over-grimy scrubbing that could spread spores. Remember, mold growth is usually a sign of moisture problems; addressing the moisture source is as important as cleanup. For deeper inspection, a simple moisture meter can help you assess relative humidity and possible hidden water intrusion behind walls.
Quick Tests You Can Try
Home testing for mold is not a perfect science, but it can help you decide whether to pursue professional assessment. A few practical, low-risk options include documenting odors and growth, using a moisture meter to identify damp areas, and performing a light surface wipe test in a small inconspicuous area with a clean cloth to see if color or texture changes. Do not attempt aggressive sampling or air testing without understanding the limitations of the kit and laboratory processes. If you choose to use a DIY test kit, follow the manufacturer’s instructions precisely and interpret results cautiously. Results that indicate growth or require lab confirmation should prompt a professional evaluation.
Another helpful tactic is to monitor humidity levels. Aim to keep indoor relative humidity below 50% (ideally around 30-50%) to limit mold growth potential. If you notice recurring condensation on windows, persistent damp patches, or repeated leaks, it’s a strong signal that you’ll need to address the moisture problem and consider remediation. The goal of these tests is not perfection but risk reduction and informed decision-making about next steps.
Moisture Control and Cleaning Practices
Even after you identify mold, controlling moisture is the most effective long-term defense. Start by fixing leaks promptly, ensuring there are no hidden water sources behind walls, and improving ventilation in high-humidity areas. Use exhaust fans in bathrooms and kitchens, and consider a dehumidifier in damp spaces such as basements or laundry rooms. Regularly inspect caulking and sealants around sinks, bathtubs, and windows to prevent water intrusion. For cleaning, opt for non-bleach cleaners on non-porous surfaces and avoid aggressively scrubbing porous materials like drywall or fabric, which can release spores and damage material integrity. If you must clean small, non-porous patches yourself, wear PPE and ensure the area is well-ventilated, then dispose of contaminated materials safely and wash hands thoroughly.
For larger or recurring issues, professional remediation is the safer route. A qualified mold remediation professional will isolate the area to prevent cross-contamination, use HEPA filtration, and follow established containment protocols to protect other occupants and spaces. Mold Removal Lab Team notes that success hinges on addressing the moisture problem first and foremost: without stopping the source, mold will likely return after cleanup.
When to Escalate: Working with Professionals and What to Expect
If you notice large areas of growth, persistent odors, health symptoms, or recurring moisture problems after a cleanup, it’s time to involve professionals. Professionals bring specialized equipment, containment practices, and experience with different materials and building structures. They will typically perform a more thorough assessment, including moisture mapping, surface and air testing as appropriate, and a remediation plan tailored to the severity and location of the contamination. Expect a remediation process that may involve containment barriers, HEPA air filtration, targeted removal of contaminated materials, and thorough cleaning of surrounding spaces. In many cases, the remediation will include post-remediation verification to ensure the area is compliant with moisture and air quality standards.
The Mold Removal Lab Team emphasizes the value of a proactive, safety-first approach. They advise documenting conditions, communicating clearly with building management or landlords, and keeping records of inspections, photos, and professional reports. If you’re a renter, review your lease for mold-related responsibilities and ensure any remediation plan complies with local health and safety codes. This collaboration helps protect your health and your home while preventing costly damage over time.
Tools & Materials
- LED flashlight(Bright, battery-powered; helps inspect dark corners and behind objects)
- Disposable gloves(Nitrile or latex; prevents contamination and skin exposure)
- N95 respirator(Fit as well as possible; essential for sensitive individuals)
- Safety goggles(Protect eyes from spores during inspection)
- Camera or smartphone(Document evidence with date stamps)
- Moisture meter / hygrometer (optional)(Helps quantify ambient humidity and moisture hotspots)
- Microfiber cloth(Surface wipe for quick checks on non-porous areas)
- Notebook and pen(Record locations, odors, and conditions)
- Ventilation aids (optional)(Portable fans or exhaust fans to improve air flow during inspection)
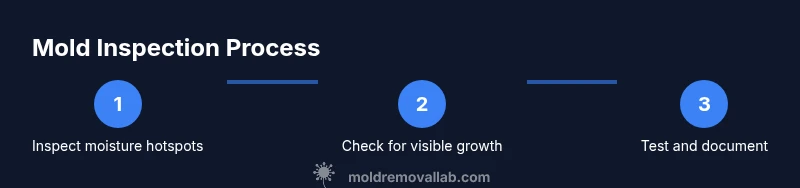
Steps
Estimated time: 60-90 minutes
- 1
Gather PPE and tools
Put on gloves, an N95 mask, and eye protection. Gather all tools and a camera before you begin so you won’t have to pause mid-inspection.
Tip: Check battery levels on PPE and devices ahead of time to avoid interruptions. - 2
Identify moisture hotspots
Scan bathrooms, kitchens, basements, laundry areas, beneath sinks, and along exterior walls where leaks or condensation are common. Mark suspect spots for closer inspection.
Tip: Keep a running map of suspect areas to help you plan targeted remediation. - 3
Document with photos and notes
Take clear photos from multiple angles and log date, location, and observed conditions. This helps establish the scope and track changes over time.
Tip: Avoid heavy editing; preserve original images for reference. - 4
Check for visible growth and odors
Look for patches, staining, or fuzzy textures on walls, ceilings, or hidden surfaces. Note any musty smells which can indicate unseen growth.
Tip: If you smell something but see nothing, investigate behind appliances and under flooring if safe to access. - 5
Test moisture and airflow
Use a hygrometer to measure humidity, and run ventilation near damp areas to see if odors or moisture decline after airflow changes.
Tip: Keep windows slightly open (if safe and permitted) to facilitate air exchange during the inspection. - 6
Avoid disturbing active growth
Do not peel, cut, or scrub large patches. Disturbing mold can release spores into the air and worsen contamination.
Tip: If you must touch suspected growth, use minimal contact and isolate the area. - 7
Decide on next steps
If growth covers large areas, if odors persist, or if health symptoms occur, escalate to a professional remediation service.
Tip: Have your notes and photos ready to share with the pro for faster assessment.
FAQ
What are the most common signs of mold in an apartment?
Musty odors, visible growth, stains, and moisture damage are typical signs of mold. Persistent symptoms or odor in a particular area warrant closer inspection and documentation.
Look for musty smells, visible patches, and water damage. If you notice persistent symptoms, inspect the area and consider professional help.
Is it safe to test for mold myself?
Basic observations and moisture measurements are safe if you wear PPE. Do not rely on DIY test kits for a definitive diagnosis; interpret results cautiously and seek pro remediation if necessary.
It's safer to document first and use PPE. For a definitive result, consider a professional assessment.
When should I call a professional?
Call a professional if the mold covers a large area, if growth returns after cleaning, or if health symptoms appear. Professionals provide containment, proper remediation, and post-remediation verification.
Call a professional if you see large growth or health symptoms.
Do I need to remove mold myself?
Small, non-porous surface areas can be cleaned carefully with appropriate PPE. Do not attempt to remove mold from porous materials like drywall or insulation yourself; this requires professional remediation.
Clean small non-porous spots carefully, but large or porous areas need pros.
How can I prevent mold from returning?
Control moisture by fixing leaks promptly, improving ventilation, and using dehumidifiers when needed. Regular cleaning and monitoring humidity help prevent recurrences.
Fix leaks, ventilate spaces, and keep humidity in check to prevent mold returns.
What is the difference between mold and mildew?
Mold often grows in porous materials and appears fuzzy or patchy, while mildew is a superficial, powdery growth on non-porous surfaces. Both thrive in damp conditions and require moisture control.
Mold is usually fuzzy and in porous materials; mildew is a powdery surface issue.
Watch Video
The Essentials
- Start with moisture sources and visible signs to guide inspection.
- Wear PPE and document findings before taking action.
- Use moisture measurements to identify hidden problems.
- Transfer findings to a professional remediation plan when needed.